Asus RS720Q-E6 RS12 User Guide - Page 38
Firmly push the new power supply, latch locks to the server chassis.
 |
View all Asus RS720Q-E6 RS12 manuals
Add to My Manuals
Save this manual to your list of manuals |
Page 38 highlights
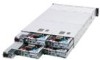
3. Firmly pull the power supply module out of the system chassis. 4. Firmly push the new power supply module into the chassis until the latch locks to the server chassis. • If you install two or more nodes, please install both the power supply modules. • The system automatically combines the two power supply modules as a single one. The combined output power varies with input voltages. Refer to the table below for details. Input Voltage Max. Output Power (Watt) per PSU 100-120Vac, 12-10A, 50-60Hz 1000W 120-140Vac, 12-10A, 50-60Hz 1200W 180-240Vac, 10.5-8A, 50-60Hz 1620W • To enable the hot-swap feature (redundant mode), keep the total power consumption of the installed nodes under the maximum output power of an individual power supply module. • For steady power input, use only the power cables that come with the server system package. 2-18 Chapter 2: Hardware setup
-
 1
1 -
2
-
3
-
4
-
5
-
6
-
7
-
8
-
9
-
10
-
11
-
12
-
13
-
14
-
15
-
16
-
17
-
18
-
19
-
20
-
21
-
22
-
23
-
24
-
25
-
26
-
27
-
28
-
29
-
30
-
31
-
32
-
 33
33 -
 34
34 -
 35
35 -
 36
36 -
 37
37 -
 38
38 -
 39
39 -
 40
40 -
 41
41 -
 42
42 -
 43
43 -
44
-
45
-
46
-
47
-
48
-
49
-
50
-
51
-
52
-
53
-
54
-
55
-
56
-
57
-
58
-
59
-
60
-
61
-
62
-
63
-
64
-
65
-
66
-
67
-
68
-
69
-
70
-
71
-
72
-
73
-
74
-
75
-
76
-
77
-
78
-
79
-
80
-
81
-
82
-
83
-
84
-
85
-
86
-
87
-
88
-
89
-
90
-
91
-
92
-
93
-
94
-
95
-
96
-
97
-
98
-
99
-
100
-
101
-
102
-
103
-
104
-
105
-
106
-
107
-
108
-
109
-
110
-
111
-
112
-
113
-
114
-
115
-
116
-
117
-
118
-
119
-
120
-
121
-
122
-
123
-
124
-
125
-
126
-
127
-
128
-
129
-
130
-
131
-
132
-
133
-
134
-
135
-
136
-
137
-
138
-
139
-
140
-
141
-
142
-
143
-
144
-
145
-
146
-
147
-
148
-
149
-
150
-
151
-
152
-
153
-
154
-
155
-
156
-
157
-
158
-
159
-
160
-
161
-
162
-
163
-
164
-
165
-
166
 |
 |
