Asus TS500-E6/PS4 User Guide - Page 27
Installing the CPU heatsink and fan, tighten them one by one
 |
UPC - 610839689828
View all Asus TS500-E6/PS4 manuals
Add to My Manuals
Save this manual to your list of manuals |
Page 27 highlights
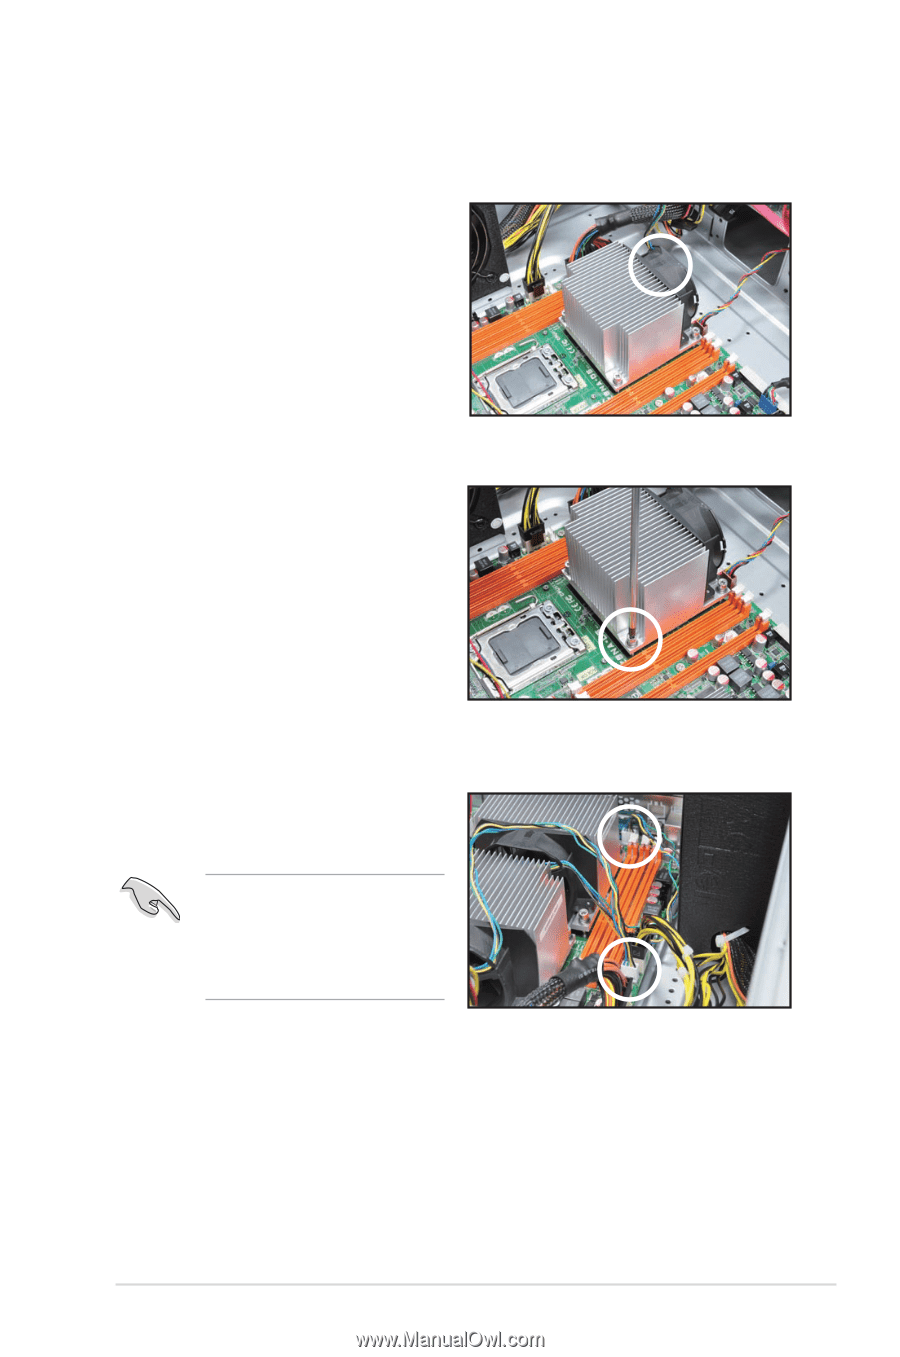
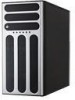
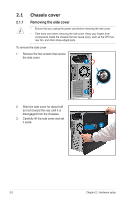
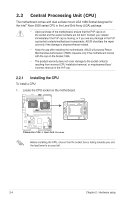
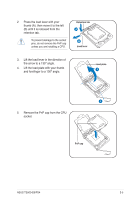
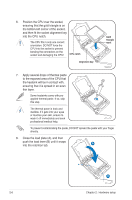
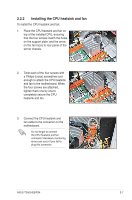
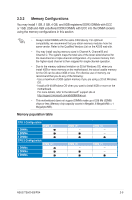
2.2.2 Installing the CPU heatsink and fan To install the CPU heatsink and fan: 1. Place the CPU heatsink and fan on top of the installed CPU, ensuring that the four screws match the holes on the support plate, and the arrow on the fan faces to rear panel of the server chassis. 2. Twist each of the four screws with a Philips (cross) screwdriver just enough to attach the CPU heatsink and fan to the motherboard. When the four screws are attached, tighten them one by one to completely secure the CPU heatsink and fan. 3. Connect the CPU heatsink and fan cable to the connector on the motherboard. Do not forget to connect the CPU heatsink and fan connector! Hardware monitoring errors can occur if you fail to plug this connector. ASUS TS500-E6/PS4 2-7
-
 1
1 -
2
-
3
-
4
-
5
-
6
-
7
-
8
-
9
-
10
-
11
-
12
-
13
-
14
-
15
-
16
-
17
-
18
-
19
-
20
-
21
-
 22
22 -
 23
23 -
 24
24 -
 25
25 -
 26
26 -
 27
27 -
 28
28 -
 29
29 -
 30
30 -
 31
31 -
 32
32 -
33
-
34
-
35
-
36
-
37
-
38
-
39
-
40
-
41
-
42
-
43
-
44
-
45
-
46
-
47
-
48
-
49
-
50
-
51
-
52
-
53
-
54
-
55
-
56
-
57
-
58
-
59
-
60
-
61
-
62
-
63
-
64
-
65
-
66
-
67
-
68
-
69
-
70
-
71
-
72
-
73
-
74
-
75
-
76
-
77
-
78
-
79
-
80
-
81
-
82
-
83
-
84
-
85
-
86
-
87
-
88
-
89
-
90
-
91
-
92
-
93
-
94
-
95
-
96
-
97
-
98
-
99
-
100
-
101
-
102
-
103
-
104
-
105
-
106
-
107
-
108
-
109
-
110
-
111
-
112
-
113
-
114
-
115
-
116
-
117
-
118
-
119
-
120
-
121
-
122
-
123
-
124
-
125
-
126
-
127
-
128
-
129
-
130
-
131
-
132
-
133
-
134
-
135
-
136
-
137
-
138
-
139
-
140
-
141
-
142
-
143
-
144
-
145
-
146
-
147
-
148
-
149
-
150
-
151
-
152
-
153
-
154
-
155
-
156
-
157
-
158
-
159
-
160
-
161
-
162
 |
 |