Asus WL520GC User Manual - Page 16
Setting up DDNS - password
 |
UPC - 610839732623
View all Asus WL520GC manuals
Add to My Manuals
Save this manual to your list of manuals |
Page 16 highlights
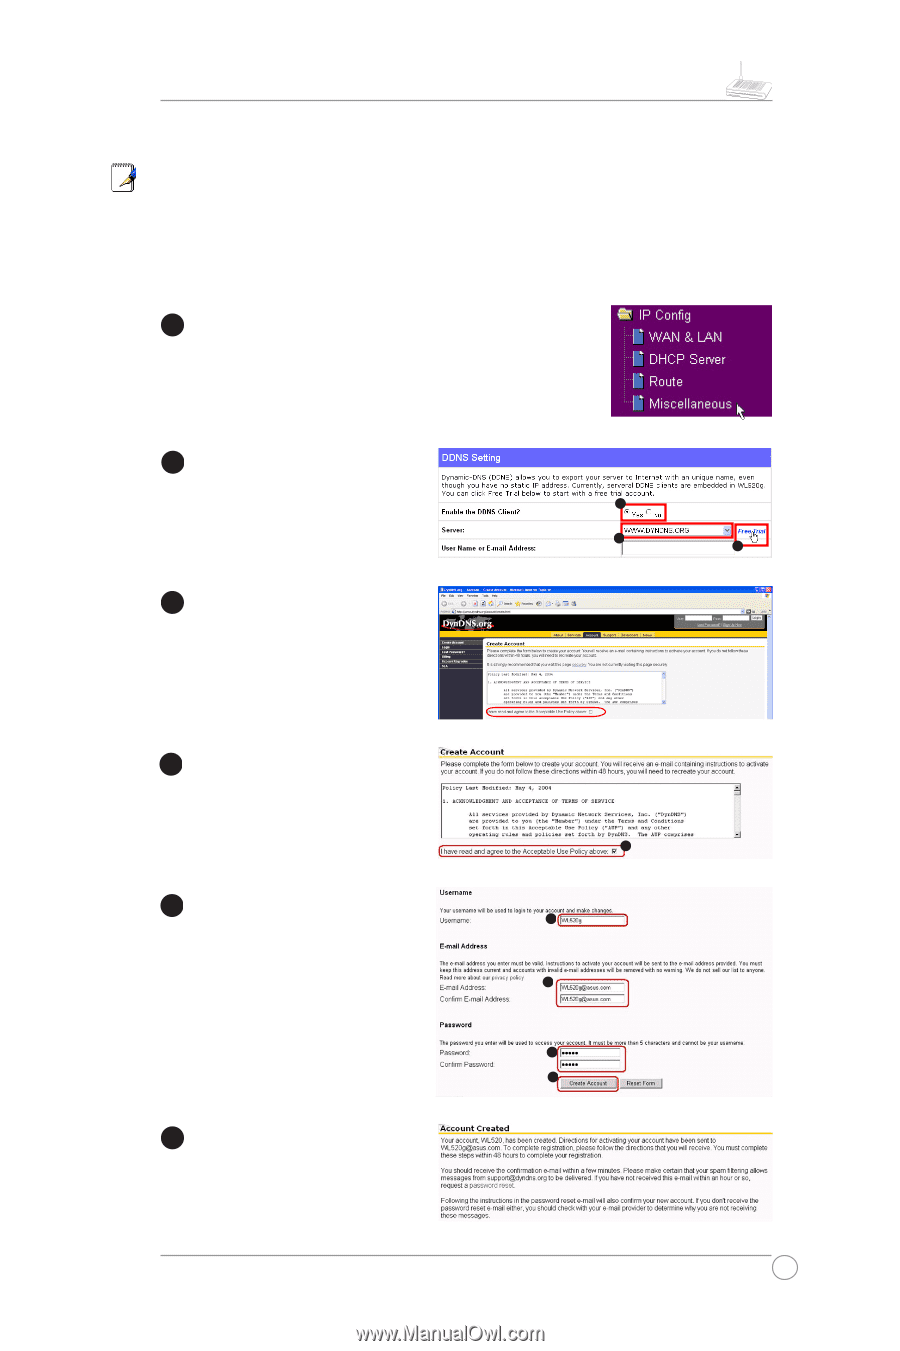
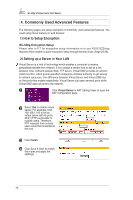
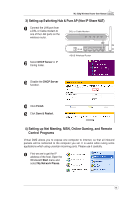
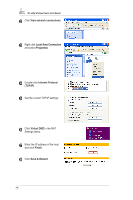
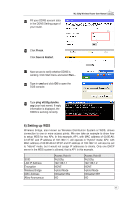
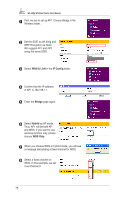
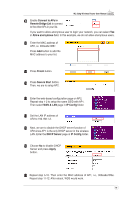
WL-520g Wireless Router User Manual 5) Setting up DDNS Dynamic DNS (DDNS) allows user to export host name to Internet through DDNS service provider. Each time the ASUS Wireless Router connect to Internet and get an IP address from ISP, this function will update your IP address to DDNS service provider automatically, so that any user on Internet can access the wireless network or servers behind it through a predefined name registered in DDNS service provider. 1 Click Miscellaneous from IP Config folder. 2 Enable the DDNS Client. If you have not acquired a DDNS account, click Free Trial to apply for one. 3 After clicking Free Trial, you would be directed to www. DynDNS.org, where you could register and apply for DDNS services. 4 Read the policy and select "I have read...". 5 Enter your user name, e-mail address, password for this account, and then click Create Account. 6 You would see this message informing that you account has been created. You will receive an e-mail to activate the account. 1 2 3 4 5 6 7 8 15
-
 1
1 -
2
-
3
-
4
-
5
-
6
-
7
-
8
-
9
-
10
-
 11
11 -
 12
12 -
 13
13 -
 14
14 -
 15
15 -
 16
16 -
 17
17 -
 18
18 -
 19
19 -
 20
20 -
 21
21 -
22
-
23
-
24
-
25
-
26
-
27
-
28
-
29
-
30
-
31
 |
 |