Asus Z81Sp A4S Hareware User's Manual for English Edition (E2014) - Page 19
Asus Z81Sp Manual
 |
View all Asus Z81Sp manuals
Add to My Manuals
Save this manual to your list of manuals |
Page 19 highlights
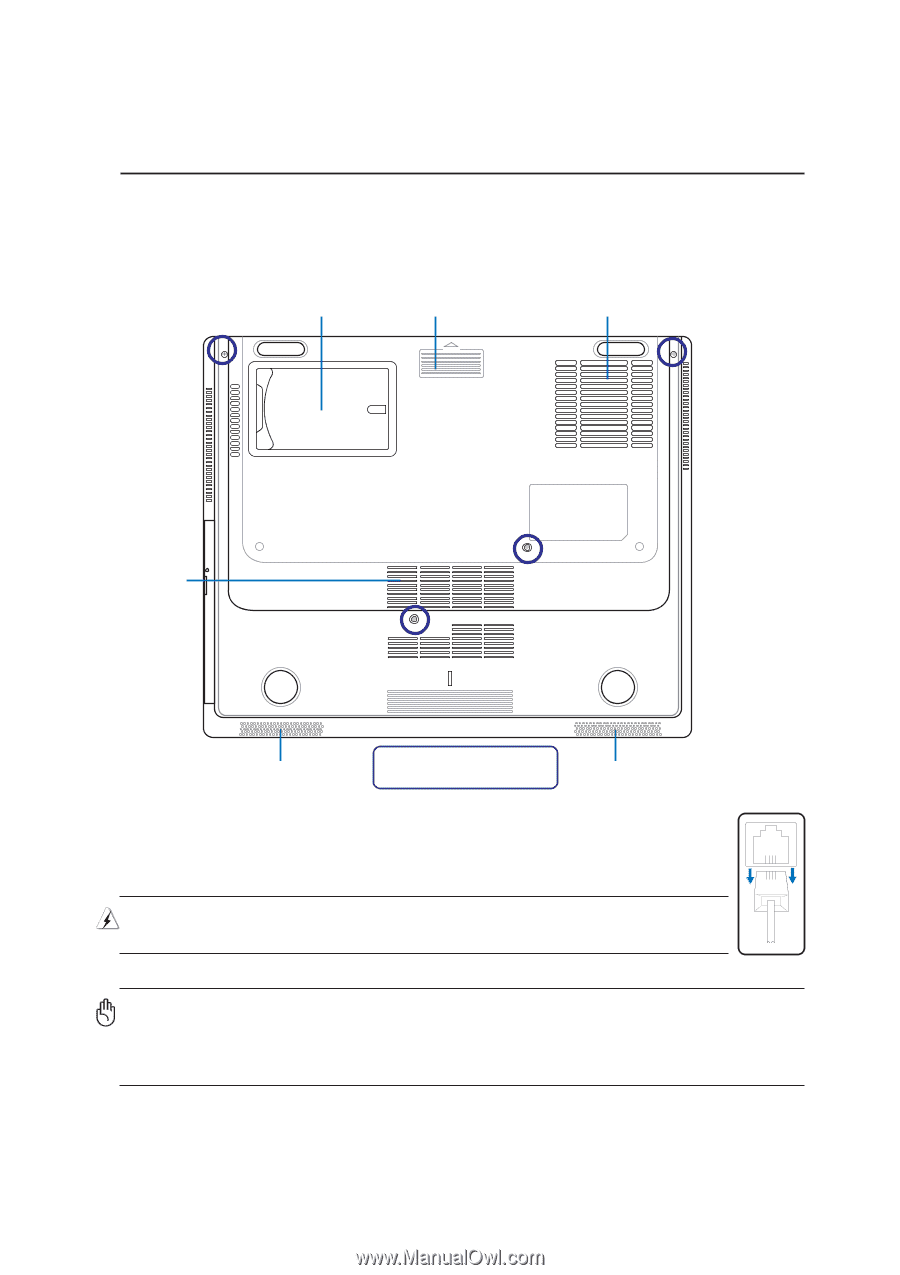
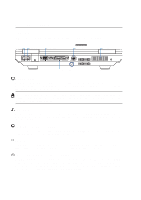
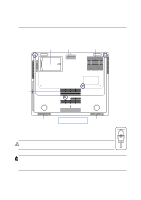
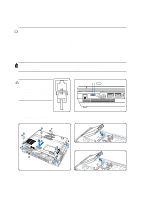
Knowing the Parts 2 Bottom Side Refer to the diagram below to identify the components on this side of the Notebook PC. Details are given starting from the top and going clockwise. Name Card Holder Bottom cover removal tab Air Vents Air Vents Air Vents Bottom cover screws are circled in this illustration. One screw is located on the rear side. Bottom Panel Screws This notebook PC contains easy to install/upgrade components under the bottom cover. Several screws must be removed to open the bottom panel. One screw is located on the rear side. WARNING! Because telephone lines carry electrical current, you must remove the phone (modem) cable before removing the bottom cover. IMPORTANT! The bottom of the Notebook PC can get very hot. Be careful when handling the Notebook PC while it is in operation or recently been in operation. High temperatures are normal during charging or operation. DO NOT PUT THE NOTEBOOK PC ON THE LAP OR OTHER PARTS OF THE BODY TO AVOID INJURY FROM THE HEAT. OPEN Air Vents 19
-
 1
1 -
2
-
3
-
4
-
5
-
6
-
7
-
8
-
9
-
10
-
11
-
12
-
13
-
 14
14 -
 15
15 -
 16
16 -
 17
17 -
 18
18 -
 19
19 -
 20
20 -
 21
21 -
 22
22 -
 23
23 -
 24
24 -
25
-
26
-
27
-
28
-
29
-
30
-
31
-
32
-
33
-
34
-
35
-
36
-
37
-
38
-
39
-
40
-
41
-
42
-
43
-
44
-
45
-
46
-
47
-
48
-
49
-
50
-
51
-
52
-
53
-
54
-
55
-
56
-
57
-
58
-
59
-
60
-
61
-
62
-
63
-
64
-
65
-
66
-
67
-
68
-
69
-
70
-
71
-
72
-
73
-
74
-
75
-
76
 |
 |