Ativa 802.11g Wireless Cable/DSL Product Manual
Ativa 802.11g Wireless Cable/DSL Manual
 |
View all Ativa 802.11g Wireless Cable/DSL manuals
Add to My Manuals
Save this manual to your list of manuals |
Ativa 802.11g Wireless Cable/DSL manual content summary:
- Ativa 802.11g Wireless Cable/DSL | Product Manual - Page 1
Wireless G Router User Manual AWGR54 - Ativa 802.11g Wireless Cable/DSL | Product Manual - Page 2
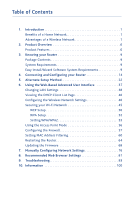
Network 1 Advantages of a Wireless Network 1 2. Product Overview 6 Product Features 6 3. Knowing your Router 9 Package Contents 9 System the Router 64 Updating the Firmware 68 7. Manually Configuring Network Settings 76 8. Recommended Web Browser Settings 81 9. Troubleshooting 83 - Ativa 802.11g Wireless Cable/DSL | Product Manual - Page 3
you for purchasing the Ativa Wireless G Router (the Router). The following two short sections discuss the benefits of home networking and outline best 1 practices for maximizing your wireless home network range and performance. Please be sure to read through this User Manual completely, and pay - Ativa 802.11g Wireless Cable/DSL | Product Manual - Page 4
, try moving the computer to a position between five and 10 feet away from the Router in order to see if distance is the problem. If difficulties persist even at close range, please contact Ativa Technical Support. Note: While some of the items listed below can affect network performance, they will - Ativa 802.11g Wireless Cable/DSL | Product Manual - Page 5
If your phone supports channel selection, change the channel on the phone to the farthest channel from your wireless network. For example, change the phone to channel 1 and move your Router to channel 11. See your phone's user manual for detailed instructions. • If necessary, consider switching to - Ativa 802.11g Wireless Cable/DSL | Product Manual - Page 6
• For Ativa wireless networking products, use the detailed Site Survey and wireless channel information included with your Wireless Network Card or Adapter. See your Network Card's user guide for more information. These guidelines should allow you to cover the maximum possible area with your Router - Ativa 802.11g Wireless Cable/DSL | Product Manual - Page 7
section Introduction For more information regarding our networking products, visit our website at www.ativasupport.com or call Ativa Technical Support at: 1 US: 1-866-91-ATIVA (1-866-912-8482) 2 3 4 5 6 7 8 9 10 5 - Ativa 802.11g Wireless Cable/DSL | Product Manual - Page 8
new Ativa Wireless G Router an ideal solution for your home or small office network. Works with Both PCs and Mac® Computers The Router supports a by your Internet Service Provider while saving the cost of adding IP addresses to your Internet service account. SPI Firewall Your Router is equipped with - Ativa 802.11g Wireless Cable/DSL | Product Manual - Page 9
Port Switch The Router has a built-in, 4-port network switch to allow your wired 1 computers to share printers, data and MP3 files, digital photos, and much more. The switch the Router for connection to your Internet Service Provider (ISP). In a matter of minutes, your Wireless Router will be - Ativa 802.11g Wireless Cable/DSL | Product Manual - Page 10
Product Overview Integrated 802.11g Wireless Access Point 802.11g is an exciting new wireless technology that achieves data rates up to 54Mbps, nearly five times faster than 802.11b. MAC Address Filtering For added security, you can set up a list of MAC addresses (unique client identifiers) that are - Ativa 802.11g Wireless Cable/DSL | Product Manual - Page 11
Knowing your Router Package Contents 1 • Ativa Wireless G Router • Quick Installation Guide 2 • Ativa Easy Install Wizard Software CD with User Manual • Ativa RJ45 Ethernet Networking Cable 3 • Power Supply System Requirements 4 • Broadband Internet connection such as a cable or DSL modem - Ativa 802.11g Wireless Cable/DSL | Product Manual - Page 12
Solid Blue Router is OFF Router is Booting Up Router is Ready 2. Wireless Network LED OFF Wireless Network is OFF Blue Wireless Network is Ready Blinking Blue Indicates Wireless Activity 3. Wired Computer Status LEDs These LEDs are labeled 1-4 and correspond to the numbered ports on the - Ativa 802.11g Wireless Cable/DSL | Product Manual - Page 13
Status LED This LED lights in BLUE to indicate that your modem is connected 1 properly to the Router. It blinks rapidly when information is being sent over the port between the Router and the modem. 2 OFF No WAN Link Solid Blue Good WAN Link 3 Blinking Blue WAN Activity 4 5. Internet - Ativa 802.11g Wireless Cable/DSL | Product Manual - Page 14
LEDs on the front of the Router. 8. Connection to Modem (Modem Port) This port is for connection to your cable or DSL modem. Use the cable that was provided with the modem to connect the modem to this port. Use of a cable other than the cable supplied with the cable modem may not work properly. 12 - Ativa 802.11g Wireless Cable/DSL | Product Manual - Page 15
is complete. b. Restoring the Factory Defaults Press and hold the "Reset" button for at least 10 seconds, then 6 release it. The lights on the Router will momentarily flash. The Power/Ready light will begin to blink. When the Power/Ready light 7 becomes solid again, the restore is complete - Ativa 802.11g Wireless Cable/DSL | Product Manual - Page 16
Installation Guide • Ativa Easy Install Wizard Software CD with User Manual • RJ45 Ethernet Networking Cable (for connection of the Router to the computer) • Power Supply • Wireless Security Setup Guide Modem Requirements Your cable or DSL modem must be equipped with an RJ45 Ethernet port. Many - Ativa 802.11g Wireless Cable/DSL | Product Manual - Page 17
is now 5 directly connected to the cable or DSL modem. DO NOT CONNECT THE ROUTER AT THIS TIME. 6 • Quick Installation Guide • The Easy Install Wizard Software CD with User Manual 7 • The Router • The Router's Power Supply 8 • RJ45 Ethernet Networking Cable 9 1.3 Turn off any firewall or - Ativa 802.11g Wireless Cable/DSL | Product Manual - Page 18
will appear. Make sure you have not connected the Router at this point. If you have connected your Router, please reconnect your computer directly to the modem. computer's network settings and gather information needed to complete the Router's connection to the Internet. When the Wizard is finished - Ativa 802.11g Wireless Cable/DSL | Product Manual - Page 19
the screen using the pictures as a guide. 3 2.1 This step instructs you to locate the cable connected between your modem and the networking port on 4 your computer. Unplug this cable from the computer and plug it into 5 the modem port on the Router. Click "Next" to continue. 6 7 2.2 This - Ativa 802.11g Wireless Cable/DSL | Product Manual - Page 20
Connecting and Configuring your Router 2.4 This step instructs you to look at the lights on the front of your Router. Make sure the appropriate this screen. Your user name and password is provided to you by your Internet Service Provider. If you have to type in a user name and password to connect - Ativa 802.11g Wireless Cable/DSL | Product Manual - Page 21
section Connecting and Configuring your Router 3.3 Wireless Setup This step is optional. 1 Click "Next" if you want to skip it. 2 Using this step, you can customize your wireless network settings if you want to. Follow the steps on the screen to complete this step. Click "Next" 3 to - Ativa 802.11g Wireless Cable/DSL | Product Manual - Page 22
Wizard may not detect a connection right away. If not, it will retry a number of times. The "Connected" light on the front panel of the Router will flash during this time. Please be patient through this process. 5.2 Finished When the Internet connection is complete, the Wizard will tell you that you - Ativa 802.11g Wireless Cable/DSL | Product Manual - Page 23
section Connecting and Configuring your Router Congratulations. You have finished installing your new Ativa Router. You are ready to set up the other computers in your home. You can also add 1 computers to your Router anytime you want. 2 3 4 5 6 7 8 9 10 21 - Ativa 802.11g Wireless Cable/DSL | Product Manual - Page 24
and unplug it from your computer, leaving the other end connected to your modem. 1.3 Plug the loose end of the cable you just unplugged into the port on the back of the Router labeled "Modem". 1.4 Connect a new network cable (not included) from the back of the computer to one of the wired computer - Ativa 802.11g Wireless Cable/DSL | Product Manual - Page 25
Mac or PC computer that was originally connected to the cable or DSL modem 2 Network cable To power adapter (to computer) 3 4 5 6 Existing networking cable (came with modem) 7 Note: Your Router may have ports in different locations than depicted in the illustration above. 8 1.6 Before - Ativa 802.11g Wireless Cable/DSL | Product Manual - Page 26
Method Step 2 Set up your Computer's Network Settings to Work with a DHCP Server See the section in this User Manual called "Manually Configuring Network Settings" for directions. Step 3 Configure the Router Using the Web-Based Advanced User Interface Using your Internet browser, you can access the - Ativa 802.11g Wireless Cable/DSL | Product Manual - Page 27
to 99 minutes. For more 3 information, see the section in this manual entitled "Changing the Login Time-Out Setting". 4 Using the Web- User Interface (UI). The home page shows you a quick view of the 5 Router's status and settings. All advanced setup pages can be reached from this page. - Ativa 802.11g Wireless Cable/DSL | Product Manual - Page 28
This indicator is visible in all pages of the UI, indicating the connection status of the Router. When the indicator says "connection OK" in GREEN, the Router is connected to the Internet. When the Router is not connected to the Internet, the indicator will read "no connection" in RED. The indicator - Ativa 802.11g Wireless Cable/DSL | Product Manual - Page 29
of the screen. 4 7. Features Shows the status of the Router's NAT, firewall, and wireless features. 5 Changes can be made to the settings by clicking on serial number of the Router. 10 10. Page Name The page you are on can be identified by this name. This User Manual will sometimes refer to - Ativa 802.11g Wireless Cable/DSL | Product Manual - Page 30
The "Internet /WAN" tab is where you will set up your Router to connect to your Internet Service Provider (ISP). The Router is capable of connecting to virtually any ISP's system provided you have correctly configured the Router's settings for your ISP's connection type. Your ISP connection settings - Ativa 802.11g Wireless Cable/DSL | Product Manual - Page 31
section Alternate Setup Method Setting your Connection Type From the "Connection Type" page, you can select the type of connection you use. 1 Select the type of connection you use by clicking the button (1) next to your connection type and then clicking "Next" (2). 2 3 4 5 6 (1) 7 (2) 8 - Ativa 802.11g Wireless Cable/DSL | Product Manual - Page 32
Alternate Setup Method Setting your Internet Service Provider (ISP) Connection Type to Dynamic IP A dynamic connection type is the most common connection type used with cable modems. Setting the connection type to "dynamic" in many cases is enough to complete the connection to your ISP. Some dynamic - Ativa 802.11g Wireless Cable/DSL | Product Manual - Page 33
indicator will read 3 "connection OK" if your Router is set up properly. 4 5 (1) (2) 6 (3) 7 8 9 1. IP Address 10 Provided by your ISP. Enter your IP address here. 2. Subnet Mask Provided by your ISP. Enter your subnet mask here. 3. ISP Gateway Address Provided by your ISP. Enter the - Ativa 802.11g Wireless Cable/DSL | Product Manual - Page 34
Alternate Setup Method Setting your ISP Connection Type to PPPoE Most DSL providers use PPPoE as the connection type. If you use a DSL modem to connect to the Internet, your ISP may use PPPoE to log you into the service. If you have an Internet connection in your home or small office that doesn - Ativa 802.11g Wireless Cable/DSL | Product Manual - Page 35
. 3 3. Service Name A service name is rarely required by an ISP. If you are not sure if your 4 ISP requires a service name, leave this problems with Internet applications working properly. 7 5. Maximum Idle Time The "Maximum Idle Time" feature is used to automatically disconnect 8 the Router - Ativa 802.11g Wireless Cable/DSL | Product Manual - Page 36
Internet that translates Universal Resource Locators (URLs) like "www.ativasupport.com" into IP addresses. Many Internet Service Providers (ISPs) do not require you to enter this information into the Router. The "Automatic from ISP" box (1) should be checked if your ISP did not give you a specific - Ativa 802.11g Wireless Cable/DSL | Product Manual - Page 37
computer connect to the Internet service. When you install the 2 Router, its own MAC address will be "seen" by the ISP and may cause the connection not to work. Ativa has provided the ability to modem. Cloning the address will not 5 cause any problems with your network. 6 7 8 9 10 35 - Ativa 802.11g Wireless Cable/DSL | Product Manual - Page 38
Click the "Clone" button (1). Click "Apply Changes" (3). Your MAC address is now cloned to the Router. Entering a Specific MAC Address In certain circumstances you may need a specific WAN MAC address. You can manually enter one in the "MAC Address" page. Type in a MAC address in the spaces provided - Ativa 802.11g Wireless Cable/DSL | Product Manual - Page 39
Using the Web-Based Advanced User Interface Viewing the LAN Settings Clicking on the header of the "LAN Setup" tab (1) will take you to its 1 header page. A quick description of the functions can be found here. To view the settings or make changes to any of the LAN settings, click on "LAN 2 - Ativa 802.11g Wireless Cable/DSL | Product Manual - Page 40
(where x is anything between 0 and 255). 2. Subnet Mask There is no need to change the subnet mask. This is a unique, advanced feature of your Ativa Router. It is possible to change the subnet mask if necessary; however, do NOT make changes to the subnet mask unless you have a specific reason to - Ativa 802.11g Wireless Cable/DSL | Product Manual - Page 41
necessary; however, in order to do so you must manually set a static 2 IP address for each computer on any of the other advanced features of the Router such as DMZ or client IP filters, these 6. Local Domain Name The default setting is "Ativa". You can set a local domain name (network name - Ativa 802.11g Wireless Cable/DSL | Product Manual - Page 42
been any changes, the list will be updated. (1) (2) (3) (4) Configuring the Wireless Network Settings Clicking on the header of the "Wireless" tab will take you to the "Wireless" header page. From this page, the Router's wireless radio can be enabled or disabled (the default setting is enabled - Ativa 802.11g Wireless Cable/DSL | Product Manual - Page 43
Using the Web-Based Advanced User Interface Changing the Wireless Network Name (SSID) To identify your wireless network, a name called the SSID (Service Set 1 Identifier) is used. The default SSID of the Router is "Ativa54g". You can change this to anything you want to or you can leave it - Ativa 802.11g Wireless Cable/DSL | Product Manual - Page 44
Using the Web-Based Advanced User Interface Using the Wireless Mode Switch Your Router can operate in three different wireless modes: "g and b", "g only", and "b only". The different modes are explained on the next page. 42 - Ativa 802.11g Wireless Cable/DSL | Product Manual - Page 45
When to use b only Mode 7 In some cases, older 802.11b clients may not be compatible with 802.11g wireless. These adapters tend to be of inferior design and may use older drivers or technology. Switching to this mode can solve problems that 8 sometimes occur with these clients. If you suspect - Ativa 802.11g Wireless Cable/DSL | Product Manual - Page 46
change. Protected Mode Switch As part of the 802.11g specification, Protected mode ensures proper operation of 802.11g clients and access points when there is heavy 802.11b traffic in the operating environment. When Protected mode is ON, 802.11g scans for other wireless network traffic before it - Ativa 802.11g Wireless Cable/DSL | Product Manual - Page 47
Here are a few different ways you can maximize the security of your 1 wireless network and protect your data from prying eyes and ears. This section is home office, and small office user. At the time of this User Manual's publication, there are three encryption 2 methods available. 3 Name 64 - Ativa 802.11g Wireless Cable/DSL | Product Manual - Page 48
-bit WEP encryption, but you might have older equipment that only supports 64-bit WEP. All Ativa wireless products will support both 64-bit and 128-bit WEP. Encryption Keys After selecting use the hex WEP key from your Router or access point and enter it manually into the hex WEP key table in your - Ativa 802.11g Wireless Cable/DSL | Product Manual - Page 49
same network key to access the network. Typically, this is the mode that will be used in a home environment. 5 For a list of Ativa wireless products that support WPA, please visit our website at www.ativasupport.com. 6 Sharing the Same Network Keys Most Wi-Fi products ship with security turned - Ativa 802.11g Wireless Cable/DSL | Product Manual - Page 50
Using the Web-Based Advanced User Interface Network key= MyPassword Network key= MyPassword Network key= MyPassword Network key= WRONG Password The Wireless G Desktop Card cannot access the network because it is using a different network key than the network key that is configured - Ativa 802.11g Wireless Cable/DSL | Product Manual - Page 51
You will use this key to program the encryption settings on your Router and your wireless computers. 5 6 7 8 Note to Mac users: Original Apple® AirPort® products support 64-bit encryption only. Apple AirPort 2 products can support 64-bit or 128-bit encryption. Please check your product to see - Ativa 802.11g Wireless Cable/DSL | Product Manual - Page 52
encryption mode, you can enter your key by typing in the hex key manually, or you can put a check mark in "Passphrase", then type in your configuring the Wireless G Router or access point from a computer with a wireless client, you must ensure that security is turned ON for this wireless client. If - Ativa 802.11g Wireless Cable/DSL | Product Manual - Page 53
mode, you can enter your key 4 by typing in the hex key manually, or you can put a check mark in "Passphrase", then type in your configuring the Wireless G Router or access point from a computer with a wireless client, you must ensure that security is turned ON for this wireless client. If - Ativa 802.11g Wireless Cable/DSL | Product Manual - Page 54
. You must download the latest driver for your Ativa Wireless G Notebook Card from the Ativa support site. Other operating systems are not supported at this time. Microsoft's patch only supports devices with WPA-enabled drivers such as Ativa 802.11g products. WPA uses a so-called pre-shared key - Ativa 802.11g Wireless Cable/DSL | Product Manual - Page 55
Using the Web-Based Advanced User Interface Setting WPA/WPA2 1. Select "WPA/WPA2" or "WPA2 only" from the "Allowed Client Type". 1 2. Select "Pre-shared key" as the authentication type. 2 3. Enter your pre-shared key. This can be from eight to 63 characters and can be letters, numbers, or - Ativa 802.11g Wireless Cable/DSL | Product Manual - Page 56
Setting up WPA for Wireless Desktop and Wireless Notebook Cards that are NOT Manufactured by Ativa If you do NOT have an Ativa Wireless G Notebook Card and it is not equipped with WPA-enabled software, a file from Microsoft called "Windows XP Support Patch for Wireless Protected Access" is available - Ativa 802.11g Wireless Cable/DSL | Product Manual - Page 57
Web-Based Advanced User Interface 4. Under the "Wireless Networks" tab, click the "Configure" button and to connect to a corporate network that supports an authentication server such as a 10 ". This setting will have to be identical to the Router that you set up. 7. Type your encryption key in - Ativa 802.11g Wireless Cable/DSL | Product Manual - Page 58
should be employed by advanced users only. The Router can be configured to work as a wireless network access point. Using this mode will defeat Connect a cable from the WAN port on the Router to your existing network. The Router is now acting as an access point. To access the Router's Web-Based - Ativa 802.11g Wireless Cable/DSL | Product Manual - Page 59
• UDP flooding 4 • Ping of Death (PoD) • Tear Drop Attack 5 • Denial of Service (DoS) • ICMP defect 6 • IP with zero length • RIP defect 7 • Smurf Attack • Fragment flooding 8 • TCP Null Scan The firewall also masks common ports that are frequently used to attack 9 networks. These - Ativa 802.11g Wireless Cable/DSL | Product Manual - Page 60
Internet) calls for services such as a web server (port 80), FTP server (Port 21), or other applications through your Router to your internal . You will need to contact the application vendor to find out which port settings you need. Entering Settings into the Virtual Server To enter settings, - Ativa 802.11g Wireless Cable/DSL | Product Manual - Page 61
IP Filters The Router can be configured to restrict access to the Internet, email, or 1 other network services at specific days wish to restrict access to in the IP fields (1). Next, enter "80" in both the port fields (2). Select "Both" (3). Select "Block" 10 (4). You can also select "Always" - Ativa 802.11g Wireless Cable/DSL | Product Manual - Page 62
of up to 32 computers. Note: You will not be able to delete the MAC address of the computer you are using to access the Router's administrative functions (the computer you are using now). 60 - Ativa 802.11g Wireless Cable/DSL | Product Manual - Page 63
you to specify one computer on your network to 1 be placed outside of the firewall. This may be necessary if the firewall is causing problems with an application such as a game or video conferencing 2 application. Use this feature on a temporary basis. The computer in the DMZ is NOT protected - Ativa 802.11g Wireless Cable/DSL | Product Manual - Page 64
the Internet. By pinging a specific IP address and receiving a response from the IP address, a hacker can determine that something of interest might be there. The Router can be set up so it will not respond to an ICMP ping from the outside. This heightens the level of security of your - Ativa 802.11g Wireless Cable/DSL | Product Manual - Page 65
section Using the Web-Based Advanced User Interface Utilities Tab 1 This screen lets you manage different parameters of the Router and perform certain administrative functions. 2 3 4 5 6 7 8 9 10 63 - Ativa 802.11g Wireless Cable/DSL | Product Manual - Page 66
button. 2. The following message will appear. Click "OK". 3. The following message will appear. Restarting the Router can take up to 25 seconds. It is important not to turn off the power to the Router during the restart. 4. A 25-second countdown will appear on the screen. When the countdown reaches - Ativa 802.11g Wireless Cable/DSL | Product Manual - Page 67
section Using the Web-Based Advanced User Interface Restoring Factory Default Settings 1 Using this option will restore all of the settings in the Router to the factory (default) settings. It is recommended that you back up your settings before you restore all of the defaults. 2 1. Click the - Ativa 802.11g Wireless Cable/DSL | Product Manual - Page 68
Using the Web-Based Advanced User Interface Saving a Current Configuration You can save your current configuration by using this feature. Saving your configuration will allow you to restore it later if your settings are lost or changed. It is recommended that you back up your current configuration - Ativa 802.11g Wireless Cable/DSL | Product Manual - Page 69
Using the Web-Based Advanced User Interface 3. When the save is complete, you will see 1 the following window. Click "Close". 2 The configuration is now saved. 3 4 Restoring a Previous Configuration 5 This option will allow you to restore a previously saved configuration. 6 7 8 1. - Ativa 802.11g Wireless Cable/DSL | Product Manual - Page 70
into the navigation bar of your browser. Updating the Firmware From time to time, Ativa may release new versions of the Router's firmware. Firmware updates contain feature improvements and fixes to problems that may exist. When Ativa releases new firmware, you can download the firmware from the - Ativa 802.11g Wireless Cable/DSL | Product Manual - Page 71
Using the Web-Based Advanced User Interface Downloading a New Version of Firmware 1 You will now be taken to the download page of "AWGR54 Firmware update - North America". 2 1. To download the new version of firmware, click the download logo ( ). 3 2. A window will open that allows you to - Ativa 802.11g Wireless Cable/DSL | Product Manual - Page 72
window. Click "Close". The download of the firmware is complete. To update the firmware, follow the next steps in "Updating the Router's Firmware". Updating the Router's Firmware 1. In the "Firmware Update" page, click "Browse". A window will open that allows you to select the location of the - Ativa 802.11g Wireless Cable/DSL | Product Manual - Page 73
60-second countdown will appear on the screen. When the countdown reaches zero, the Router's firmware update will be complete. The Router's home page should appear automatically. If not, type in the Router's address (default = 192.168.2.1) into the navigation bar of your browser. The firmware update - Ativa 802.11g Wireless Cable/DSL | Product Manual - Page 74
you to set the period of time that you can be logged into the Router's Web-Based Advanced User Interface. The timer starts when there has been no you leave, the login session will expire. You will have to log into the Router again to make any more changes. The login time-out option is for security - Ativa 802.11g Wireless Cable/DSL | Product Manual - Page 75
1 2 Enabling Remote Management 3 Before you enable this advanced feature of your Ativa Router, MAKE SURE YOU HAVE SET THE ADMINISTRATOR PASSWORD. Remote management 4 allows you to make changes to your Router's settings from anywhere on the Internet. There are two methods of remotely managing - Ativa 802.11g Wireless Cable/DSL | Product Manual - Page 76
able to access the Internet. Other problems may also occur. Turning off NAT feature offered by your Ativa Router. It is a ports. An application that is UPnP-compliant has the ability to communicate with the Router, basically "telling" the Router which way it needs the firewall configured. The Router - Ativa 802.11g Wireless Cable/DSL | Product Manual - Page 77
to automatically check for a new version of firmware and alert you that the new firmware is available. 8 When you log into the Router's Web-Based Advanced User Interface, the Router will perform a check to see if new firmware is available. If so, you will be notified. You can choose to download - Ativa 802.11g Wireless Cable/DSL | Product Manual - Page 78
to properly communicate with your Router, you will need to change your PC's TCP/IP settings to DHCP. Manually Configuring Network Adapters in Windows (1) (2) (3) 5. If "Use the following IP address" (2) is selected, your Router will need to be set up for a static IP connection type. Write the address - Ativa 802.11g Wireless Cable/DSL | Product Manual - Page 79
Configuring Network Settings Manually Configuring Network Adapters in Windows 98SE or Me 1. Right-click this information into the Router. 9 10 section 4. Write in the IP address and subnet mask from the "IP Address" tab (3). 5. Click the "Gateway" tab (2). Write the gateway address down in the - Ativa 802.11g Wireless Cable/DSL | Product Manual - Page 80
Manually Configuring Network Settings Set up the computer that is connected to the cable or DSL modem FIRST using these steps. You can also use these steps to add computers to your Router after the Router has been set up to connect to the Internet. 78 - Ativa 802.11g Wireless Cable/DSL | Product Manual - Page 81
Manually Configuring Network Settings Manually Configuring Network Adapters in Mac OS X 1 1. Click on the "System Preferences" icon. 2 3 2. Select "Network" (1) from the "System Preferences" menu. 4 5 (1) 6 7 8 9 3. Select "Built-in Ethernet" (2) next to " - Ativa 802.11g Wireless Cable/DSL | Product Manual - Page 82
make sure that "Connect using PPPoE" is NOT selected. If it is, you will need to configure your Router for a PPPoE connection type using your user name and password. 5. If "Manually" is selected, your Router will need to be set up for a static IP connection type. Write the address information in the - Ativa 802.11g Wireless Cable/DSL | Product Manual - Page 83
Web Browser Settings In most cases, you will not need to make any changes to your web browser's settings. If you are having trouble accessing the Internet or the 1 Web-Based Advanced User Interface, then change your browser's settings to the recommended settings in this section. 2 Internet - Ativa 802.11g Wireless Cable/DSL | Product Manual - Page 84
Recommended Web Browser Settings 4. Make sure there are no check marks next to any of the displayed options: "Automatically detect settings", "Use automatic configuration script", and "Use a proxy server". Click "OK". Then click "OK" again in the "Internet Options" page. Netscape® Navigator® 4.0 or - Ativa 802.11g Wireless Cable/DSL | Product Manual - Page 85
Troubleshooting Problem: Installation CD does not automatically start. 1 Solution: 2 If the CD-ROM does not start the Easy "EasyInstall.exe". section 4. If the Easy Install Wizard still does not start, reference the section titled "Manually Configuring Network Settings" (page 76 of this User - Ativa 802.11g Wireless Cable/DSL | Product Manual - Page 86
Troubleshooting Problem: The Easy Install Wizard cannot find my Router. Solution: If the Easy Install Wizard is not able to find the Router during the installation process, please check the following items: 1. If the Easy Install Wizard is not able to find the Router during the installation process, - Ativa 802.11g Wireless Cable/DSL | Product Manual - Page 87
is blinking, the problem may be that your modem and Router are not connected properly. 1. Make sure the network cable between the modem and the Router is connected. We strongly recommend using the cable that was supplied with your cable or DSL modem for this purpose. The cable should be connected - Ativa 802.11g Wireless Cable/DSL | Product Manual - Page 88
to reattempt communication with the modem. If the "WAN" light on the Router is not lit after completing these steps, please contact Ativa Technical Support. 4. Try shutting down and restarting your computer. Problem: • The Easy Install Wizard completed installation, but my web browser doesn't work - Ativa 802.11g Wireless Cable/DSL | Product Manual - Page 89
10 software, please contact Ativa Technical Support. Problem: I can't connect to the Internet wirelessly. Solution: If you are unable to connect to the Internet from a wireless computer, please do the following: 1. Look at the lights on your Router. Your Ativa Router's lights should be as - Ativa 802.11g Wireless Cable/DSL | Product Manual - Page 90
Troubleshooting 2. Open your wireless utility software by clicking on the icon in the system tray at the bottom, right-hand corner of the screen. If you are also using an Ativa Wireless G Card or Adapter with this Router, the tray icon should look like this [place image here] (the icon may be red or - Ativa 802.11g Wireless Cable/DSL | Product Manual - Page 91
a range or interference problem. Please see the suggestions discussed in the section titled "Placement of your Router for Optimal Performance" in this User Manual. 2. Using a computer that is connected to the Router through a network cable (as opposed to wirelessly), ensure that "Broadcast SSID - Ativa 802.11g Wireless Cable/DSL | Product Manual - Page 92
Troubleshooting Problem: My wireless network performance is inconsistent. Data transfer is sometimes slow. Signal strength is poor. I am having difficulty establishing and/or maintaining a Virtual Private Network (VPN) connection. Solution: Wireless technology is radio-based, which means - Ativa 802.11g Wireless Cable/DSL | Product Manual - Page 93
for browsing the Internet. For more assistance, see your wireless card's user manual. 2 Problem: 3 How do I extend the range of my wireless network? Solution: 4 Ativa recommends using one of the following products to extend wireless network coverage throughout large homes or offices - Ativa 802.11g Wireless Cable/DSL | Product Manual - Page 94
Troubleshooting Problem: I am having difficulty setting up Wired Equivalent Privacy (WEP) security on an Ativa Wireless Router. Solution: 1. Log into your Wireless Router. Open your web browser and type in the IP address of the Wireless Router. (The Router's default is 192.168.2.1.) Log into your - Ativa 802.11g Wireless Cable/DSL | Product Manual - Page 95
Troubleshooting Problem: I am having difficulty setting up Wired Equivalent Privacy (WEP) security on 1 an Ativa client card (Wireless Network Card or Adapter). Solution: 2 The client card must use the same key as the Wireless G Router or access point. For instance, if your Wireless Router - Ativa 802.11g Wireless Cable/DSL | Product Manual - Page 96
need to download the latest driver for your Ativa Wireless Notebook Card from the Ativa support site. Other operating systems are not supported at this time. Microsoft's patch only supports devices with WPAenabled drivers such as Ativa 802.11g products. Download the latest driver at www.ativasupport - Ativa 802.11g Wireless Cable/DSL | Product Manual - Page 97
Troubleshooting Problem: I am having difficulty setting up Wi-Fi Protected Access (WPA) security on 1 an Ativa Wireless Router or for a home network. Solution: 2 1. From the "Security Mode" drop-down menu, select "WPA-PSK (no server)". 3 2. For "Encryption Technique", select "TKIP" or "AES - Ativa 802.11g Wireless Cable/DSL | Product Manual - Page 98
Troubleshooting Problem: I am having difficulty setting up Wi-Fi Protected Access (WPA) security on an Ativa client card (Wireless Network Card or Adapter) for a home network. Solution: Clients must use the same key that the Wireless G Router or access point uses. For instance, if the key is "Smith - Ativa 802.11g Wireless Cable/DSL | Product Manual - Page 99
Troubleshooting Problem: I am having difficulty setting up Wi-Fi Protected Access (WPA) security on 1 an Ativa client card (Wireless Network Card or Adapter) for a business. Solution: 2 1. Double-click the "Signal Indicator" icon to bring up the "Wireless Network Utility" screen. The " - Ativa 802.11g Wireless Cable/DSL | Product Manual - Page 100
Troubleshooting Problem: I am having difficulty setting up Wi-Fi Protected Access (WPA) security and I am NOT using an Ativa client card for a home network. Solution: If you are NOT using an Ativa Wireless G Notebook Card and it is not equipped with WPA-enabled software, a file from Microsoft called - Ativa 802.11g Wireless Cable/DSL | Product Manual - Page 101
select "WPA-PSK" under "Network Administration". 5 5. Select "TKIP" or "AES" under "Date Encryption". This setting will have to be identical to the Wireless G Router or access point that you set up. 6 6. Type in your encryption key in the "Network key" box. Important: Enter your pre-shared key - Ativa 802.11g Wireless Cable/DSL | Product Manual - Page 102
Information Technical Support You can find technical support information at http://www.ativasupport.com through the tech-support area. If you want to contact technical support by phone, please call: US: 1-866-91-ATIVA (1-866-912-8482) 100 - Ativa 802.11g Wireless Cable/DSL | Product Manual - Page 103
Information FCC Statement 1 DECLARATION OF CONFORMITY WITH FCC RULES FOR ELECTROMAGNETIC COMPATIBILITY 2 We, Ativa, of 2200 Old Germantown Rd., Del Ray Beach, FL 33445, declare under our sole responsibility that the product, 3 AWGR54 to which this declaration relates, 4 complies - Ativa 802.11g Wireless Cable/DSL | Product Manual - Page 104
the product has been damaged by accident, abuse, misuse, or misapplication; if the product has been modified without the written permission of Ativa; or if any Ativa serial number has been removed or defaced. THE WARRANTY AND REMEDIES SET FORTH ABOVE ARE EXCLUSIVE IN LIEU OF ALL OTHERS, WHETHER ORAL - Ativa 802.11g Wireless Cable/DSL | Product Manual - Page 105
Information 1 2 3 4 5 6 7 8 9 10 103 section - Ativa 802.11g Wireless Cable/DSL | Product Manual - Page 106
Wireless G Router www.ativasupport.com Ativa Tech Support US: 1-866-91-ATIVA (1-866-912-8482) © 2006 Ativa. All rights reserved. All trade names are registered trademarks of respective manufacturers listed. Apple, AirPort, Mac, Mac OS, and AppleTalk are trademarks of Apple Computer,
-
 1
1 -
 2
2 -
 3
3 -
 4
4 -
 5
5 -
 6
6 -
 7
7 -
8
-
9
-
10
-
11
-
12
-
13
-
14
-
15
-
16
-
17
-
18
-
19
-
20
-
21
-
22
-
23
-
24
-
25
-
26
-
27
-
28
-
29
-
30
-
31
-
32
-
33
-
34
-
35
-
36
-
37
-
38
-
39
-
40
-
41
-
42
-
43
-
44
-
45
-
46
-
47
-
48
-
49
-
50
-
51
-
52
-
53
-
54
-
55
-
56
-
57
-
58
-
59
-
60
-
61
-
62
-
63
-
64
-
65
-
66
-
67
-
68
-
69
-
70
-
71
-
72
-
73
-
74
-
75
-
76
-
77
-
78
-
79
-
80
-
81
-
82
-
83
-
84
-
85
-
86
-
87
-
88
-
89
-
90
-
91
-
92
-
93
-
94
-
95
-
96
-
97
-
98
-
99
-
100
-
101
-
102
-
103
-
104
-
105
-
106
 |
 |
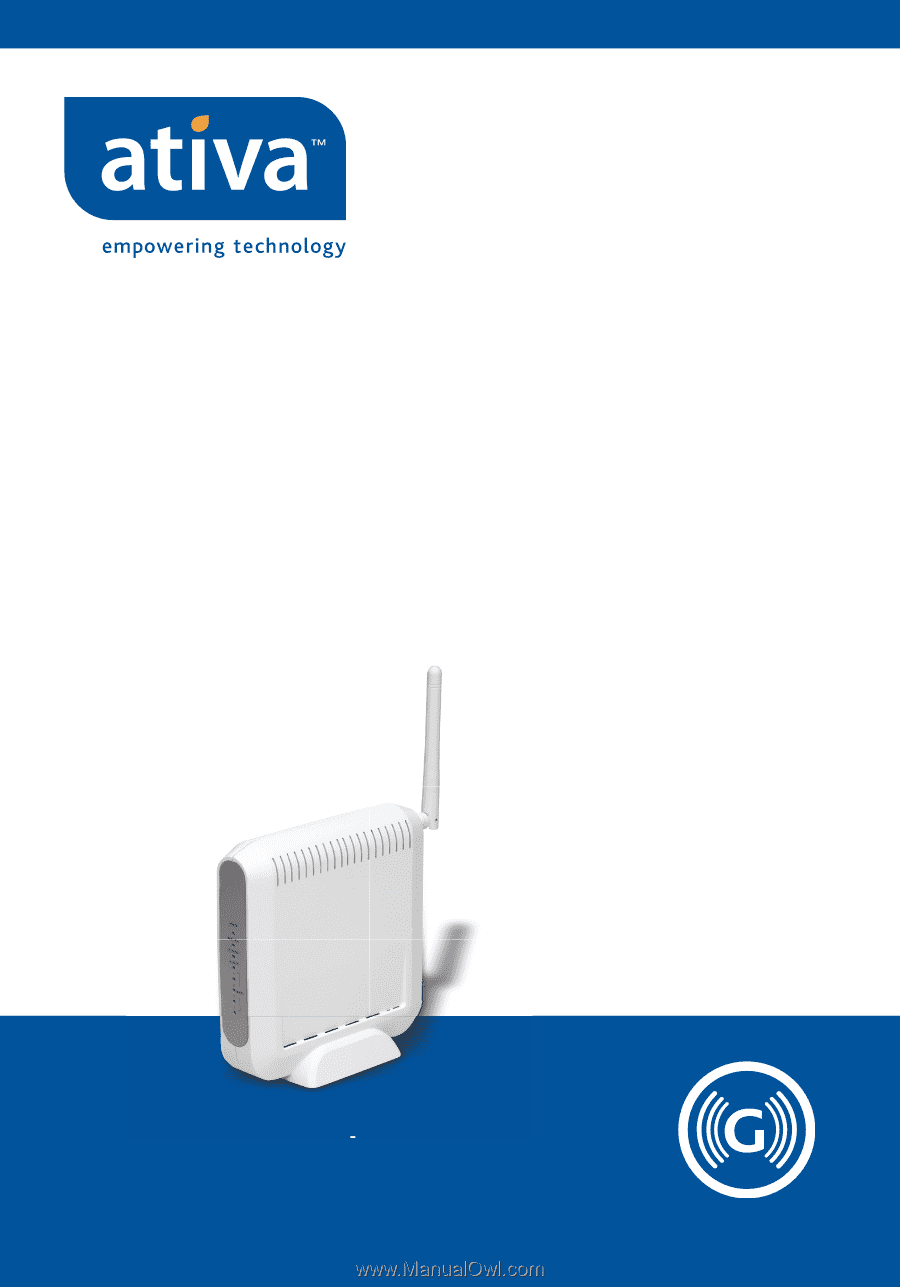
AWGR54
User Manual
Wireless G
Router