Ativa AT220H Product Manual - Page 8
Shortcuts Function - manual
 |
View all Ativa AT220H manuals
Add to My Manuals
Save this manual to your list of manuals |
Page 8 highlights
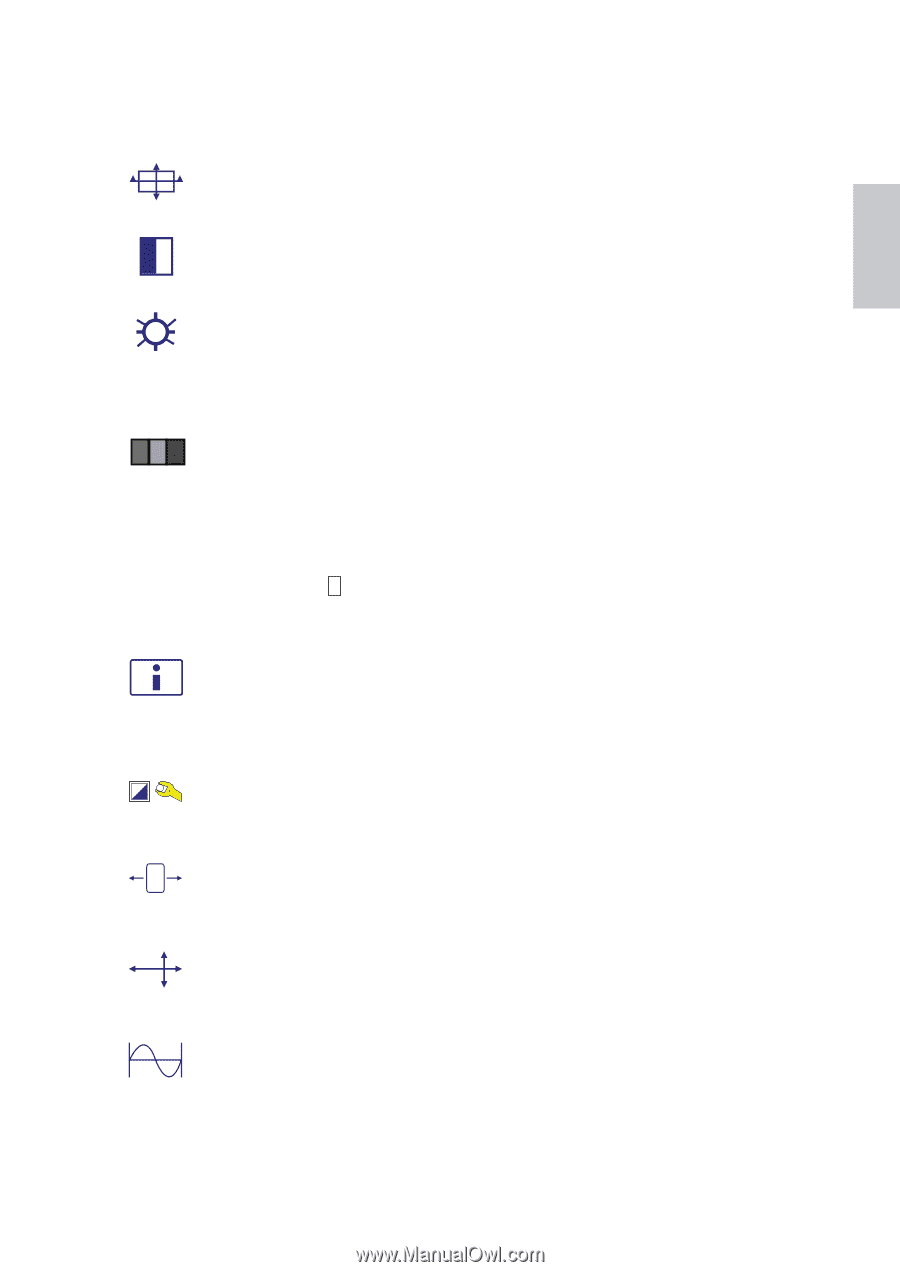
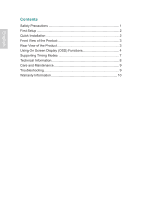
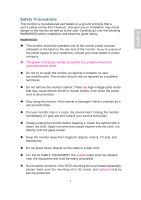
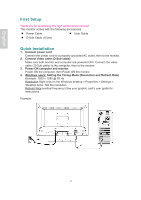
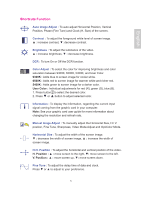
English Shortcuts Function Auto Image Adjust : To auto adjust Horizontal Position, Vertical Position, Phase (Fine Tune) and Clock (H. Size) of the screen. Contrast : To adjust the foreground white level of screen image. ▲ : increase contrast, ▼: decrease contrast. Brightness : To adjust the luminance of the video. ▲ : increase brightness, ▼ : decrease brightness. DCR : To turn On or Off the DCR function. Color Adjust : To select the color for improving brightness and color saturation between 9300K, 6500K, 5400K, and User Color. 9300K : Adds blue to screen image for cooler white. 6500K : Adds red to screen image for warmer white and richer red. 5400K : Adds green to screen image for a darker color. User Color : Individual adjustments for red (R), green (G), blue (B). 1. Press button 2 to select the desired color. 2. Press ▼ or ▲ button to adjust selected color. Information : To display the information, regarding the current input signal coming from the graphic card in your computer. Note: See your graphic card user guide for more information about changing the resolution and refresh rate. Manual Image Adjust : To manually adjust the Horizontal Size, H./ V. position, Fine Tune ,Sharpness, Video Mode Adjust and OptiColor Mode. Horizontal Size : To adjust the width of the screen image. ▼ : decrease the width of screen image, ▲ : increase the width of screen image. H./V. Position : To adjust the horizontal and vertical position of the video. H. Position : ▲ : move screen to the right, ▼: move screen to the left. V. Position : ▲ : move screen up, ▼: move screen down. Fine Tune : To adjust the delay time of data and clock. Press ▼ or ▲ to adjust to your preference. 5
-
 1
1 -
2
-
 3
3 -
 4
4 -
 5
5 -
 6
6 -
 7
7 -
 8
8 -
 9
9 -
 10
10 -
 11
11 -
 12
12 -
 13
13 -
14
-
15
-
16
-
17
-
18
-
19
-
20
-
21
-
22
-
23
-
24
-
25
-
26
-
27
-
28
-
29
-
30
-
31
-
32
-
33
-
34
-
35
-
36
-
37
-
38
-
39
 |
 |