Audiovox VE1040 Owners Guide - Page 13
Channel Tuning Set Up, Setting The Time, Setting And Activating The Alarm, Alarm, Positioning - remote
 |
UPC - 044476004926
View all Audiovox VE1040 manuals
Add to My Manuals
Save this manual to your list of manuals |
Page 13 highlights
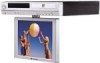
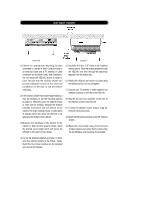
Operation CHANNEL TUNING SET UP In addition to normal broadcast reception of VHF and UHF channels, if you are a Cable TV subscriber, your new TV is capable of receiving many unscrambled Cable channels without the use of a converter box. When set to broadcast TV, it receives CH2-CH69. When set to one of the CATV modes (STD, HRC, or IRC) it receives CH1-CH125. NOTE: Most cable companies broadcast in STD Mode. POSITIONING THE SCREEN Pivot the screen forward until a comfortable viewing angle is reached. The screen may also be rotated from side to side. Do not force the screen beyond its rotational limit. The VE1040 is now ready for use. Pressing the ON/OFF button on the TV or the remote will turn the system on or off. Remember to turn the unit off and pivot the screen to the closed position when not in use. SETTING THE TIME NOTE : The VE1040 must be turned off (except when SETTING THE PRESETS). 1) Press the SET button and the minutes will flash. 2) Use the UP and DOWN buttons to set the minutes. 3) Press the LEFT/RIGHT buttons to toggle between the hour and minutes. 4) Use the UP and DOWN buttons to set the hour(Check AM/PM indicator). 5) Press the ON/OFF button to return to the time display. SETTING and ACTIVATING the ALARM NOTE : The VE1040 must be turned "OFF" when performing the following procedure. 1) Press the SET button(1) twice and VE1040 should enter the alarm mode as indicated by alarm; present time will be displayed with the minutes portion blinking. (Alarm ACTIVATED mode, Alarm indicator "ALM" on). NOTE : If alarm and a series of dashes appear ( alarm Deactivated mode) press the T/F button (2) once to switch to the alarm activated mode. 2) Press the LEFT/RIGHT buttons to select the hour or minute for adjustment. When setting the alarm, check the AM/PM indicator to assure the proper setting. 3) Use the UP and DOWN buttons to adjust the hours and minutes. 4) Press the ON/OFF button. The alarm is now set and activated. Once the alarm is set it will sound each day at the same time as long as it is activated. - 13 -
-
 1
1 -
2
-
3
-
4
-
5
-
6
-
7
-
 8
8 -
 9
9 -
 10
10 -
 11
11 -
 12
12 -
 13
13 -
 14
14 -
 15
15 -
 16
16 -
 17
17 -
 18
18 -
19
-
20
-
21
-
22
-
23
-
24
-
25
-
26
-
27
-
28
 |
 |
