Audiovox VE705 Operation Manual - Page 10
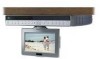
Countertop/desktop Installation - lcd monitors
 |
UPC - 044476027703
View all Audiovox VE705 manuals
Add to My Manuals
Save this manual to your list of manuals |
Page 10 highlights
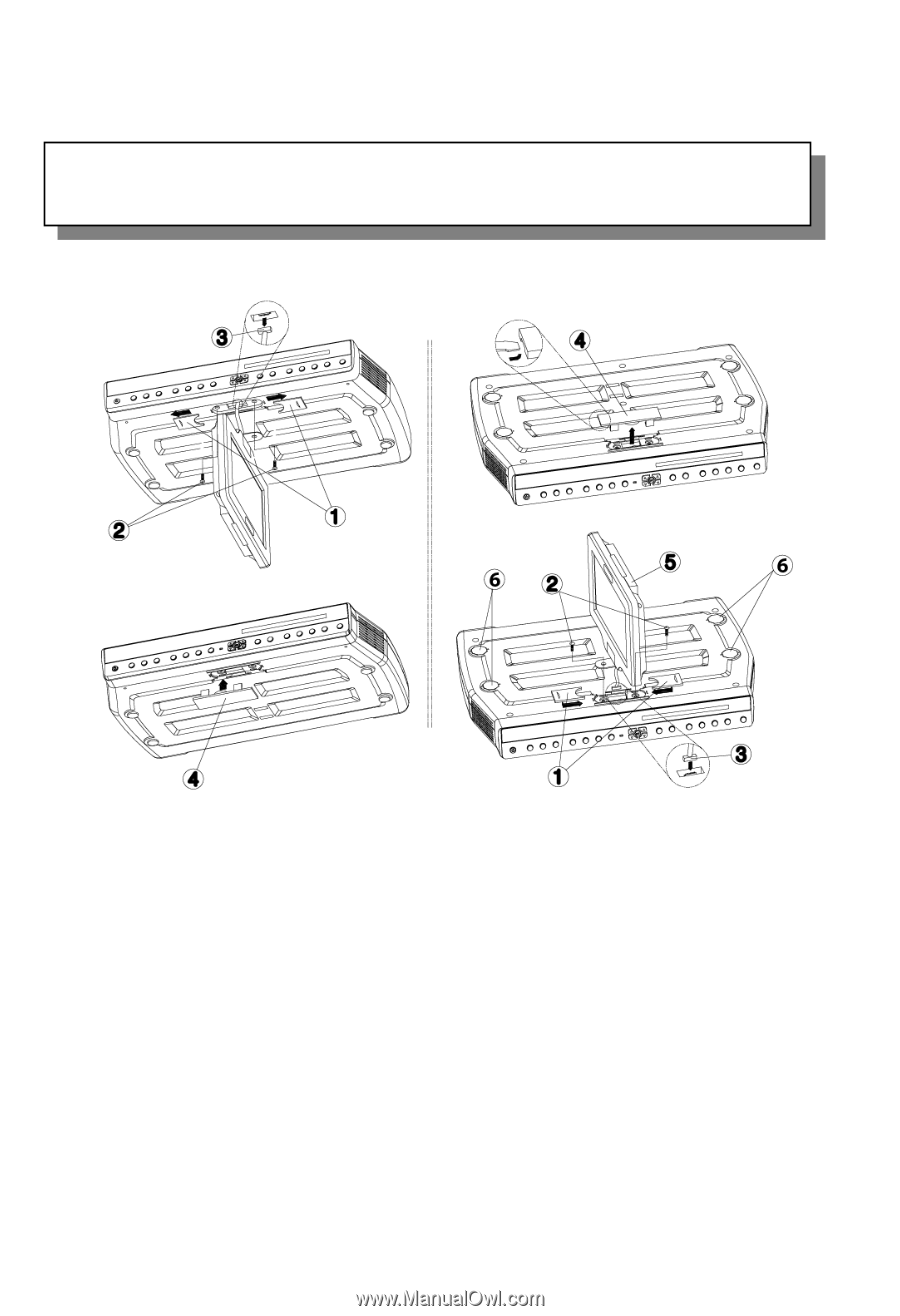
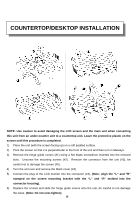
COUNTERTOP/DESKTOP INSTALLATION NOTE: Use caution to avoid damaging the LCD screen and the main unit when converting this unit from an under-counter unit to a countertop unit. Leave the protective plastic on the screen until this procedure is completed. 1) Place the unit (with the screen facing up) on a soft padded surface. 2) Pivot the screen so that it is perpendicular to the front of the unit and then turn it sideways. 3) Remove the hinge guide covers (#1) using a flat blade screwdriver inserted into the removal slots. Unscrew the mounting screws (#2). Remove the connector from the unit (#3), be careful not to damage the screen (#5). 4) Turn the unit over and remove the blank cover (#4) 5) Connect the plug of the LCD monitor into the connector (#3). (Note: align the "L" and "R" stamped on the screen mounting bracket with the "L" and "R" molded into the connector housing). 6) Replace the screws and slide the hinge guide covers onto the unit, be careful to not damage the wires. (Note: Do not over-tighten). 9 -
-
 1
1 -
2
-
3
-
4
-
 5
5 -
 6
6 -
 7
7 -
 8
8 -
 9
9 -
 10
10 -
 11
11 -
 12
12 -
 13
13 -
 14
14 -
 15
15 -
16
-
17
-
18
-
19
-
20
 |
 |