Audiovox VE705 Operation Manual - Page 15
Operat
 |
UPC - 044476027703
View all Audiovox VE705 manuals
Add to My Manuals
Save this manual to your list of manuals |
Page 15 highlights
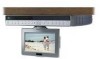
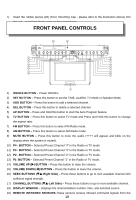
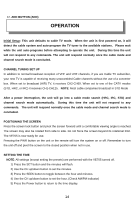
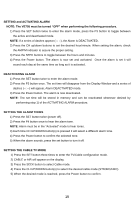
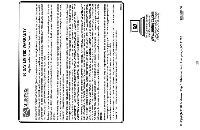
12. ADD BUTTON (ADD) Press this button to add the selected channel to memory. OPERATION Initial Setup: This unit defaults to cable TV mode. When the unit is first powered on, it will detect the cable system and auto-program the TV tuner to the available stations. Please wait while the unit auto-programs before attempting to operate the unit. During this time the unit will not respond to any commands. The unit will respond normally once the cable mode and channel search mode is concluded. CHANNEL TUNING SET UP In addition to normal broadcast reception of VHF and UHF channels, if you are Cable TV subscriber, your new TV is capable of receiving many unscrambled Cable channels without the use of a converter box. When set to broadcast (AIR) TV, it receives CH2-CH69. When set to one of the CATV modes (STD, HRC, or IRC) it receives CH1-CH125. NOTE: Most cable companies broadcast in STD Mode After a power interruption, the unit will go into a cable mode search (HRC, IRC, STD) and channel search mode automatically. During this time the unit will not respond to any commands. The unit will respond normally once the cable mode and channel search mode is concluded. POSITIONING THE SCREEN Press the screen lock button and pivot the screen forward until a comfortable viewing angle is reached. The screen may also be rotated from side to side. Do not force the screen beyond its rotational limit. The VE705 is now ready for use. Pressing the PWR button on the unit or the remote will turn the system on or off. Remember to turn the unit off and pivot the screen to the closed position when not in use. SETTING THE TIME NOTE: All settings (except setting the presets) are performed with the VE705 turned off. 1) Press the SET button and the minutes will flash. 2) Use the CH up/down button to set the minutes. 3) Press the SEEK button to toggle between the hour and minutes. 4) Use the CH up/down button to set the hour. (Check AM/PM indicator) 5) Press the Power button to return to the time display. 14-
-
 1
1 -
2
-
3
-
4
-
5
-
6
-
7
-
8
-
9
-
 10
10 -
 11
11 -
 12
12 -
 13
13 -
 14
14 -
 15
15 -
 16
16 -
 17
17 -
 18
18 -
 19
19 -
 20
20
 |
 |