Autodesk 00126-050008-1630A User Guide - Page 24
Changes in AutoCAD Standard Functions when Working with, WiseImage, Inserting and Scaling Raster
 |
UPC - 606121656470
View all Autodesk 00126-050008-1630A manuals
Add to My Manuals
Save this manual to your list of manuals |
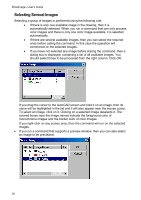
Page 24 highlights
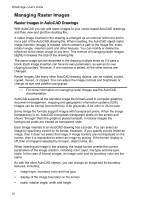
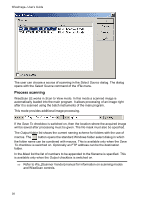
3 Basics Ÿ image transparency Ÿ image brightness, contrast, and level of merging with background Ÿ quality and speed of image display on the screen Þ For details see the relevant sections of the AutoCAD User's Guide. Changes in AutoCAD Standard Functions when Working with WiseImage AutoCAD tools do not allow you to change raster images, but WiseImage commands can create new images, edit and save all types of raster images, supported by AutoCAD. The standard AutoCAD functions for managing raster images are changed as follows: AutoCAD Function Changes, added by WiseImage Deleting raster images If there are unsaved changes, then WiseImage prompts you to save these changes. Unloading raster images If there are unsaved changes, then WiseImage prompts you to save these changes. Saving an AutoCAD drawing WiseImage automatically saves all changed raster images inserted into the current drawing. If new images were created, then the program opens a dialog box for saving a new raster image, where a user should specify the raster file name, location and format. Exiting AutoCAD WiseImage saves all changed raster images in case the drawing is saved. Inserting and Scaling Raster Images You can insert raster images with the AutoCAD command IMAGEATTACH that can be run from the WiseImage toolbar Insertion of a raster image is performed using the IMAGE command. When inserting, you can specify a scale factor, rotation angle, and insertion point. Images can be placed either in the paper space or model space of AutoCAD. * For more information on raster image inserting, see the relevant AutoCAD section. When editing and performing vectorization of raster images using WiseImage tools, the most convenient way to manage images is to insert them in the drawing at a scale of 1:1. This is a scale, which matches one "sheet" millimeter (inch, or another measurement unit) of a raster image to one AutoCAD measurement unit. Such a method facilitates the setting of numerical parameters and plotting. In this case a user manages a scanned image as if it were an original sheet drawing or a map. See below for a description of image insertion at a scale of 1:1. 23
-
 1
1 -
2
-
3
-
4
-
5
-
6
-
7
-
8
-
9
-
10
-
11
-
12
-
13
-
14
-
15
-
16
-
17
-
18
-
 19
19 -
 20
20 -
 21
21 -
 22
22 -
 23
23 -
 24
24 -
 25
25 -
 26
26 -
 27
27 -
 28
28 -
 29
29 -
30
-
31
-
32
-
33
-
34
-
35
-
36
-
37
-
38
-
39
-
40
-
41
-
42
-
43
-
44
-
45
-
46
-
47
-
48
-
49
-
50
-
51
-
52
-
53
-
54
-
55
-
56
-
57
-
58
-
59
-
60
-
61
-
62
-
63
-
64
-
65
-
66
-
67
-
68
-
69
-
70
-
71
-
72
-
73
-
74
-
75
-
76
-
77
-
78
-
79
-
80
-
81
-
82
-
83
-
84
-
85
-
86
-
87
-
88
-
89
-
90
-
91
-
92
-
93
-
94
-
95
-
96
-
97
-
98
-
99
-
100
-
101
-
102
-
103
-
104
-
105
-
106
-
107
-
108
-
109
-
110
-
111
-
112
-
113
-
114
-
115
-
116
-
117
-
118
-
119
-
120
-
121
-
122
-
123
-
124
-
125
-
126
-
127
-
128
-
129
-
130
-
131
-
132
-
133
-
134
-
135
-
136
-
137
-
138
-
139
-
140
-
141
-
142
-
143
-
144
-
145
-
146
-
147
-
148
-
149
-
150
-
151
-
152
-
153
-
154
-
155
-
156
-
157
-
158
-
159
-
160
-
161
-
162
-
163
-
164
-
165
-
166
-
167
-
168
-
169
-
170
-
171
-
172
-
173
-
174
-
175
-
176
-
177
-
178
-
179
-
180
-
181
-
182
-
183
-
184
-
185
-
186
-
187
-
188
-
189
-
190
-
191
-
192
-
193
-
194
-
195
-
196
-
197
-
198
-
199
-
200
-
201
-
202
-
203
-
204
-
205
-
206
-
207
-
208
-
209
-
210
-
211
-
212
-
213
-
214
-
215
-
216
-
217
-
218
-
219
-
220
-
221
-
222
-
223
-
224
-
225
-
226
-
227
-
228
-
229
-
230
-
231
-
232
-
233
-
234
-
235
 |
 |
