Behringer DDM4000 Manual - Page 12
Operating the microphone channel - effects
 |
View all Behringer DDM4000 manuals
Add to My Manuals
Save this manual to your list of manuals |
Page 12 highlights
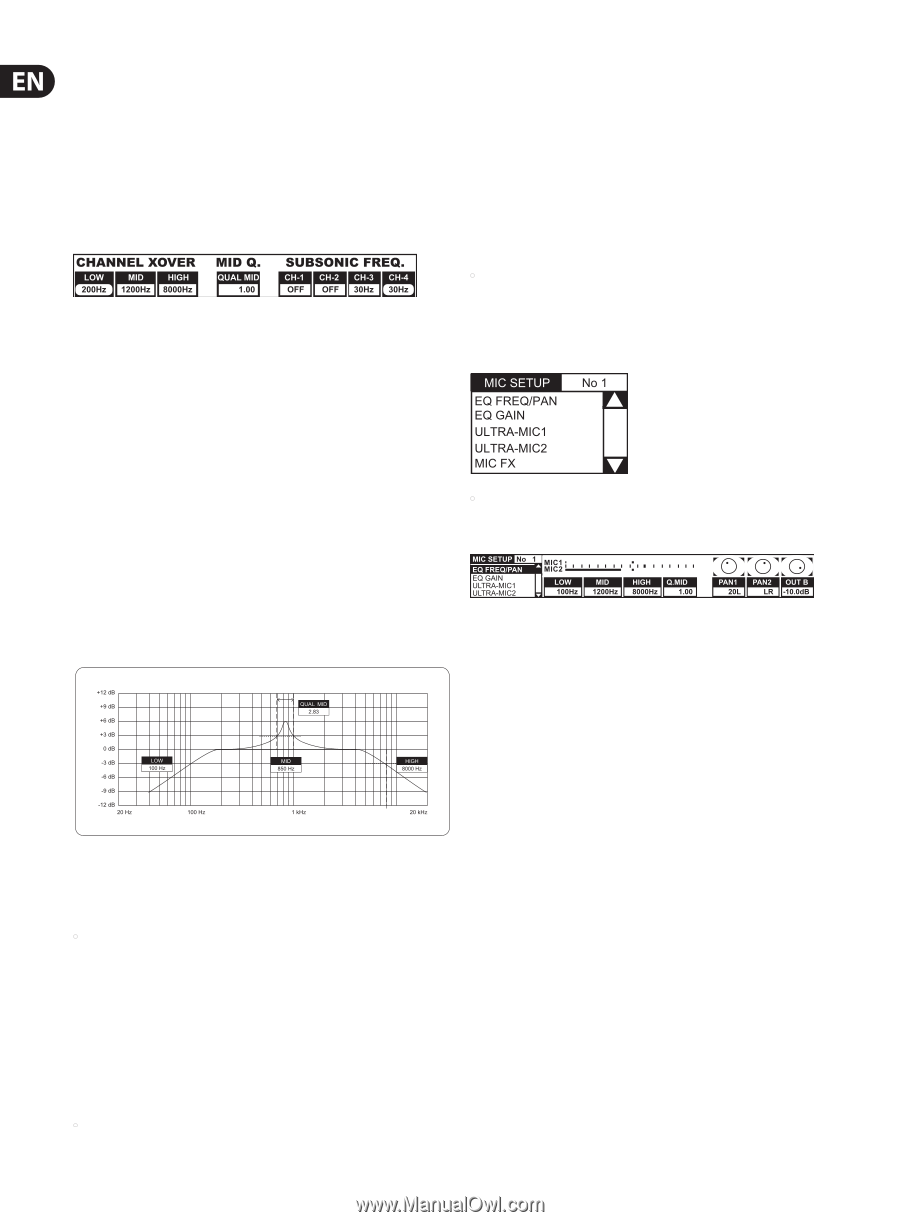
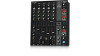
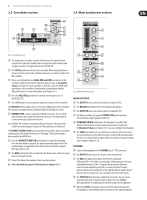
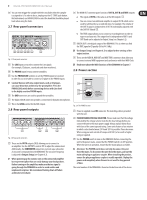
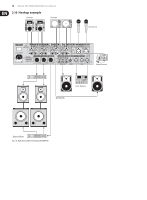
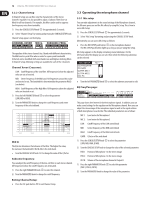
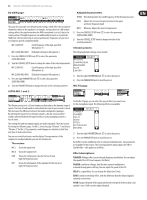
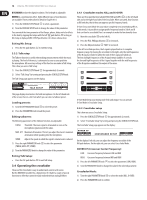
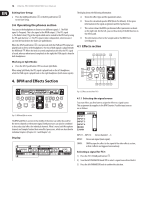
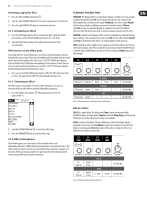
12 DIGITAL PRO MIXER DDM4000 User Manual 3.2.2 Channel setup In Channel Setup, you can fine-tune the characteristics of the stereo channels' equalizer. It is also possible to adjust a Subsonic Filter (low-cut filter) for all four channels. For example, this filter can be used to suppress low-frequency noise from turntables. 1) Press the CONSOLE SETUP knob (51) for approximately 2 seconds. 2) Select "Channel Setup" by turning and pressing the CONSOLE SETUP knob. Channel Setup appears on the display. The equalizer of the stereo channels has 3 bands with different characteristics. The Mid band is a peak filter whose center fre-quency and bandwidth (Q factor) can be modified. Both outer bands Low and High are shelving filters. In Channel Setup, following settings are available for each of the 4 channels: 3.3 Operating the microphone channel 3.3.1 Mic setup You can make adjustments to the sound settings of the Microphone channel, the Ultramic processor and the Mic effects by using Mic Setup. This is how to access Mic Setup: 1) Press the CONSOLE SETUP knob (51) for approximately 2 seconds. 2) Select "Mic Setup" by turning and pressing the CONSOLE SETUP knob. Alternatively, you can access Mic Setup as follows: • Press the MIC SETUP push button (16) on the microphone channel. The MIC SETUP push button lights up as long as you are using Mic Setup. Mic Setup appears on the display containing several submenus. On the left-hand side of the display you see a list from which the following submenus can be selected: Channel Xover (Crossover): LOW: Cutoff frequency of the Low filter. All frequencies below the adjusted value are cut or boosted. MID: Center frequency of the Mid band. All frequencies around this value are boosted or cut. The bandwidth is determined by the parameter Mid Q (see below). HIGH: Cutoff frequency of the High filter. All frequencies above the adjusted value are boosted or cut. 1) Press the left PARAMETER knob (45) to select the parameter (LOW, MID or HIGH). 2) Turn the PARAMETER knob to change the cutoff frequency and center frequency of the selected band. Mid Q: The Q factor determines the behavior of the filter. The higher the value, the narrower the bandwidth. Mid Q affects the mids band. • Turn the CONSOLE SETUP knob (51) to change the value of the Q factor. Subsonic frequency: You can adjust the cutoff frequency of the low-cut filter on each stereo channel. All frequencies below the cutoff frequency are attenuated. 1) Press the right PARAMETER knob (45) to select the channel. 2) Turn the PARAMETER knob to change the cutoff frequency. • Turn the left PARAMETER knob (45) to select the submenu you want to edit: EQ Freq/Pan page: This page shows level meters for both microphone signals. In addition, you can make sound settings for the equalizer on the Microphone channel. Here you can adjust the stereo image of the microphone signal as well as the signal relation of both microphones to each other. The individual parameters are as follows: MIC 1: Level meter for Microphone 1 MIC 2: Level meter for Microphone 2 LOW: Cutoff frequency of the LOW control knob MID: Center frequency of the MID control knob HIGH: Cutoff frequency of the HIGH control knob Q MID: Q factor of the mids band 1) Press the CONSOLE SETUP knob (51) to select the parameter (LOW, MID, HIGH, Q MID). 2) Turn the CONSOLE SETUP knob to change the value of the selected parameter. PAN1: Position of Microphone 1 in the stereo image PAN 2: Position of Microphone 2 in the stereo image OUT B: Volume of the microphone channel at Output B 1) Press the right PARAMETER knob (45) to select the parameter (PAN 1, PAN 2, OUT B). 2) Turn the PARAMETER knob to change the value of the parameter. Exiting Channel Setup: • Press the ESC push button (52) to exit Channel Setup.
-
 1
1 -
2
-
3
-
4
-
5
-
6
-
 7
7 -
 8
8 -
 9
9 -
 10
10 -
 11
11 -
 12
12 -
 13
13 -
 14
14 -
 15
15 -
 16
16 -
 17
17 -
18
-
19
-
20
-
21
-
22
-
23
-
24
-
25
-
26
-
27
-
28
-
29
-
30
-
31
-
32
 |
 |