Behringer XENYX X1222USB Manual - Page 11
CAUTION, Graphic 7-band equalizer - usb audio mixer
 |
View all Behringer XENYX X1222USB manuals
Add to My Manuals
Save this manual to your list of manuals |
Page 11 highlights
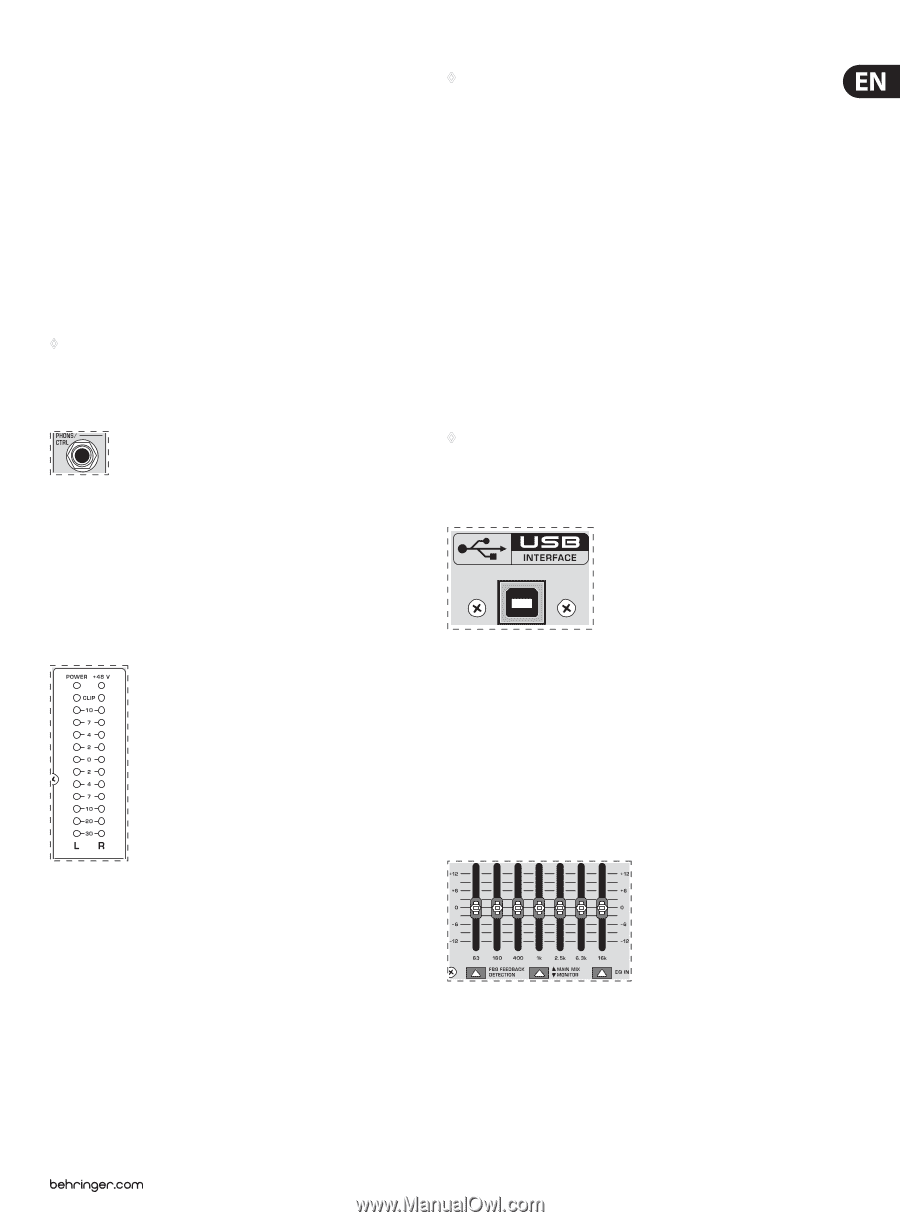
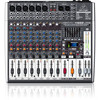
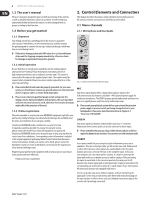
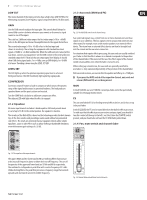
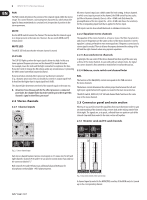
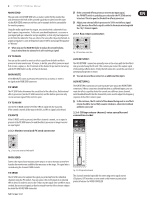
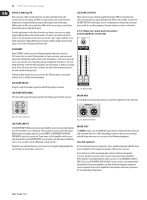
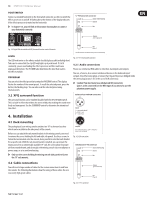
11 XENYX X1222USB User Manual Recording: For mastering, using a stereo compressor such as the COMPOSER PRO-XL MDX2600 can be recommended. Use it to custom-tailor the dynamic characteristics of your signal to the dynamic range of the recording equipment you are using. The signal is in this case passed on from the compressor into the recorder. PHONES The PHONES control adjusts the volume of the headphones connected to the PHONS/CTRL connector. If you connect active monitors or an amplifier, use this connector to adjust the output signal level. !! CAUTION! ◊ We would like to draw your attention to the fact that extreme volumes may damage your hearing and/or your headphones or loudspeakers. Turn the MAIN MIX faders and the PHONES control in the main section fully down before you switch on the unit. Always be careful to set the appropriate volume. Fig. 2.13: PHONS/CTRL connector PHONS/CTRL connector You can connect headphones to this ¼" TRS connector. The connector can also be used for feeding active monitor loudspeakers (or an amplifier) in your control room. For this purpose, the signal is taken directly before it is passed on to the main mix faders. ◊ Connect microphones before you switch on the phantom power supply. Please do not connect microphones to the mixer (or the stagebox/wallbox) while the phantom power supply is switched on. In addition, the monitor/PA loudspeakers should be muted before you activate the phantom power supply. After switching on, wait approx. one minute to allow for system stabilization. LEVEL METER/CLIP The high-precision level meter accurately displays the appropriate signal level. LEVEL SETTING: When recording to a digital device, the recorder's peak meter should not exceed 0 dB. This is because, unlike analog recordings, slightly excessive levels can create unpleasant digital distortion. When recording to an analog device, the VU meters of the recording machine should reach approx. +3 dB with low-frequency signals (e.g. kick drum). Due to their inertia VU meters tend to display too low a signal level at frequencies above 1 kHz. This is why, for example, a Hi-Hat should only be driven as far as -10 dB. Snare drums should be driven to approx. 0 dB. ◊ The peak meters of your XENYX display the level virtually independent of frequency. A recording level of 0 dB is recommended for all signal types. 2.3.7 USB input/output 2.3.6 Level meter and level setting Fig. 2.15: USB input/output The XENYX mixer line has built-in USB connectivity, allowing stereo signals to be sent to and from the mixer and a computer. The audio sent from the mixer to a computer is identical to the MAIN MIX. Audio being sent to the mixer from a computer can be routed to the main mix with the 2-TR/USB TO MAIN button. Connect the USB type B plug into the USB jack on the mixer, and the other end into a free USB port on your computer. There are no required drivers, but we recommend that PC users install the included ASIO driver. The driver can also be downloaded from behringer.com. 2.4 Graphic 7-band equalizer Fig. 2.14: Level meter POWER The blue POWER LED indicates that the device is switched on. +48 V The red "+48 V" LED lights up when the phantom power supply is switched on. The phantom power supply is necessary for condenser microphones and is activated using the corresponding switch on the rear of the device. Fig. 2.16: The graphic stereo equalizer The graphic stereo equalizer allows you to tailor the sound to the room acoustics.
-
 1
1 -
2
-
3
-
4
-
5
-
 6
6 -
 7
7 -
 8
8 -
 9
9 -
 10
10 -
 11
11 -
 12
12 -
 13
13 -
 14
14 -
 15
15 -
 16
16 -
17
 |
 |