Belkin F7D4515 User Manual - Page 14
Daily Use with yoUr screencast remote anD on-screen Display
 |
View all Belkin F7D4515 manuals
Add to My Manuals
Save this manual to your list of manuals |
Page 14 highlights
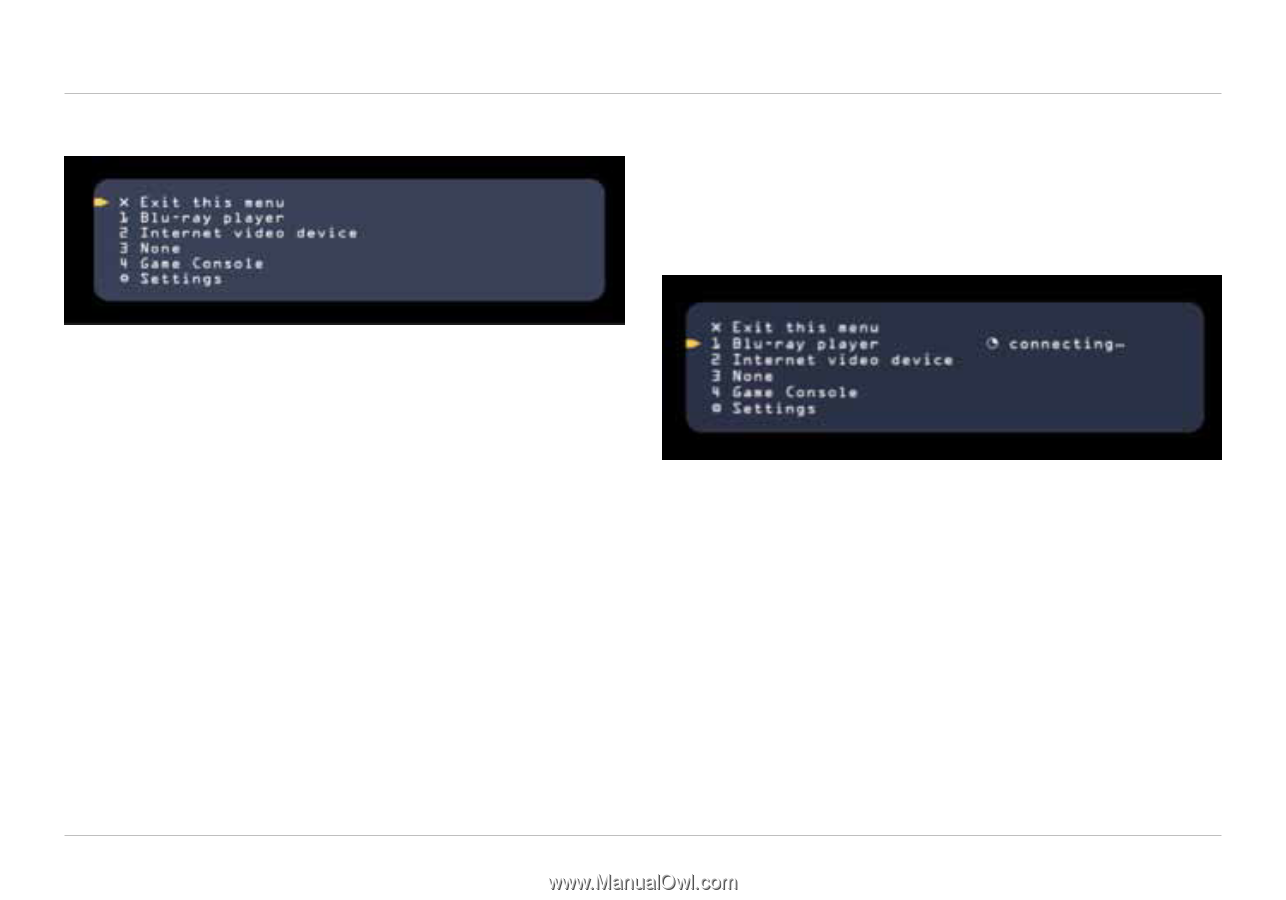
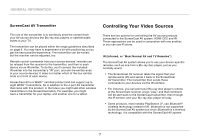
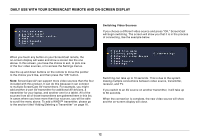
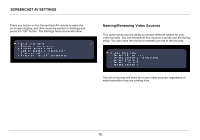
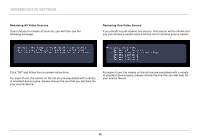
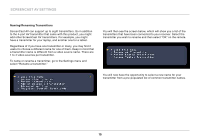
Daily Use with Your ScreenCast Remote and On-Screen Display Switching Video Sources If you choose a different video source and press "OK," ScreenCast will begin switching. The screen will show you that it is in the process of connecting, like the example below. When you touch any button on your ScreenCast remote, the on-screen display will wake and show a screen like the one above. In this screen, you have the choice to exit, to pick one of the four video sources, or to access the Settings menus. Use the up and down buttons on the remote to move the pointer to the choice you'd like, and then press the "OK" button. Note: ScreenCast AV can support more video sources than the four included with this product. It can do this because it can connect to multiple ScreenCast AV transmitters. For example, you might add another 4-port AV transmitter for additional AV devices, a transmitter for your laptop, and another one for a tablet. All of the sources from all of those transmitters are gathered here in this list. In cases where you have more than four sources, you will be able to scroll the menu above. To add a WHDI™ transmitter, please go to the section titled "Adding/Deleting a Transmitter" on page 16. Switching can take up to 10 seconds. This is due to the system making multiple connections between video source, transmitter, receiver, and TV. If you switch to an AV source on another transmitter, it will take up to 60 seconds. When the connection is complete, the new video source will show and the on-screen display will close. 12
-
 1
1 -
2
-
3
-
4
-
5
-
6
-
7
-
8
-
 9
9 -
 10
10 -
 11
11 -
 12
12 -
 13
13 -
 14
14 -
 15
15 -
 16
16 -
 17
17 -
 18
18 -
 19
19 -
20
-
21
-
22
-
23
-
24
-
25
-
26
-
27
-
28
-
29
-
30
 |
 |