BenQ 0.6 Wall Mount-WM06G3 Wall Mount User Manual - Page 4
Required Tools, Angle Adjustment
 |
View all BenQ 0.6 Wall Mount-WM06G3 manuals
Add to My Manuals
Save this manual to your list of manuals |
Page 4 highlights
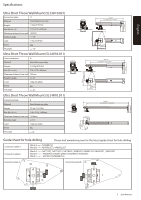
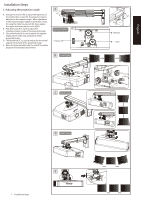
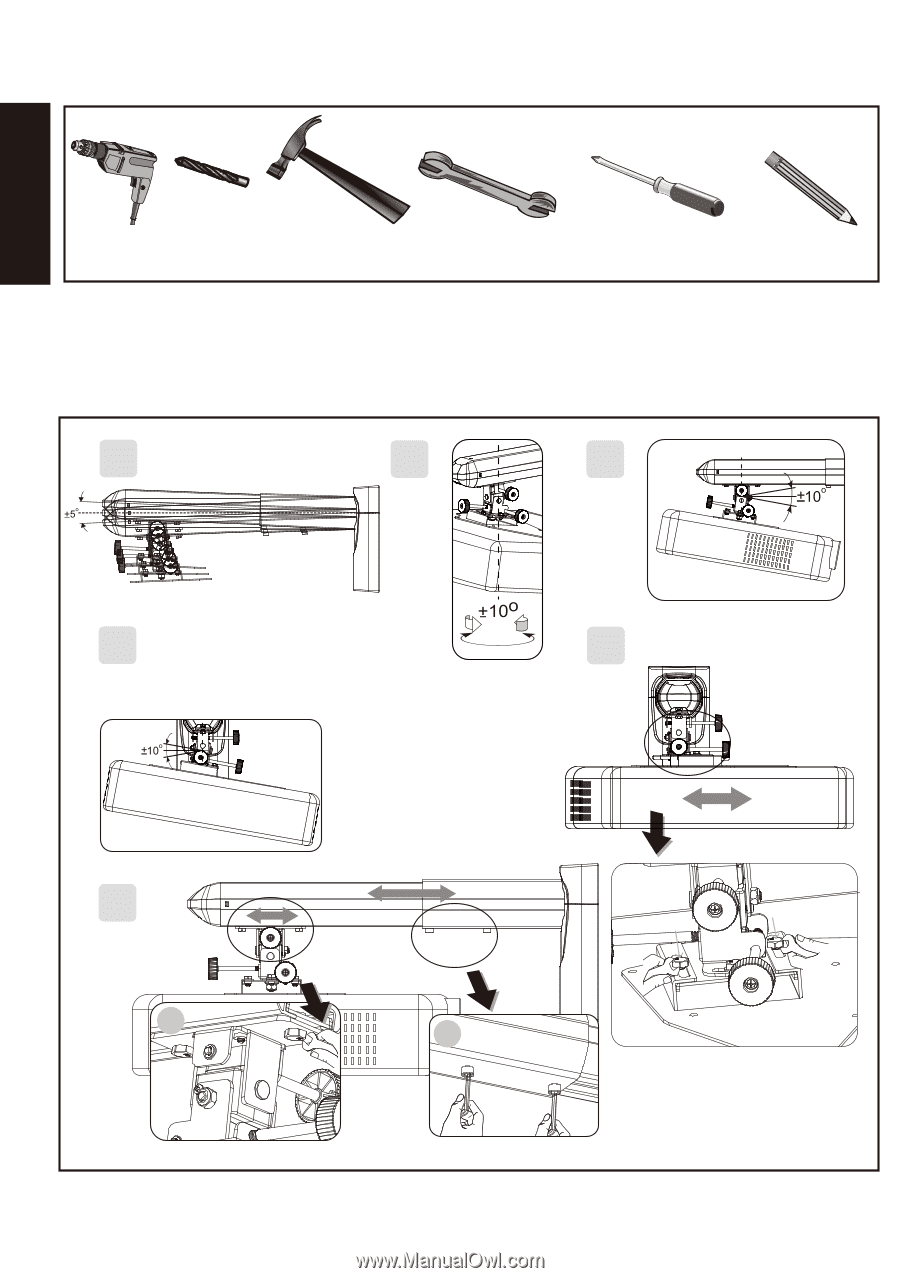
English Required Tools 1. Power drill 2. Drill bit 3. Hammer 4. Spanner: 8mm / 10mm5. Cross (Phillips) screwdriver 6. Pencil Angle Adjustment 1. Adjust the mounting bracket arm of the projector to ±5°. 4. Adjust the horizontal angular movement of the projected image. 2. Adjust the rotation angle of the sides of the projected image. 5.Move the base plate(A)inside the rails the rails (B) to enable 3. Adjust the angular displacement of the top and projector horizontally lateral moves. the bottom of the projected image. 6. Adjust the projection distance: (A) Move the projector bracket. (B) or adjust the projection distance. 1 2 3 4 5 6 A B 4 Required Tools/Speci cations/Size/Angle adjustment (B) (A)
-
 1
1 -
 2
2 -
 3
3 -
 4
4 -
 5
5 -
 6
6 -
 7
7
 |
 |
4
Required Tools/Specifications/Size/Angle adjustment
Required Tools
1. Power drill
2. Drill bit
3. Hammer
4. Spanner: 8mm / 10mm
5. Cross (Phillips) screwdriver
6. Pencil
Angle Adjustment
1. Adjust the mounting bracket arm of the projector to ±5°.
2. Adjust the rotation angle of the sides of the projected image.
3. Adjust the angular displacement of the top and
the bottom of the projected image.
4. Adjust the horizontal angular movement of the projected image.
English
6. Adjust the projection distance: (A) Move the projector bracket.
(B) or adjust the projection distance.
1
2
3
4
6
5
A
B
5.Move the base plate(A)inside the rails the rails (B) to enable
projector horizontally lateral moves.
(A)
(B)