BenQ 7763PA Operating Guide - Page 35
Connecting the Box, Bottom View of, AV box, Side View
 |
View all BenQ 7763PA manuals
Add to My Manuals
Save this manual to your list of manuals |
Page 35 highlights
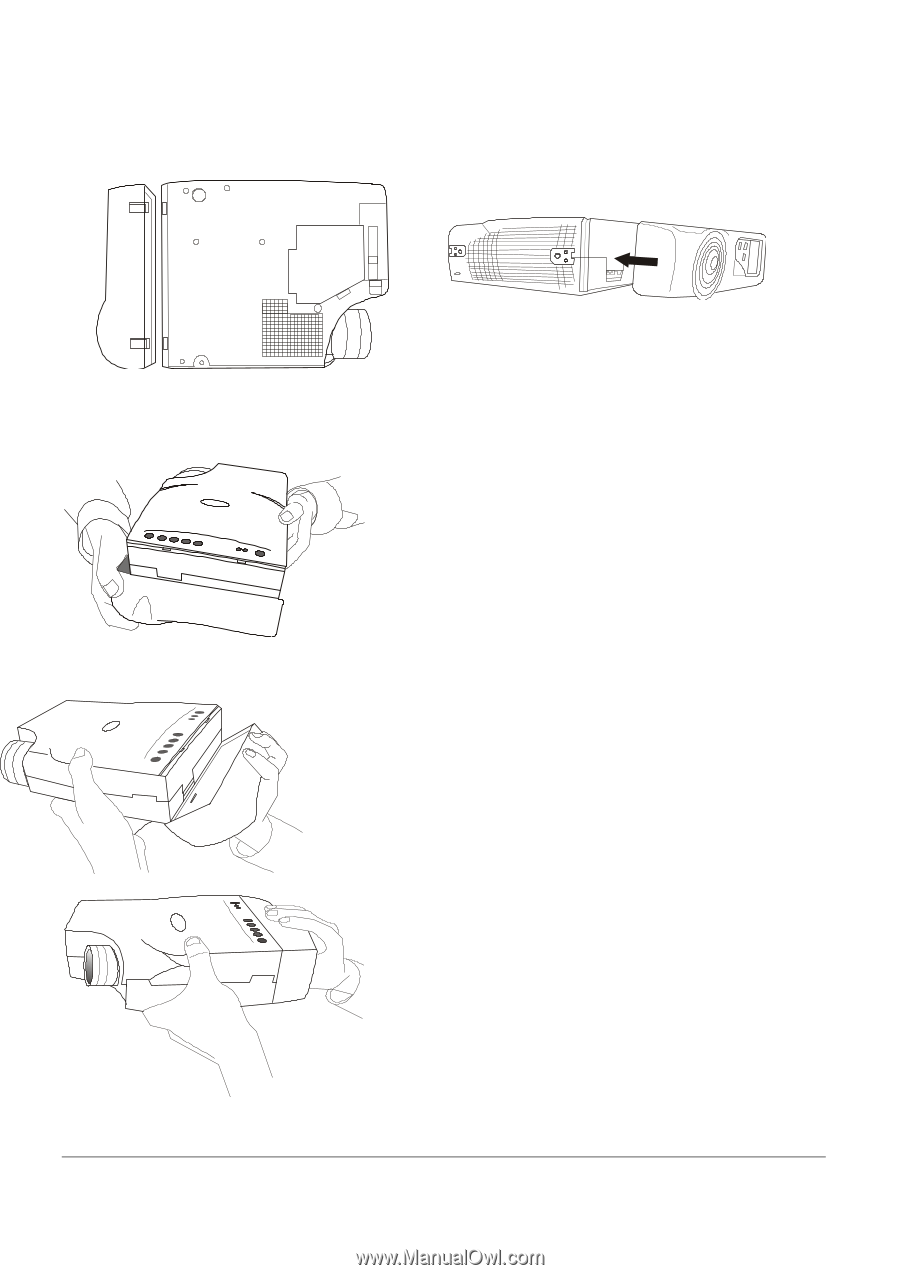
Connecting the Box Please follow the instruction here to place the AV box: Figure 30 Side View of AV box Figure 29 Bottom View of AV box To attach the AV box to the unit 1. Precisely place the two chocks at the lower surface of the AV box into the lower slots in the correspondent position in the projector. 2. Slowly push the box to fit the unit and, meanwhile, insert the box plug into the A/V connector closely. A/V function. 3. Plug in the correct cord into the correspondent jack or port to perform 4. Select inputs by pressing "Source" key, and select channel by the channel up or down keys. Figure31 Connecting the Box English 31
-
 1
1 -
2
-
3
-
4
-
5
-
6
-
7
-
8
-
9
-
10
-
11
-
12
-
13
-
14
-
15
-
16
-
17
-
18
-
19
-
20
-
21
-
22
-
23
-
24
-
25
-
26
-
27
-
28
-
29
-
 30
30 -
 31
31 -
 32
32 -
 33
33 -
 34
34 -
 35
35
 |
 |
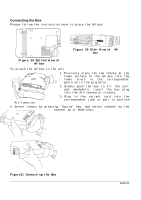
Connecting the Box
Please follow the instruction here to place the AV box:
To attach the AV box to the unit
Figure 29 Bottom View of
AV box
Figure 30 Side View of
AV
box
1. Precisely place the two chocks at the
lower surface of the AV box into the
lower slots in the correspondent
position in the projector.
2. Slowly push the box to fit the unit
and, meanwhile, insert the box plug
into the A/V connector closely.
3. Plug in the correct cord into the
correspondent jack or port to perform
A/V function.
4. Select inputs by pressing “Source” key, and select channel by the
channel up or down keys.
Figure31 Connecting the Box
English 31