BenQ DC2410 User Manual - Page 9
Using the DC 2410, U
 |
View all BenQ DC2410 manuals
Add to My Manuals
Save this manual to your list of manuals |
Page 9 highlights
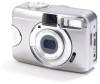
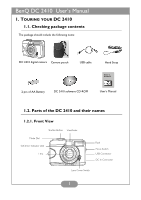
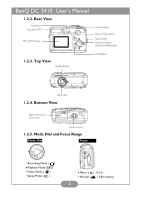
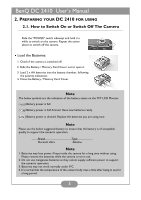
BenQ DC 2410 User's Manual 3. USING THE DC 2410 The functions of DC 2410 are mainly composed of five modes: Recording mode, Playback mode, Video Mode, and Setup Mode. In this chapter, we will introduce the functions of DC 2410 according to these four modes. Basic Photography 1. Open the lens cover. 2. Switch on the power. 3. Set the Mode Dial at Shooting Mode ( ) for still image or Movie Clip Mode ( ) for video recording. 4. The setting of the focus range for still image capture is required as follows: Macro ( ) : 0.2m Normal ( ): 0.8m~infinity 5. Refer to the next section -- "Working Mode" (page 7) to set up the features you prefer. 6. Hold still and press down the Shutter Button. 7. The LED Indicator starts blinking right after the Shutter Button is released. 8. Once the LED Indicator stops blinking, you are ready to take another shot. 1. 2. 3. 4. 5. Note A message of "LENS COVER" blinking on the TFT LCD Monitor as a warning is to remind you of opening the lens cover first. Note The TFT LCD Monitor will show "Low Light!" as a warning to remind you that the image which you are going to capture is in a low light environment. It is suggested to set the Flash Mode at Auto Flash or Fill-in Flash for supplementary light to compose a good image. 6
-
 1
1 -
2
-
3
-
 4
4 -
 5
5 -
 6
6 -
 7
7 -
 8
8 -
 9
9 -
 10
10 -
 11
11 -
 12
12 -
 13
13 -
 14
14 -
15
-
16
-
17
-
18
-
19
-
20
-
21
-
22
-
23
-
24
-
25
-
26
-
27
-
28
-
29
-
30
-
31
-
32
-
33
-
34
-
35
 |
 |
