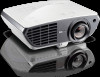
BenQ W3000 User Manual - Page 12
Remote control, MHL Control buttons
 |
View all BenQ W3000 manuals
Add to My Manuals
Save this manual to your list of manuals |
Page 12 highlights
Remote control 4. OK Confirms the selected OSD menu item. 1 10 When the OSD menu is off and you are 2 11 under the MHL connection mode, use the 12 key to confirm the selection on the OSD of your smart device. 5. BACK Goes back to previous OSD menu, exits 3 and saves menu settings. 4 When the OSD menu is off and you are 13 under the MHL connection mode, use the 5 14 key to return or exit the OSD menu of 6 your smart device. 6. , , 7 • Mute: Toggles projector audio 8 15 between on and off. 16 • Volume Down: Decreases the 9 projector volume. • Volume Up: Increases the projector volume. 7. MHL Control buttons ( Backward, Play/Pause, Forward, Rewind, 1. ON, OFF Stop, Fast forward) Toggles the projector between on and off Goes to the previous file/Plays/Pauses/ mode. Goes to the next file/Rewinds/Stops/Fast- 2. 3D, INVERT forwards during media playback. Only Launches the 3D menu and toggles the available when controlling your smart invert function between on and off. device in MHL mode. 3. Arrow keys (▲ Up/▼ Down/◄ Left/ When you are under the MHL connection ► Right) mode and the OSD is off, these buttons are When the On-Screen Display (OSD) menu is activated, these keys are used as available for controlling your smart device: arrow keys, OK, BACK, and MHL control buttons. directional arrows to select the desired menu items and to make adjustments. 8. KEYSTONE When the OSD menu is off and you are under the MHL connection mode, these arrows keys are available for controlling your smart device. 9. Launches the 2D Keystone window. Use the Arrow keys to manually correct distorted images resulting from an angled projection. Picture quality adjustment keys These function keys perform the same tasks as specified in the OSD menu. 12 Projector features
-
 1
1 -
2
-
3
-
4
-
5
-
6
-
 7
7 -
 8
8 -
 9
9 -
 10
10 -
 11
11 -
 12
12 -
 13
13 -
 14
14 -
 15
15 -
 16
16 -
 17
17 -
18
-
19
-
20
-
21
-
22
-
23
-
24
-
25
-
26
-
27
-
28
-
29
-
30
-
31
-
32
-
33
-
34
-
35
-
36
-
37
-
38
-
39
-
40
-
41
-
42
-
43
-
44
-
45
-
46
-
47
-
48
-
49
-
50
-
51
-
52
-
53
-
54
-
55
-
56
-
57
-
58
-
59
-
60
-
61
-
62
-
63
-
64
-
65
-
66
-
67
-
68
-
69
-
70
-
71
-
72
-
73
-
74
-
75
-
76
-
77
-
78
-
79
 |
 |
