Beretta ARX160 22LR Pistol Instruction Manual - Page 20
Reassembly
 |
View all Beretta ARX160 22LR Pistol manuals
Add to My Manuals
Save this manual to your list of manuals |
Page 20 highlights
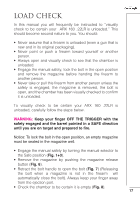
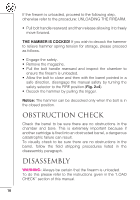
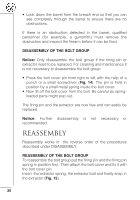
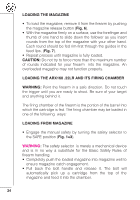
• Look down the barrel from the breach end so that you can see completely through the barrel to ensure there are no obstructions. If there is an obstruction detected in the barrel, qualified personnel (for example, a gunsmith) must remove the obstruction and inspect the firearm before it can be fired. DISASSEMBLY OF THE BOLT GROUP Notice: Only disassemble the bolt group if the firing pin or extractor need to be replaced. For cleaning and maintenance it is not necessary to disassemble the bolt group. • Press the bolt cover pin from right to left with the help of a punch or a small screwdriver (Fig. 14). The pin is held in position by a small metal spring inside the bolt cover. • Now lift off the bolt cover from the bolt. Be careful as springloaded parts might pop out. The firing pin and the extractor are now free and can easily be replaced. Notice: Further disassembly is not necessary or recommended. REASSEMBLY Reassembly works in the reverse order of the procedures described under DISASSEMBLY. REASSEMBLY OF THE BOLT GROUP To reassemble the bolt group put the firing pin and the firing pin spring in position first. Then attach the bolt cover and fix it with the bolt cover pin. Insert the extractor spring, the extractor bolt and finally snap in the extractor (Fig. 15). 20
-
 1
1 -
2
-
3
-
4
-
5
-
6
-
7
-
8
-
9
-
10
-
11
-
12
-
13
-
14
-
 15
15 -
 16
16 -
 17
17 -
 18
18 -
 19
19 -
 20
20 -
 21
21 -
 22
22 -
 23
23 -
 24
24 -
 25
25 -
26
-
27
-
28
-
29
-
30
-
31
-
32
-
33
-
34
-
35
-
36
-
37
-
38
-
39
 |
 |