Bernina 009DCC Owners Manual - Page 2
DCC - manual
 |
View all Bernina 009DCC manuals
Add to My Manuals
Save this manual to your list of manuals |
Page 2 highlights
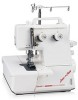
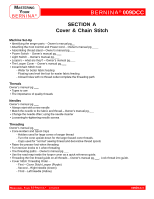
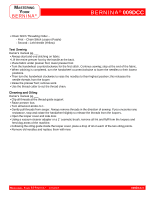
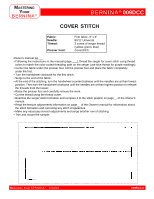
MASTERING YOUR BERNINA® BERNINA® 009DCC SECTION A Cover & Chain Stitch Machine Set-Up • Identifying the serger parts - Owner's manual pg__ • Attaching the Foot Control and Power Cord - Owner's manual pg.____ • Assembling thread stand - Owner's manual pg.___ • Power Switch - Owner's manual pg.___ • Light Switch - Owner's manual pg.___ • Loopers - what are they? - Owner's manual pg.___ • The Looper Cover - Owner's manual pg.___ • Cover/Chain Stitch Foot - Wider for better fabric feeding - Floating toes level the foot for easier fabric feeding - Closed holes with no thread outlet complete the threading path Threads Owner's manual pg.___ • Types to use • The importance of quality threads Needles Owner's manual pg.___ • Always start with a new needle • Match the needle to the fabric and thread - Owner's manual pg.___ • Change the needle often; using the needle inserter • Loosening/re-tightening needle screws Threading Owner's manual pg.___ • Cone Holders and Spool Caps - Holders used for large cones of serger thread - Turn the cone upside down for the larger based cone threads. - Caps used for "normal" sewing thread and decorative thread spools • Raise the presser foot when threading • Turn tension knobs to 1 when threading • The threading paths - Owner's manual pg.___ • Use the road map inside the looper cover as a quick reference guide. • Threading the first thread guide on all threads - Owner's manual pg.___. Lock thread into guide. • Cover Stitch Threading Order - - First - Cover Stitch Looper (Purple) - Second - Right Needle (Green) - Third - Left Needle (Yellow) MASTERING YOUR BERNINA® 1/04/02 009DCC/2
-
 1
1 -
 2
2 -
 3
3 -
 4
4 -
 5
5 -
 6
6 -
 7
7 -
 8
8 -
9
-
10
-
11
-
12
 |
 |