Bernina 009DCC Owners Manual - Page 4
Cover Stitch - serger
 |
View all Bernina 009DCC manuals
Add to My Manuals
Save this manual to your list of manuals |
Page 4 highlights
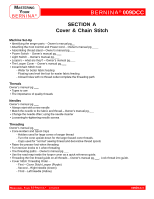
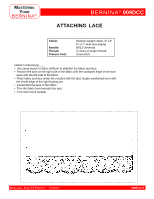
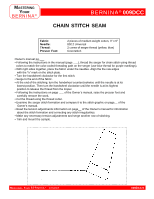
MASTERING YOUR BERNINA® BERNINA® 009DCC COVER STITCH Fabric: Needle: Thread: Presser Foot: Firm fabric, 3" x 6" 80/12 Universal 3 cones of serger thread (yellow, green, blue) Coverstitch Owner's manual pg.___ • Following the instructions in the manual (page ___), thread the serger for cover stitch using thread colors to match the color-coded threading path on the serger (use blue thread for purple markings). • Center the fabric under the presser foot. Lift the presser foot and place the fabric completely under the foot. • Turn the handwheel clockwise for the first stitch. • Serge to the end of the fabric. • At the end of the stitching, turn the handwheel counterclockwise until the needles are at their lowest position. Then turn the handwheel clockwise until the needles are at their highest position to release the threads from the looper. • Raise the presser foot and carefully remove the work. • Cut the thread using the thread cutter. • Examine the serger stitch formation and compare it to the stitch graphic on page__ of the Owner's manual. • Read the tension adjustments information on page__ of the Owner's manual for information about the stitch formation and correcting any stitch irregularities. • Make any necessary tension adjustments and serge another row of stitching. • Trim and mount the sample. MASTERING YOUR BERNINA® 1/04/02 009DCC/4
-
 1
1 -
 2
2 -
 3
3 -
 4
4 -
 5
5 -
 6
6 -
 7
7 -
 8
8 -
 9
9 -
 10
10 -
11
-
12
 |
 |