Biostar M7VIG 400 M7VIG 400 user's manual - Page 8
How to set up Jumper, CPU Installation - socket
 |
View all Biostar M7VIG 400 manuals
Add to My Manuals
Save this manual to your list of manuals |
Page 8 highlights
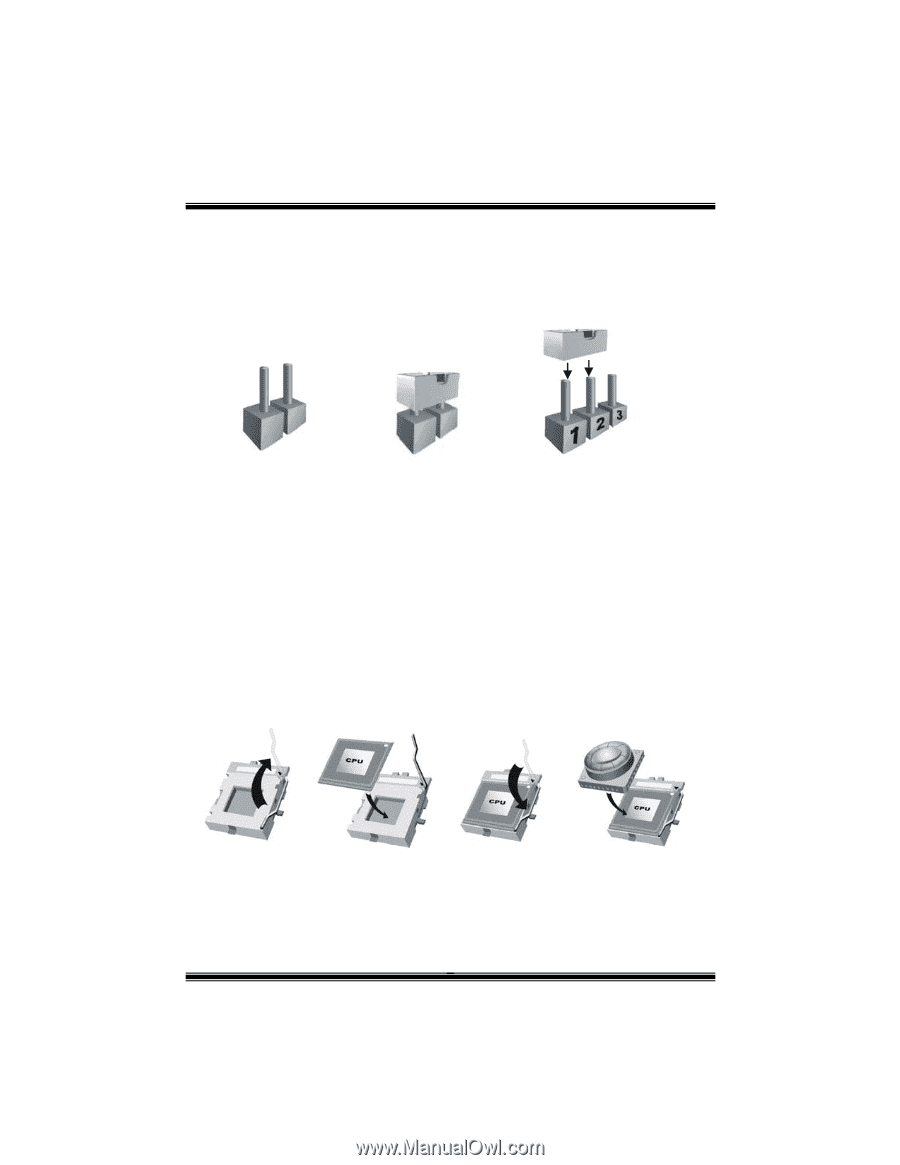
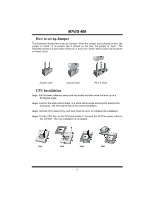
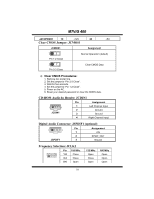
MM77VVIIGG 440000 How to set up Jumper The illustration shows how to set up a jumper. When the Jumper cap is placed on pins, the jumper is "close". If no jumper cap is placed on the pins, the jumper is "open". The illustration shows a 3-pin jumper whose pin 1 and 2 are "close" when jumper cap is placed on these 2 pins. Jumper open Jumper close Pin1-2 close CPU Installation Step1: Pull the lever sideways away from the socket and then raise the lever up to a 90-degree angle. Step2: Look for the white dot/cut edge. The white dot/cut edge should point towards the lever pivot. The CPU will fit only in the correct orientation. Step3: Hold the CPU down firmly, and then close the lever to complete the installation. Step4: Put the CPU Fan on the CPU and buckle it. Connect the CPU fan power cable to the JCFAN1. Then the installation is completed. Step1 Step2 Step3 Step4 6
-
 1
1 -
2
-
 3
3 -
 4
4 -
 5
5 -
 6
6 -
 7
7 -
 8
8 -
 9
9 -
 10
10 -
 11
11 -
 12
12 -
 13
13 -
14
-
15
-
16
-
17
-
18
-
19
-
20
-
21
-
22
-
23
-
24
-
25
-
26
-
27
-
28
 |
 |