Bissell BISSELL Healthy Home Vacuum User Guide - English - Page 15
Changing the light bulb, TurboBrush maintenance - belt installation
 |
View all Bissell BISSELL Healthy Home Vacuum manuals
Add to My Manuals
Save this manual to your list of manuals |
Page 15 highlights
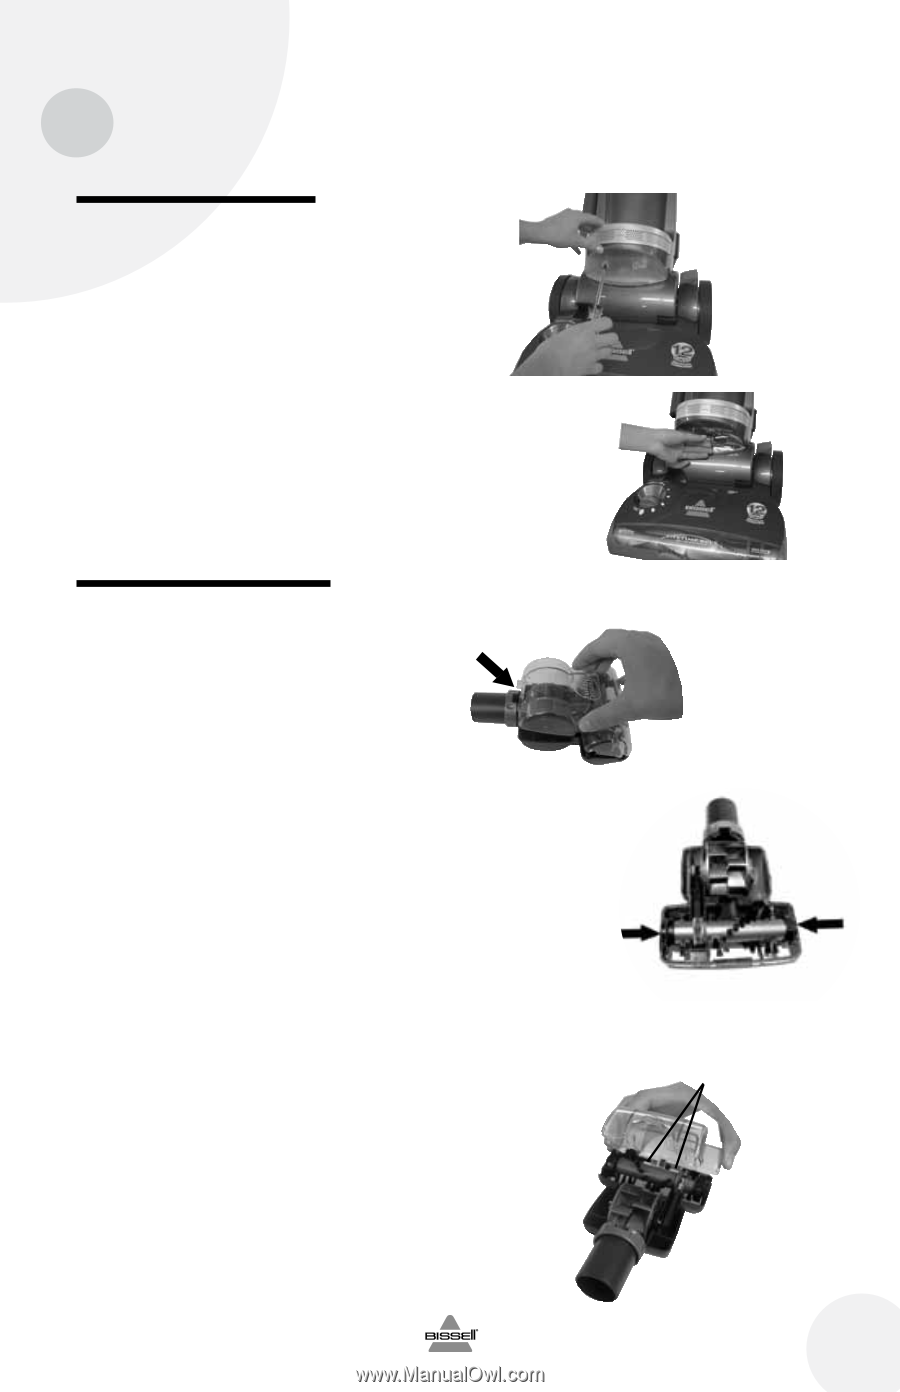
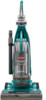
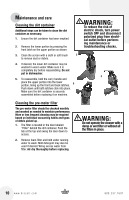
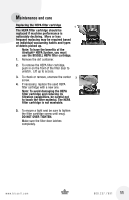
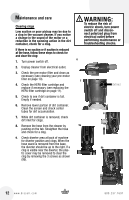
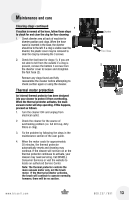
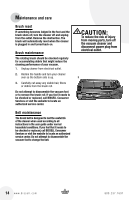
Maintenance and care Changing the light bulb 2 1. Turn power switch off. 2. Unplug cleaner from electrical outlet. 3. Recline handle for easier access to light bulb and remove 2 screws to lift off lens. 4. Remove the bulb by grasping bulb and pull- 3 ing straight out of the socket. Install the new bulb by pushing gently into the socket until the bulb snaps into place. TurboBrush maintenance The TurboBrush should be checked regularly for clogs or debris wrapping around the brush. 1. Remove tool from hose or front of vacuum. 2 2. Twist collar so opening is at the top and lift top cover to remove. 3. Remove the brush from the belt and clean debris. 4. Replace the brush inside the belt and place ends into slots on sides as shown. 5. Reposition top cover making sure to line up inside tab at the front with the opening on the cover. Twist collar until opening is at the bottom to lock into place. 5 4 Inside Tab www.bissell.com 800.237.7691 15
-
 1
1 -
2
-
3
-
4
-
5
-
6
-
7
-
8
-
9
-
 10
10 -
 11
11 -
 12
12 -
 13
13 -
 14
14 -
 15
15 -
 16
16 -
 17
17 -
 18
18 -
 19
19 -
 20
20
 |
 |