Bissell Steam Mop User Guide - English - Page 5
Caution - laminate floors
 |
View all Bissell Steam Mop manuals
Add to My Manuals
Save this manual to your list of manuals |
Page 5 highlights
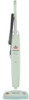
Operation Getting ready continued 3. Twist the quick release cord wrap to unwrap the power cord and plug into a 120-Volt grounded outlet as described in the Important Safety Instructions, on page 2. 4. The ready light will illuminate when the Steam Mop is ready for use. NOTE: During the first use it may take several seconds for the Steam Mop to begin steaming. The water needs to flow through the filter to the heater. The delay will only occur during initial use or when using a new filter. Cleaning hard floors Your Steam Mop is designed to clean hard flooring such as ceramic tile, laminate, marble, stone and sealed hard wood floors. Use of your Steam Mop on waxed or some unwaxed floors may result in diminished glossiness. On surfaces that have been treated with wax, the wax may be removed by the heat and steam action. Do not use on unsealed wood floors or let unit stand on any wood floor for an extended period of time. This could cause the wood grain to rise. When using on peel-and-stick vinyl, linoleum or any other heat sensitive floors, use extra caution. Too much heat can melt down glue in the flooring. For best results test in an inconspicuous area and check the care instructions from your flooring manufacturer. 1. When the ready light illuminates, begin cleaning by passing over surface while pressing trigger to emit steam. 2. To sanitize an area of your floor, place the center of the Steam Mop over the spot for a minimum 15 seconds, but no longer than 20 seconds. 3. When the Steam Mop stops emitting steam, simply remove the water tank, refill, and continue cleaning. Tip: Do not attempt to use your Steam Mop without water in the tank. Carpet Refresher Attachment (select models only) This accessory is recommended for the refreshing of carpets. Once the steam mop is cradled in the carpet refresher attachment, it will easily glide over the carpet. NOTE: Always be sure a mop pad is in place before placing in carpet refresher attachment. It is recommended that only white mop pads be used with the carpet attachment. Do not use carpet attachment on spots or stains, or glide it over the same spot for longer than 20 seconds. 1. Attach the mop pad to the swivel mop head. As directed in step 1 on page 4. 2. Place the swivel mop head, with mop pad attached, in the carpet refresher attachment. Note: that the Steam Mop rests in the carpet refresher attachment and may not stay attached to the swivel mop head. It is meant to glide over the carpet. 3. Fill the water tank with water. Begin refreshing your carpet or rug by pushing the Steam Mop in a forward and backward motion, releasing steam as you go. CAUTION: Never put descaling, alcoholic, or detergent products into the steam cleaner, as this may damage it or make it unsafe for use. 2 3 www.bissell.com 800.237.7691 5
-
 1
1 -
 2
2 -
 3
3 -
 4
4 -
 5
5 -
 6
6 -
 7
7 -
 8
8
 |
 |
