Bissell Zing Bagless Canister Vacuum Zing® User's Guide - Page 9
Cleaning the dirt cup filters - attachments
 |
View all Bissell Zing Bagless Canister Vacuum manuals
Add to My Manuals
Save this manual to your list of manuals |
Page 9 highlights
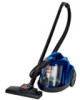
Maintenance and care Cleaning the dirt cup filters Use only BISSELL replacement filters in your Zing Compact. 1. Unplug the vacuum from the electrical outlet. 2. The dirt cup filters can be reached by removing the dirt cup from the vacuum, grasping the handle on the bottom of the dirt cup filter assembly and turning counter clockwise to unlock. Pull straight down to remove. 3. Remove the dirt cup filter screen by grasping the bottom of the filter frame base and pulling straight up. 4. Remove the dirt cup filter by grasping the bottom of the filter frame base and turning the dirt cup filter counter clockwise and pulling straight up. 5. The dirt cup filter screen and dirt cup filter can be hand washed in cold water with a mild detergent. Rinse well and air dry completely before placing back onto the filter frame base. 6. Attach the dirt cup filter back onto the filter frame base by lining up the tabs on the filter base with the notches on the dirt cup filter and turning clockwise to lock back into place. 7. Attach the dirt cup filter screen back on to the dirt cup filter by sliding it down over the dirt cup filter, making sure that the tabs on the bottom of the dirt cup filter screen line up with the notches on the dirt cup filter. 8. Insert the dirt cup filter assembly back into the dirt cup by lining up the tabs on the top of the dirt cup filter assembly with the notches inside the top of the dirt cup and turning the handle on the bottom of the dirt cup filter assembly clockwise to lock into place. www.bissell.com 2. 3. 4. 9 800.237.7691
-
 1
1 -
2
-
3
-
 4
4 -
 5
5 -
 6
6 -
 7
7 -
 8
8 -
 9
9 -
 10
10 -
 11
11 -
 12
12 -
 13
13 -
 14
14 -
15
-
16
 |
 |
