Bosch 53514B Operating Instructions - Page 10
FIG. 7, FIG. 9, FIG. 8
 |
UPC - 000346325706
View all Bosch 53514B manuals
Add to My Manuals
Save this manual to your list of manuals |
Page 10 highlights
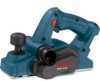
BM 2610925944 6-05 6/10/05 11:50 AM Page 10 on any angle up to 45 degrees, to allow edge chamfering (Fig. 7). Installing the angle fence: Place the wing knob through the appropriate hole in the guide bracket and screw into the housing. Securely tighten wing knob (Fig. 1). Setting the cutting width: Loosen wing knob and using the width scale, slide the fence along the guide bracket to the desired position. Securely tighten wing knob (Fig. 1). Setting the cutting angle: Loosen round knobs and pivot the fence to the desired position. Securely tighten round knobs (Fig. 1). Note that the adjustable front shoe contains a chamfer V-groove, which will follow the corner of a workpiece to allow easier handling when using the deluxe angle/width fence (Fig. 7). RABBETING DEPTH STOP The optional rabbeting depth stop accessory (Fig. 1) allows the user to set any rabbeting depth from 0 to 5/16 inch. For best results, it is important that the blade be properly aligned (See "BLADE ALIGNMENT"). The width of FIG. 7 the rabbet is controlled by the width fence. The maximum cutting width is 3-1/4", and the final depth is achieved by repetitive cutting until the rabbeting depth guide contacts the workpiece. The maximum rabbeting depth is 5/16" Setting the rabbet depth: Loosen wing knob and using the depth scale on the rabbeting depth stop, set the desired rabbet depth. Securely tighten wing knob. DRIVE BELT The drive belt is a normal maintenance part and should be inspected periodically for wear. If the drive belt shows signs of drying out, cracking or tearing, it should be replaced. If the drive belt will not track properly or comes off the pulleys, it should be replaced. Installing new drive belt: Loosen screws and remove the drive belt cover (Fig. 8). Cut and remove the worn drive belt. Before installing the new drive belt, clean both pulleys thoroughly. First place the new drive belt onto the drive pulley then rotate clockwise while pushing the belt onto the driven pulley. Reinstall the drive belt cover and securely tighten screws (Fig. 9). FIG. 9 FIG. 8 DRIVE BELT COVER SCREW -10- DRIVEN PULLEY DRIVE BELT DRIVE PULLEY
-
 1
1 -
2
-
3
-
4
-
 5
5 -
 6
6 -
 7
7 -
 8
8 -
 9
9 -
 10
10 -
 11
11 -
 12
12 -
 13
13 -
 14
14 -
 15
15 -
16
-
17
-
18
-
19
-
20
-
21
-
22
-
23
-
24
-
25
-
26
-
27
-
28
-
29
-
30
-
31
-
32
-
33
-
34
-
35
-
36
-
37
-
38
-
39
-
40
-
41
-
42
-
43
-
44
 |
 |
