Bosch HBL8752UC Installation Instructions - Page 6
Cabinet Dimension Requirements - dimensions
 |
View all Bosch HBL8752UC manuals
Add to My Manuals
Save this manual to your list of manuals |
Page 6 highlights
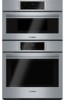
Checklist Use this checklist to verify that you have completed each step of the installation process. This can help you avoid mistakes. ▯ Before installing the oven, be sure to verify the cabinet dimensions are correct and the required electrical connections are present. ▯ Refer to additional information in this manual regarding Safety, Cabinet Dimensions, Removing Packaging, Electrical Installation, Testing the Installation and Customer Service. ▯ Remove the lower oven door to reduce the unit weight and to provide access to gripping points for lifting. See "Remove Lower Oven Door Prior to Installation" information. ▯ Move the oven units into place in front of the cabinet opening, leaving the bottom packaging on the units to avoid damaging flooring. ▯ Remove the Star-head screws (T-20 size using Starhead screwdriver) holding the speed microwave oven or steam convection oven to the base of its carton. ▯ Assemble the two units of the combination oven. See "Pre-Assembly of the Combination Oven". ▯ Connect the power cable from the lower oven to the junction box in the cabinet. ▯ Remove the Star-head screws (T-20 size using Starhead screwdriver) holding the lower oven to the base of its carton. ▯ Team-lift the unit directly into the cabinet cutout taking care not to pinch fingers, scratch arms or hands. ▯ Slide the unit all the way in to place. ▯ Fasten the combination unit to the cabinetry opening with the screws supplied (using Philips screwdriver). ▯ Reinstall the oven door removed in Step 3 above. ▯ Consult the complete installation instructions and follow the remainder of the procedures listed, including performing operation test. ▯ INSTALLER- Leave the literature pack and the accessories with the customer. Cabinet Dimension Requirements It is good practice, when an oven is installed at the end of a cabinet run, adjacent to a perpendicular wall, or cabinet door, to allow at least 1/4" (6.4 mm) space between the side of the oven and the wall/door. For oven support, install 2x4s extending front to back flush with the bottom and the sides of the opening. The supporting base must be well secured to the floor/ cabinet and level. Junction boxes can be located anywhere within reach of the oven's power cable. The cabinet base must be flat and capable of supporting the weight of the combination oven up to 429 lbs. (195 kg). 6
-
 1
1 -
 2
2 -
 3
3 -
 4
4 -
 5
5 -
 6
6 -
 7
7 -
 8
8 -
 9
9 -
 10
10 -
 11
11 -
 12
12 -
13
-
14
-
15
-
16
-
17
-
18
-
19
-
20
-
21
-
22
-
23
-
24
-
25
-
26
-
27
-
28
-
29
-
30
-
31
-
32
-
33
-
34
-
35
-
36
-
37
-
38
-
39
-
40
-
41
-
42
-
43
-
44
-
45
-
46
-
47
-
48
-
49
-
50
-
51
-
52
-
53
-
54
-
55
-
56
 |
 |
