Bosch SRX53C15UC Instructions for Use - Page 15
Care and Maintenance - 18
 |
View all Bosch SRX53C15UC manuals
Add to My Manuals
Save this manual to your list of manuals |
Page 15 highlights
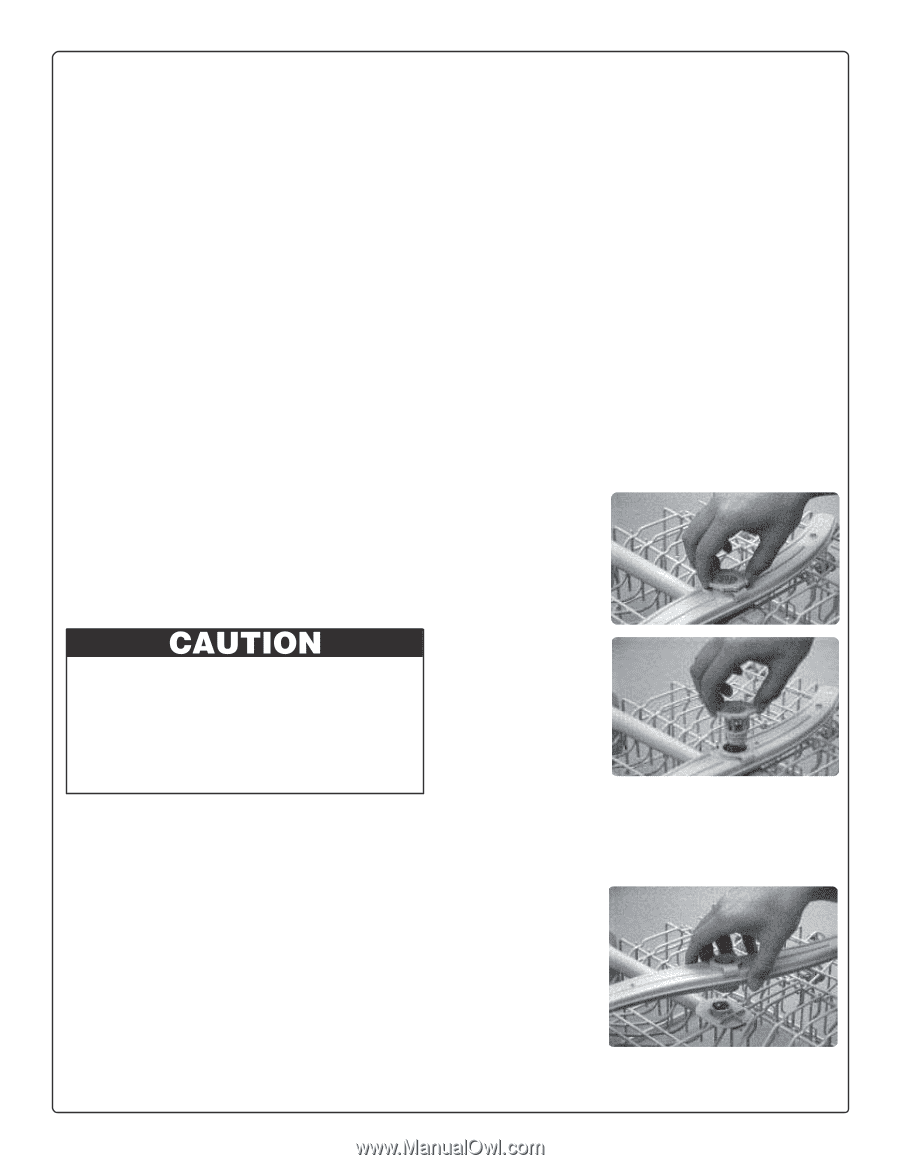
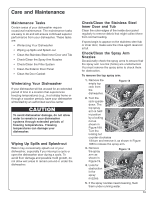
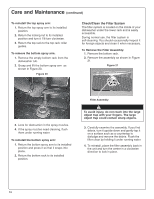
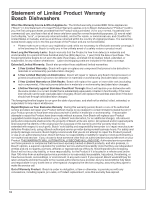
Care and Maintenance Maintenance Tasks Certain areas of your dishwasher require occasional maintenance. The maintenance tasks are easy to do and will ensure continued superior performance from your dishwasher. These tasks are: • Winterizing Your Dishwasher • Wiping up Spills and Splash-out • Clean the Stainless Steel Inner Door and Tub • Check/Clean the Spray Arm Nozzles • Check/Clean the Filter System • Clean the Exterior Door Panel • Clean the Door Gasket Winterizing Your Dishwasher If your dishwasher will be unused for an extended period of time in a location that experiences freezing temperatures (e.g., in a holiday home or through a vacation period), have your dishwasher winterized by an authorized service center. To avoid dishwasher damage, do not allow water to remain in your dishwasher systems through extended periods of freezing temperatures. Freezing temperatures can damage your dishwasher. Wiping Up Spills and Splash-out Water may occasionally splash out of your dishwasher, especially if you interrupt a cycle or open the dishwasher door during a cycle. To avoid floor damage and possible mold growth, do not allow wet areas to remain around or under the dishwasher. Check/Clean the Stainless Steel Inner Door and Tub Clean the outer edges of the inside door panel regularly to remove debris that might collect there from normal loading. If spots begin to appear on the stainless steel tub or inner door, make sure the rinse agent reservoir is full. Check/Clean the Spray Arm Nozzles Occasionally check the spray arms to ensure that the spray arm nozzles (holes) are unobstructed. You must remove the spray arms to check them for obstruction. To remove the top spray arm: 1. Remove the empty top rack from A the dishwasher. Figure 18 2. Turn the rack upsidedown. The top spray arm is held B in position by a locking nut as shown in Figure 18A. Turn the locking nut counter-clockwise 1/8 turn and remove it, as shown in Figure 18B to release the spray arm. 3. Remove the spray arm as shown in Figure 19. Figure 19 4. Look for obstruction in the spray nozzles. 5. If the spray nozzles need cleaning, flush them under running water. 13
-
 1
1 -
2
-
3
-
4
-
5
-
6
-
7
-
8
-
9
-
 10
10 -
 11
11 -
 12
12 -
 13
13 -
 14
14 -
 15
15 -
 16
16 -
 17
17 -
 18
18 -
 19
19 -
 20
20 -
21
-
22
-
23
-
24
-
25
-
26
-
27
-
28
-
29
-
30
-
31
-
32
-
33
-
34
-
35
-
36
-
37
-
38
-
39
-
40
-
41
-
42
-
43
-
44
-
45
-
46
-
47
-
48
-
49
-
50
-
51
-
52
-
53
-
54
-
55
-
56
-
57
-
58
-
59
-
60
-
61
-
62
-
63
-
64
-
65
-
66
-
67
-
68
-
69
-
70
-
71
-
72
-
73
-
74
-
75
-
76
-
77
-
78
-
79
-
80
-
81
-
82
-
83
-
84
-
85
-
86
-
87
-
88
-
89
-
90
-
91
-
92
-
93
-
94
-
95
-
96
-
97
-
98
-
99
-
100
-
101
-
102
-
103
-
104
-
105
-
106
 |
 |