Bosch WTVC3500UC User Guide - Page 19
Preparing, to transport - model
 |
UPC - 825225874300
View all Bosch WTVC3500UC manuals
Add to My Manuals
Save this manual to your list of manuals |
Page 19 highlights
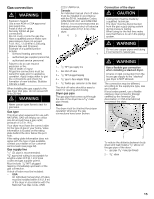
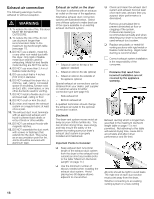
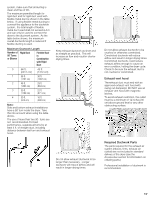
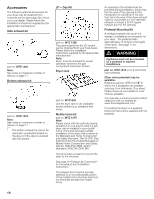
Stacking Kits d WARNING Use a flexible gas connection when installing a stacked dryer. A hard, or rigid connection from the house gas supply to the stacked" gas dryer is NOT allowed. There are two stacking kits available. Basic Stacking Kit This kit anchors the dryer on top of the washer and adds approximately 0.63 inches (16 mm) to the stacked height. See page 12 for dimensions. part no. WTZ 1601 is for the basic mechanical stacking kit. Pull-Out Shelf Stacking Kit This kit serves to stack the dryer on top of the washer and also provides a pullout shelf. This kit adds approximately 1.52 inches (38.6 mm) to the stacked washer/dryer height. See page 12 for dimensions. This kit may also be combined with the pedestal mounting kit to provide a pull-out shelf as well as a combined increase in height of the dryer of approximately 16.5 inches. i The pedestal can not be combined with the pull-out shelf stacking kit in stacked washer/dryer installations. part no. WTZ 1600 is for the solid white pull-out shelf stacking kit. Other color pull-out shelf stacking kits may be available. Reference part no. WTZ 1600"X" in which the X designates an available color (eg: A for Anthracite, S for silver). Please inquire at your dealer for color choices available. Preparing to transport the dryer ć step by step i These procedures should only be performed by a qualified person. 1. Close the shut-off valve. 2. Rotate the program selector to "OFF". 3. Disconnect the power supply (turn the circuit breaker off, unplug the appliance) 4. Disconnect gas supply. 5. Turn off the water faucet connected to the water supply hose (Steam models only). Disconnect the water supply hose. 6. Disconnect the exhaust duct from the exhaust air outlet on the dryer. 7. Collect any accessories and package them for shipment with the appliance. 8. Close the door and secure with adhesive tape. 9. Screw the heightĆadjustable feet of the dryer into the housing to prevent them from being damaged during transportation. 10. Reinstallation of the Dryer at the New Location - refer to the Installation Instructions in this manual (see page 7). 19
-
 1
1 -
2
-
3
-
4
-
5
-
6
-
7
-
8
-
9
-
10
-
11
-
12
-
13
-
 14
14 -
 15
15 -
 16
16 -
 17
17 -
 18
18 -
 19
19 -
 20
20 -
 21
21 -
 22
22 -
 23
23 -
 24
24 -
25
-
26
-
27
-
28
-
29
-
30
-
31
-
32
-
33
-
34
-
35
-
36
-
37
-
38
-
39
-
40
-
41
-
42
-
43
-
44
-
45
-
46
-
47
-
48
-
49
-
50
-
51
-
52
-
53
-
54
-
55
-
56
-
57
-
58
-
59
-
60
-
61
-
62
-
63
-
64
-
65
-
66
-
67
-
68
-
69
-
70
-
71
-
72
-
73
-
74
-
75
-
76
-
77
-
78
-
79
-
80
-
81
-
82
-
83
-
84
-
85
-
86
-
87
-
88
-
89
-
90
-
91
-
92
-
93
-
94
-
95
-
96
-
97
-
98
-
99
-
100
-
101
-
102
-
103
-
104
 |
 |
