Bose 10.2 Series II Owner's guide - Page 5
Stereo, Amplifier, Receiver, Lettspear
 |
View all Bose 10.2 Series II manuals
Add to My Manuals
Save this manual to your list of manuals |
Page 5 highlights
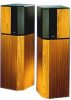
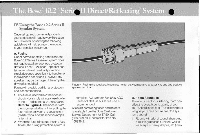
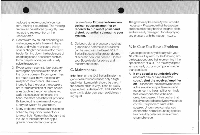
• • on the rear of the receiver/amp, making sure to connect the positive side of the wire to the receiver/amp positive terminal(marked( +)or colored red) and the negative side of the wire to the negative terminal (marked( - )or colored black). Refer to Figure 3. The idea is tomake sure that the speaker's positive terminal is connected to the receiver/amp's positive terminal, and the negatives are connected properly as well. Make sure all connections are secure. F. Repeat steps D and E for the Part 2 (right) speaker and right receiver/amp side. Make sure all connections are secure. G. Finally, check carefully tomakesure that no loose strandsof wireare brushing against the other terminal on either the speaker or receiver/amp. Such "bridged" wires create short circuits which can damage your amplifier. Repair any loose wire strands before plugging in your receiver/amp. If you have stapled the wiring to a floor or wall, make sure the stapleshavenot penetrated the wire as thismay causea short circuit. STEREO AMPLIFIER OR RECEIVER - + LettSpear Figure 3. Connecting the speakers to the receiver/amplifier. H. If you are not sure the speakers are hooked up correctly or "in phase" (positive to positive. negative to negative), try this simple test: 1. Set your receiver/amp to MONO (monophonic or "L +R"). Be sure that the balance control isin the normal or centered position. 2. Move the speakers until they are back to back, almost touching. 3. Play somemusic with deep bass. If the speakersarehooked up correctly, they will have full, natural bass response. 4. If you do not hear much deep bass, shut the receiver/amp off. Then reverse the + and - connections on one speaker only and repeat the test. Use whichever connection produces the most bass. 5
-
 1
1 -
 2
2 -
 3
3 -
 4
4 -
 5
5 -
 6
6 -
 7
7 -
 8
8 -
 9
9 -
 10
10
 |
 |
