Bose 321 GS Owners Manual - Page 15
Connecting your TV to the media center
 |
View all Bose 321 GS manuals
Add to My Manuals
Save this manual to your list of manuals |
Page 15 highlights
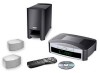
System Setup Connecting your TV to the media center Note: If you will be using the 3•2•1 system with both a TV and a VCR, skip this section and go to "Connecting your TV and VCR to the media center" on page 16. Making audio connections Note: If your TV does not have audio output jacks, see "If your TV does not have audio output jacks" on page 17. Otherwise, continue. 1. Connect one end of the supplied stereo cable to the TV Audio IN jacks on the rear panel of the media center (Figure 11). Insert the white RCA plug into the TV white L jack. Insert the red RCA plug into the TV red R jack. 2. Connect the other end of the stereo cable to the audio output jacks on your TV. Insert the white RCA plug into the white AUDIO OUT L jack. Insert the red RCA plug into the red AUDIO OUT R jack. Making composite video connections Note: Some older TVs with standard TV cable connectors do not have a composite video or an S-video input. Such TVs are not compatible with any DVD players and require use of an RF modulator for this connection. RF modulators are available at your local electronics store. 1. Insert one end of the supplied video cable (yellow) to the Video OUT C (composite) jack on the back of the media center (Figure 11). 2. Insert the other end of the video cable into one of the video input jacks on your TV. Figure 11 TV (composite video)-tomedia center connections Remember the name of the TV video input you plugged the video cable into (for example: Video 1, Input 1, or Aux). Later, you will need to select the corresponding video input on your TV in order to view the 3•2•1 system video output. Media center rear panel Video cable (yellow connectors) TV connector panel TV Stereo cable (red and white connectors) * *Could be labelled "FIXED", "MONITOR", or "HiFi". 15
-
 1
1 -
2
-
3
-
4
-
5
-
6
-
7
-
8
-
9
-
 10
10 -
 11
11 -
 12
12 -
 13
13 -
 14
14 -
 15
15 -
 16
16 -
 17
17 -
 18
18 -
 19
19 -
 20
20 -
21
-
22
-
23
-
24
-
25
-
26
-
27
-
28
-
29
-
30
-
31
-
32
-
33
-
34
-
35
-
36
-
37
-
38
-
39
-
40
-
41
-
42
-
43
-
44
-
45
-
46
-
47
-
48
-
49
-
50
-
51
-
52
-
53
-
54
-
55
-
56
-
57
-
58
-
59
-
60
-
61
-
62
-
63
-
64
-
65
-
66
-
67
-
68
 |
 |
