Bose Acoustimass 15 Series II Owner's guide - Page 12
Checking the connections, Connecting the Acoustimass module to power, Upgrading your Acoustimass 15 - 6 1 upgrade speaker kit white
 |
View all Bose Acoustimass 15 Series II manuals
Add to My Manuals
Save this manual to your list of manuals |
Page 12 highlights
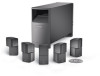
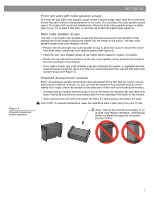
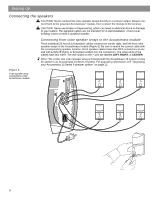
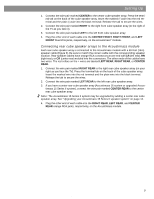
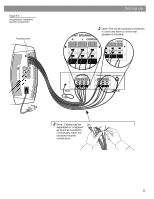
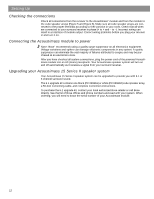
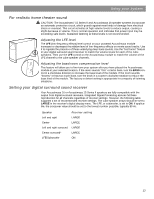
Setting Up Checking the connections Check all connections from the receiver to the Acoustimass® module and from the module to the cube speaker arrays (Figure 5 and Figure 6). Make sure all cube speaker arrays are connected to the proper terminals according to their position in your room. Check that all wires are connected to your surround receiver in phase (+ to + and - to -). Incorrect wiring can result in a total loss of module output. Correct wiring problems before you plug your receiver in and turn it on. Connecting the Acoustimass module to power Note: Bose® recommends using a quality surge suppressor on all electronics equipment. Voltage variations and spikes can damage electronic components in any system. A quality suppressor can eliminate the vast majority of failures attributed to surges and may be purchased at an electronics store. After you have checked all system connections, plug the power cord of the powered Acoustimass module into an AC (mains) receptacle. Your Acoustimass speaker system will turn on and off automatically as it receives a signal from your surround receiver. Upgrading your Acoustimass 15 Series II speaker system Your Acoustimass 15 Series II speaker system can be upgraded to provide you with 6.1 or 6 channel surround sound. The 6.1 upgrade kit contains one black (PC 029661) or white (PC 029662) cube speaker array, a 50-foot connecting cable, and complete connection instructions. To purchase the 6.1 upgrade kit, contact your local authorized Bose retailer or call Bose directly. See the list of Bose offices and phone numbers enclosed with your system. When ordering, you will need to know the serial number of your Acoustimass module. 12 AM264924_00 _V.pdf • August 13, 2002
-
 1
1 -
2
-
3
-
4
-
5
-
6
-
 7
7 -
 8
8 -
 9
9 -
 10
10 -
 11
11 -
 12
12 -
 13
13 -
 14
14 -
 15
15 -
 16
16 -
 17
17 -
18
 |
 |