Brother International 1134DW Users Manual - English and Spanish - Page 15
Funcionamiento
 |
View all Brother International 1134DW manuals
Add to My Manuals
Save this manual to your list of manuals |
Page 15 highlights
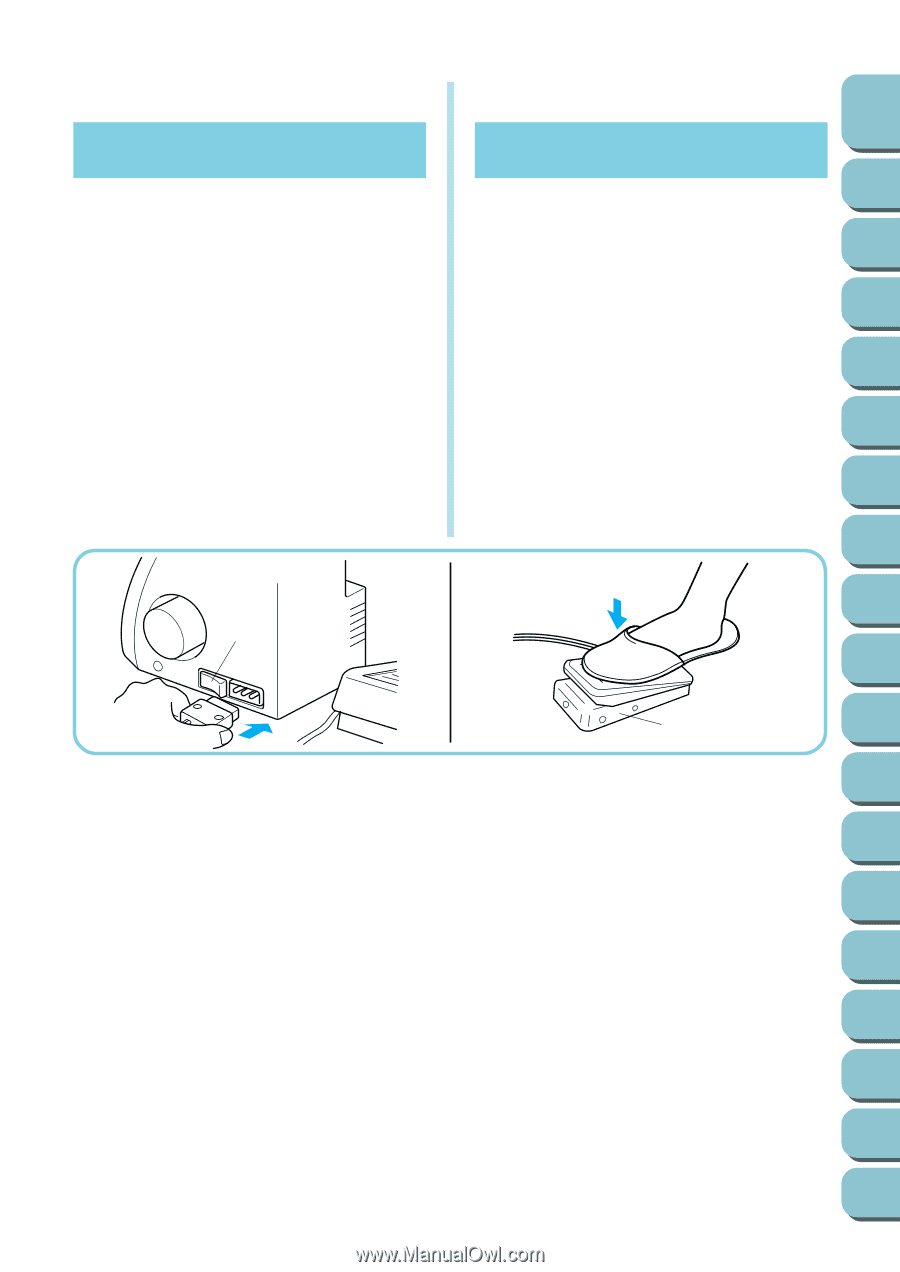
TABLE OF Chapter Chapter Chapter Chapter Chapter Chapter Chapter Chapter Chapter Chapter Chapter Chapter Chapter Chapter Chapter Chapter Chapter Chapter CONTENTS 1 2 3 4 Operating Powering the machine Preparation • Insert the three-pin plug into the socket on the bottom right side of the machine. Insert the power supply plug into a power outlet. Main Power and Sewing Light Switch This switch turns the power and sewing light on or off. To turn on push toward "1" mark. To turn off push toward "0" mark. 1 Main Power and Sewing Light Switch Operation When the pedal is pressed lightly, the machine runs at a low speed. As the pedal is pressed further, the machine will increase speed. When the pedal is released, the machine stops. 2 Foot Controller: Model N Note (For U.S.A. only): This foot controller can be used for sewing machine models 1034D, 1034, 1030D and 1030. Funcionamiento Encendido de la máquina Preparación de la máquina • Introduzca el zócalo de tres puntas en el enchufe que se encuentra abajo, en el lado derecho de la máquina e inserte el zócalo de alimentación en una toma de corriente. Interruptor principal y de luz Este interruptor permite apagar y encender la máquina así como la luz. Para encender, empuje hacia la marca "1"; para apagar, póngalo en la marca "0". 1 Interruptor principal y de luz Funcionamiento Al oprimir ligeramente el pedal, la máquina funcionará a baja velocidad. A medida que se apriete más, la máquina incrementará su velocidad. La máquina se parará tan pronto como se suelte el pedal. 2 Pedal 1 2 5 6 7 8 9 10 11 12 13 14 15 16 17 18 8
-
 1
1 -
2
-
3
-
4
-
5
-
6
-
7
-
8
-
9
-
 10
10 -
 11
11 -
 12
12 -
 13
13 -
 14
14 -
 15
15 -
 16
16 -
 17
17 -
 18
18 -
 19
19 -
 20
20 -
21
-
22
-
23
-
24
-
25
-
26
-
27
-
28
-
29
-
30
-
31
-
32
-
33
-
34
-
35
-
36
-
37
-
38
-
39
-
40
-
41
-
42
-
43
-
44
-
45
-
46
-
47
-
48
-
49
-
50
-
51
-
52
-
53
-
54
-
55
-
56
-
57
-
58
-
59
-
60
-
61
-
62
-
63
-
64
-
65
-
66
-
67
-
68
 |
 |