Brother International GT-361 Basic Instruction Manual - English - Page 46
Replacing Flushing Plate Sponge and Flushing Plate Felt, 5-1-4. Replacing the Fan Filter
 |
View all Brother International GT-361 manuals
Add to My Manuals
Save this manual to your list of manuals |
Page 46 highlights
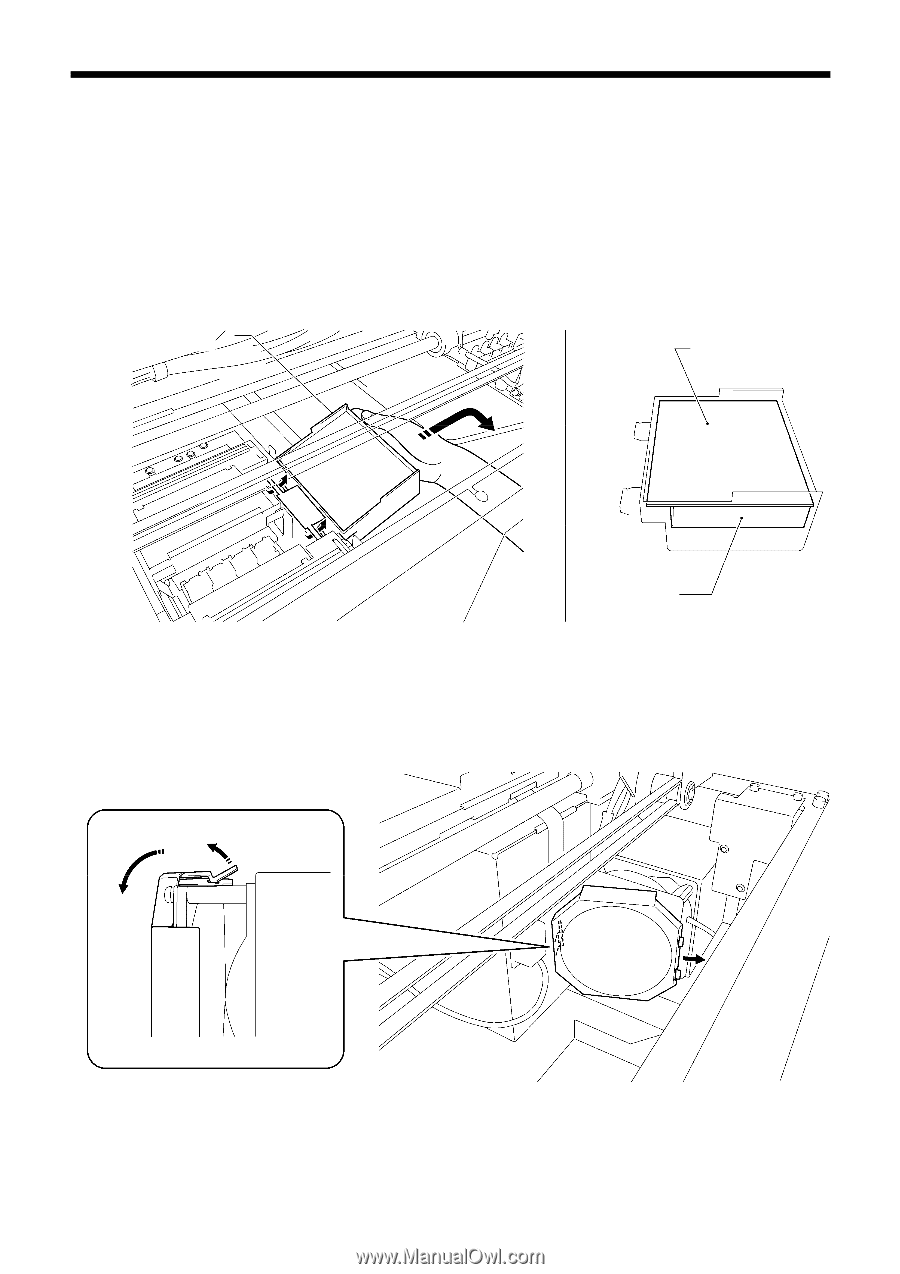
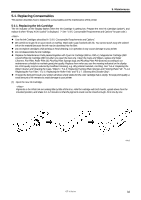
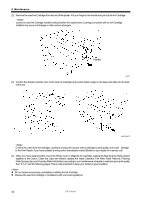
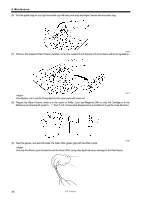
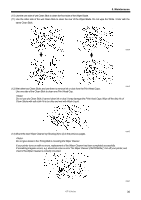
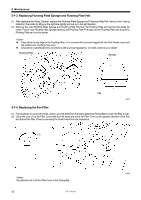
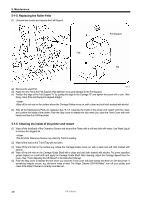
5. Maintenance 5-1-3. Replacing Flushing Plate Sponge and Flushing Plate Felt (1) After replacing the Wiper Cleaner, replace the Flushing Plate Sponge and Flushing Plate Felt. Remove the Flushing Plate from the printer by lifting up the right side slightly and pull up to the right direction. (2) Remove the used Flushing Plate Sponge and Flushing Plate Felt from the Flushing Plate and remove the waste ink inside. Put the new Flushing Plate Sponge (bottom) and Flushing Plate Felt (top) into the Flushing Plate and mount the Flushing Plate as it is to the printer. z Keep clean the top edge of the Flushing Plate; if it is covered with dust and clogged ink, the Print Heads may touch the surface and mis-firing may occur. z Dispose the used Waste Ink in accordance with your local regulations. Or make contact to your dealer. Flushing Plate Sponge Felt 0067Y 5-1-4. Replacing the Fan Filter (1) Put the gloves on your both hands, and put your left hand from the space before the Timing Belt to reach the Filter Cover. (2) Lift up the Lock (1) of the Filter Cover with your left hand and move the Filter Cover to the opposite direction of the Fan and pull out the Filter Cover by removing the Guide Holes from the projections. (1) 0068Y Pay attention not to hit the Filter Cover to the Timing Belt. 37 GT-3 Series
-
 1
1 -
2
-
3
-
4
-
5
-
6
-
7
-
8
-
9
-
10
-
11
-
12
-
13
-
14
-
15
-
16
-
17
-
18
-
19
-
20
-
21
-
22
-
23
-
24
-
25
-
26
-
27
-
28
-
29
-
30
-
31
-
32
-
33
-
34
-
35
-
36
-
37
-
38
-
39
-
40
-
 41
41 -
 42
42 -
 43
43 -
 44
44 -
 45
45 -
 46
46 -
 47
47 -
 48
48 -
 49
49 -
 50
50 -
 51
51 -
52
-
53
-
54
-
55
-
56
 |
 |