Brother International HL-4000CN Users Manual - English - Page 62
Printer Driver Settings (for envelopes), Windows settings, Macintosh settings
 |
View all Brother International HL-4000CN manuals
Add to My Manuals
Save this manual to your list of manuals |
Page 62 highlights
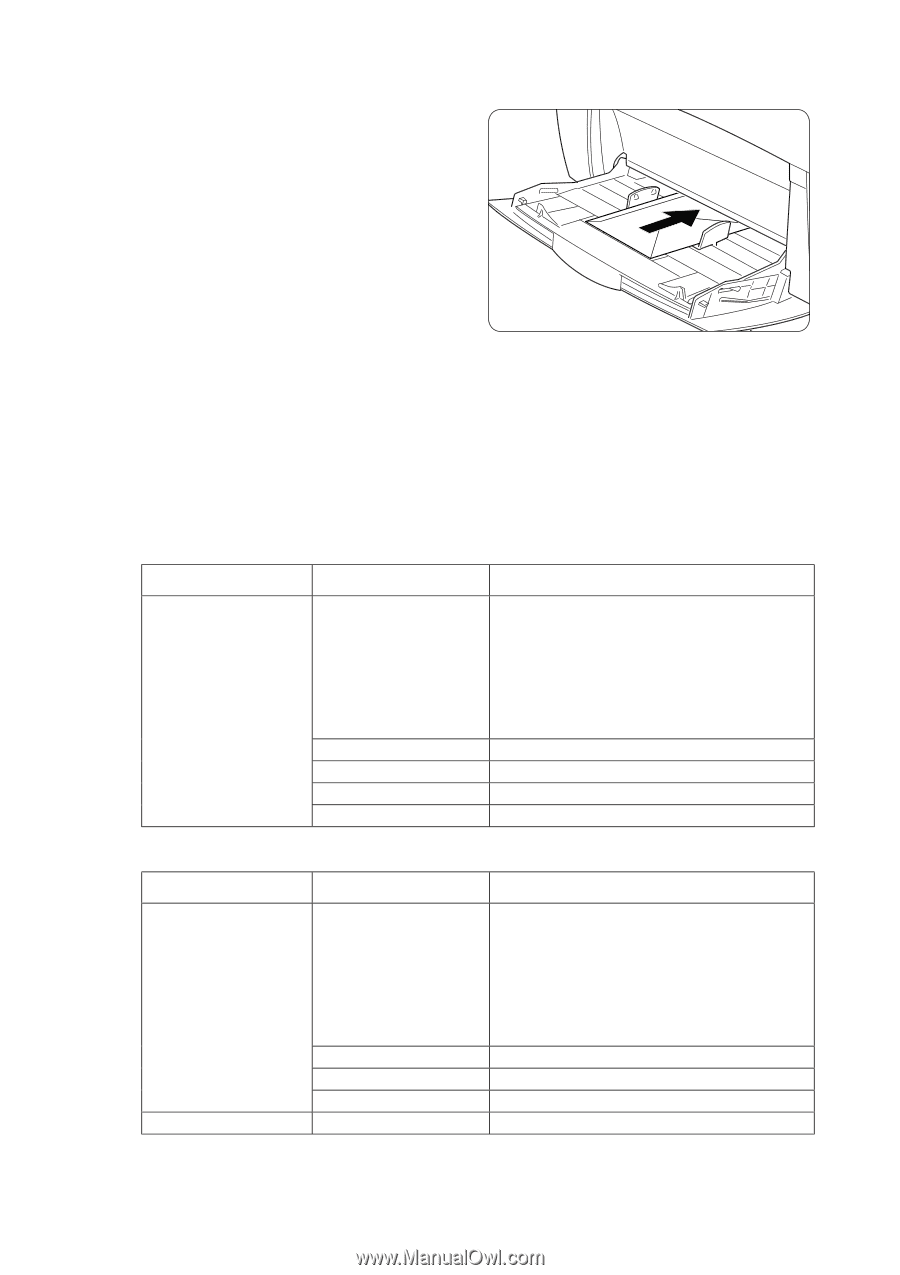
1. Adjust the paper guide to the mark corresponding to the size of envelope you are about to use. 2. Make sure the flap is closed, load the envelope with the side to be printed facing down, and the flap facing right. 3. Launch printing from your program after setting the envelope in the printer. Now set the items in "Printer Driver Settings (for envelopes)" as shown below: Printer Driver Settings (for envelopes) Windows settings Tab Item Paper/Output Paper Size Reverse Print Duplex Print Paper Tray Paper Type Setting Com-10 Monarch C5 DL Same as Document Size (When the documentation size is Com-10, Monarch, C5 or DL) Turn on if necessary. OFF MP Tray Envelope Macintosh settings Dialog Box Item Paper Settings Paper Size Printer Settings Reverse Print Paper Tray Duplex Print Paper Type Setting Com-10 Monarch C5 DL Same as Document Size (When the documentation size is Com-10, Monarch, C5 or DL) Turn on if necessary. Envelope OFF MP Tray 3-20
-
 1
1 -
2
-
3
-
4
-
5
-
6
-
7
-
8
-
9
-
10
-
11
-
12
-
13
-
14
-
15
-
16
-
17
-
18
-
19
-
20
-
21
-
22
-
23
-
24
-
25
-
26
-
27
-
28
-
29
-
30
-
31
-
32
-
33
-
34
-
35
-
36
-
37
-
38
-
39
-
40
-
41
-
42
-
43
-
44
-
45
-
46
-
47
-
48
-
49
-
50
-
51
-
52
-
53
-
54
-
55
-
56
-
 57
57 -
 58
58 -
 59
59 -
 60
60 -
 61
61 -
 62
62 -
 63
63 -
 64
64 -
 65
65 -
 66
66 -
 67
67 -
68
-
69
-
70
-
71
-
72
-
73
-
74
-
75
-
76
-
77
-
78
-
79
-
80
-
81
-
82
-
83
-
84
-
85
-
86
-
87
-
88
-
89
-
90
-
91
-
92
-
93
-
94
-
95
-
96
-
97
-
98
-
99
-
100
-
101
-
102
-
103
-
104
-
105
-
106
-
107
-
108
-
109
-
110
-
111
-
112
-
113
-
114
-
115
-
116
-
117
-
118
-
119
-
120
-
121
-
122
-
123
-
124
-
125
-
126
-
127
-
128
-
129
-
130
-
131
-
132
-
133
-
134
-
135
-
136
-
137
-
138
-
139
-
140
-
141
-
142
-
143
-
144
-
145
-
146
-
147
-
148
-
149
-
150
-
151
-
152
-
153
-
154
-
155
-
156
-
157
-
158
-
159
-
160
-
161
-
162
-
163
-
164
-
165
-
166
-
167
-
168
-
169
-
170
-
171
-
172
-
173
-
174
-
175
-
176
-
177
-
178
-
179
-
180
-
181
-
182
-
183
 |
 |