Brother International HL-4000CN Users Manual - English - Page 96
Basic Menu Operation, 5.2.1 Menu Structure and Basic Operations, Resetting the printer settings
 |
View all Brother International HL-4000CN manuals
Add to My Manuals
Save this manual to your list of manuals |
Page 96 highlights
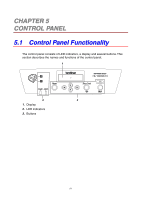
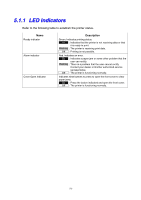
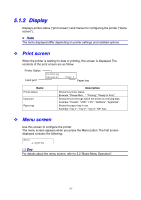
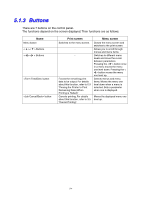
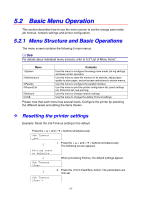
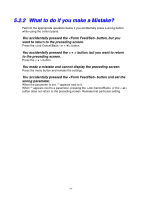
5.2 Basic Menu Operation This section describes how to use the menu screen to set the energy save mode, job timeout, network settings and printer configuration. 5.2.1 Menu Structure and Basic Operations The menu screen contains the following 5 main menus. See For details about individual menu screens, refer to 5.3 "List of Menu Items". Menu Contents 1:System 2:Maintenance 3:Parallel 4:Report/List 5:Network 6:USB Use this menu to configure the energy save mode, job log settings, and basic printer operation. Use this menu to reset NV memory to its defaults, adjust paper quality to plain paper, and set access restrictions to certain menus. Use this menu to configure the parallel interface. Use this menu to print the printer configuration list, panel settings list, PCL6 font list, and print log. Use this menu to change network settings. Use this menu to change the Adobe Protocol settings. Please note that each menu has several levels. Configure the printer by selecting the different levels and setting the items therein. Resetting the printer settings Example: Reset the Job Timeout setting to the default Press the < > and < > buttons simultaneously. Job Timeout _sec. ↓ 1. Press the < > and < > buttons simultaneously. The following screen appears. Setting reset to defaults ↓ When processing finishes, the default settings appear. Job Timeout 30sec. ↓ 2. Press the button. The parameters are now set. Job Timeout 30sec.* 5-5
-
 1
1 -
2
-
3
-
4
-
5
-
6
-
7
-
8
-
9
-
10
-
11
-
12
-
13
-
14
-
15
-
16
-
17
-
18
-
19
-
20
-
21
-
22
-
23
-
24
-
25
-
26
-
27
-
28
-
29
-
30
-
31
-
32
-
33
-
34
-
35
-
36
-
37
-
38
-
39
-
40
-
41
-
42
-
43
-
44
-
45
-
46
-
47
-
48
-
49
-
50
-
51
-
52
-
53
-
54
-
55
-
56
-
57
-
58
-
59
-
60
-
61
-
62
-
63
-
64
-
65
-
66
-
67
-
68
-
69
-
70
-
71
-
72
-
73
-
74
-
75
-
76
-
77
-
78
-
79
-
80
-
81
-
82
-
83
-
84
-
85
-
86
-
87
-
88
-
89
-
90
-
 91
91 -
 92
92 -
 93
93 -
 94
94 -
 95
95 -
 96
96 -
 97
97 -
 98
98 -
 99
99 -
 100
100 -
 101
101 -
102
-
103
-
104
-
105
-
106
-
107
-
108
-
109
-
110
-
111
-
112
-
113
-
114
-
115
-
116
-
117
-
118
-
119
-
120
-
121
-
122
-
123
-
124
-
125
-
126
-
127
-
128
-
129
-
130
-
131
-
132
-
133
-
134
-
135
-
136
-
137
-
138
-
139
-
140
-
141
-
142
-
143
-
144
-
145
-
146
-
147
-
148
-
149
-
150
-
151
-
152
-
153
-
154
-
155
-
156
-
157
-
158
-
159
-
160
-
161
-
162
-
163
-
164
-
165
-
166
-
167
-
168
-
169
-
170
-
171
-
172
-
173
-
174
-
175
-
176
-
177
-
178
-
179
-
180
-
181
-
182
-
183
 |
 |