Brother International HL-630M Users Manual - English - Page 53
See the REPLACING THE DRUM UNIT in Plug in the power cord.
 |
View all Brother International HL-630M manuals
Add to My Manuals
Save this manual to your list of manuals |
Page 53 highlights
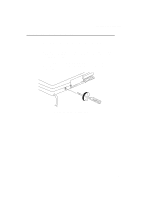
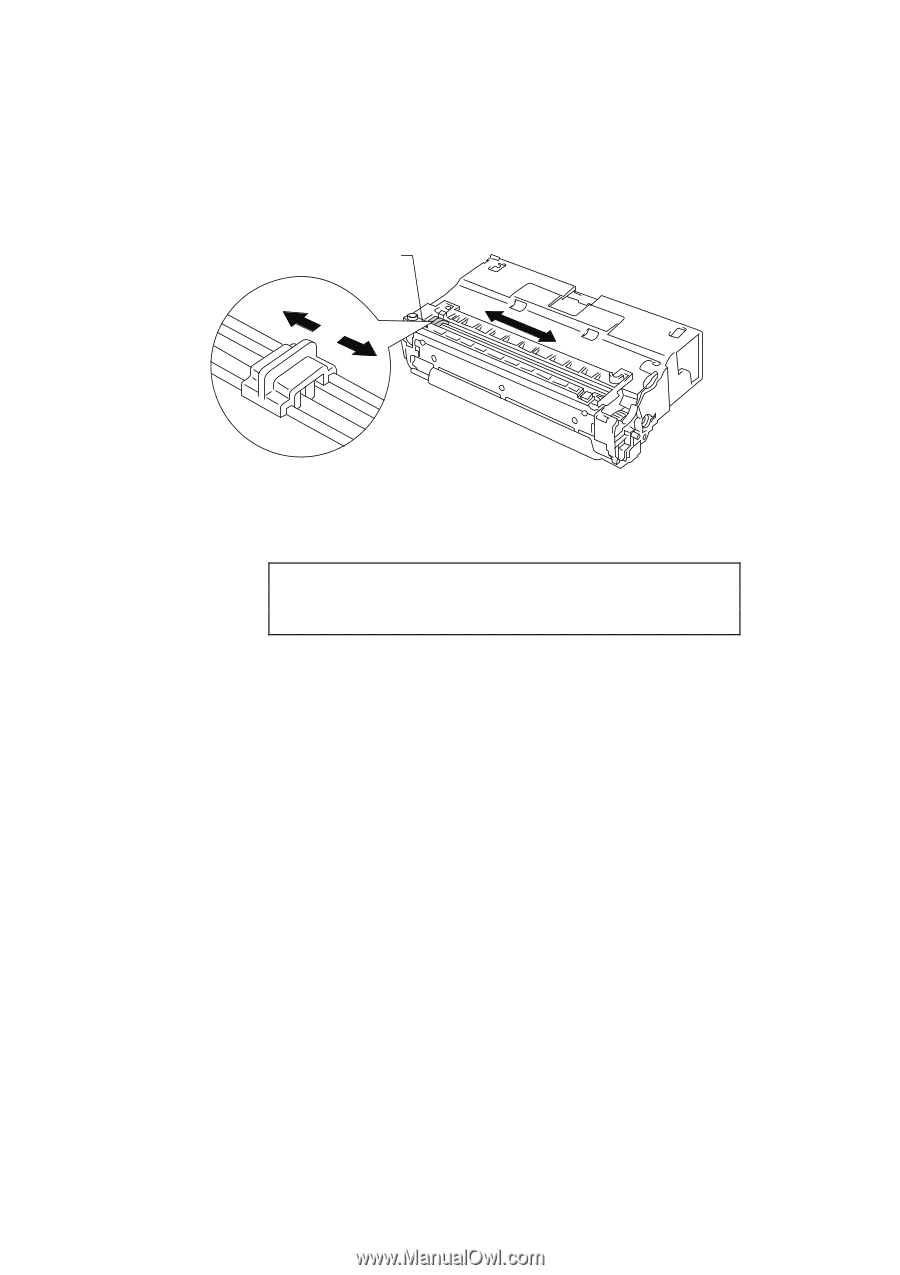
CHAPTER 5 MAINTENANCE 9. Clean the primary corona wire inside the drum unit by gently sliding the tab right and left several times. Home Position (v) Fig. 5-18 Cleaning the Primary Corona Wire 10. Position the tab at left end of the drum unit (v mark position.) Warning Be sure to position the tab at the home position to the left end of the drum after cleaning. 11. Install the drum unit into the printer. See the section "REPLACING THE DRUM UNIT" in Chapter 5. 12. Close the drum cover and top cover. 13. Install the multi-purpose sheet feeder. See the section "MULTI-PURPOSE SHEET FEEDER" in Chapter 2. 14. Plug in the power cord. 5-13
-
 1
1 -
2
-
3
-
4
-
5
-
6
-
7
-
8
-
9
-
10
-
11
-
12
-
13
-
14
-
15
-
16
-
17
-
18
-
19
-
20
-
21
-
22
-
23
-
24
-
25
-
26
-
27
-
28
-
29
-
30
-
31
-
32
-
33
-
34
-
35
-
36
-
37
-
38
-
39
-
40
-
41
-
42
-
43
-
44
-
45
-
46
-
47
-
 48
48 -
 49
49 -
 50
50 -
 51
51 -
 52
52 -
 53
53 -
 54
54 -
 55
55 -
 56
56 -
 57
57 -
 58
58 -
59
-
60
-
61
-
62
-
63
-
64
-
65
-
66
-
67
-
68
-
69
-
70
-
71
-
72
-
73
-
74
-
75
-
76
-
77
-
78
-
79
-
80
-
81
-
82
-
83
-
84
 |
 |
CHAPTER 5 MAINTENANCE
5–13
9.
Clean the primary corona wire inside the drum unit by gently sliding
the tab right and left several times.
Fig. 5-18 Cleaning the Primary Corona Wire
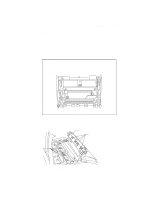
10. Position the tab at left end of the drum unit (
▲
mark position.)
Warning
Be sure to position the tab at the home position to the left end of the drum
after cleaning.
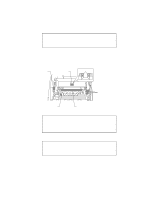
11. Install the drum unit into the printer.
See the section “REPLACING THE DRUM UNIT” in Chapter 5.
12. Close the drum cover and top cover.
13. Install the multi-purpose sheet feeder.
See the section “MULTI-PURPOSE SHEET FEEDER” in Chapter 2.
14. Plug in the power cord.
Home Position (
▲
)