Brother International IntelliFax-2840 Basic Users Guide - English - Page 104
Improving the print quality, abcde - replace toner problem
 |
View all Brother International IntelliFax-2840 manuals
Add to My Manuals
Save this manual to your list of manuals |
Page 104 highlights
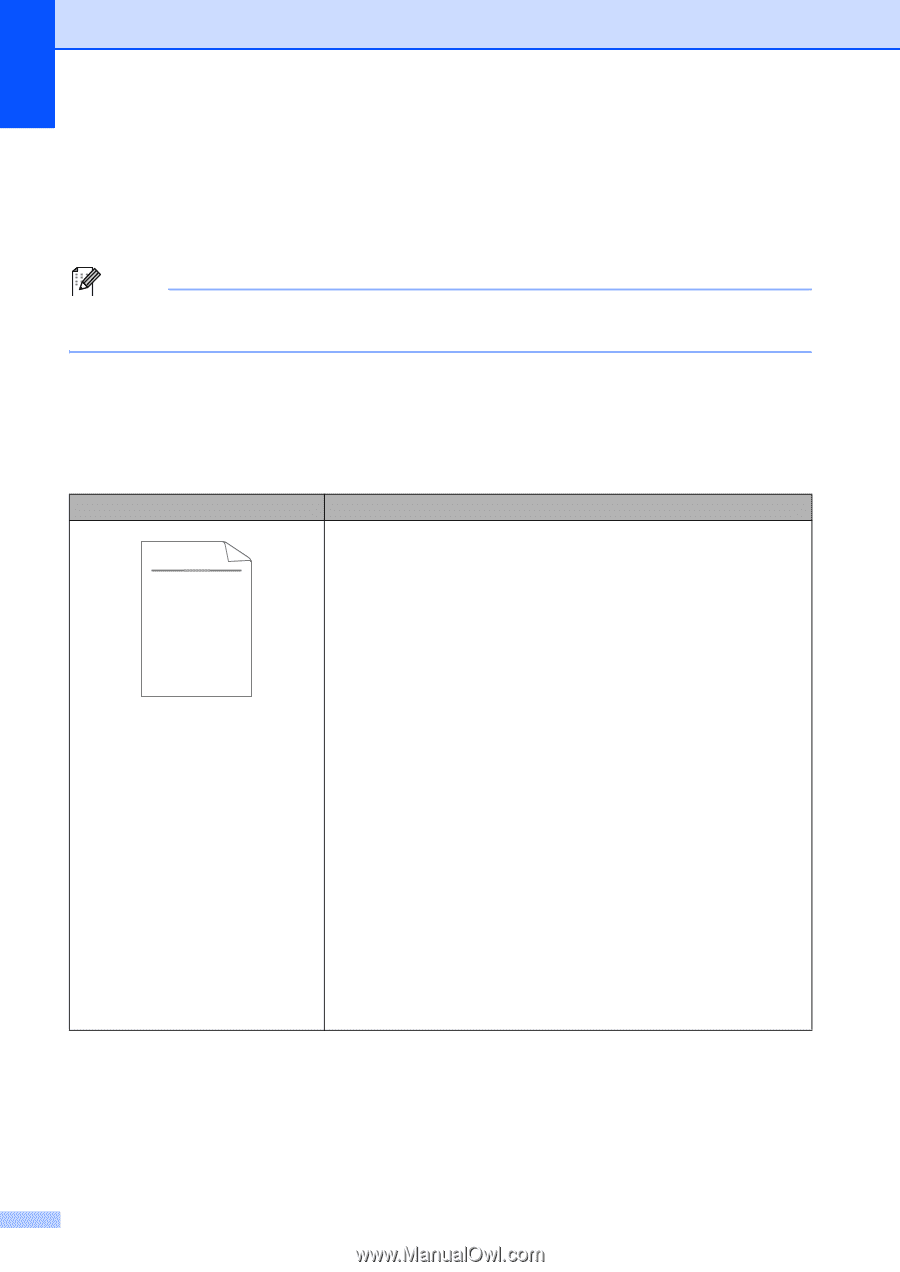
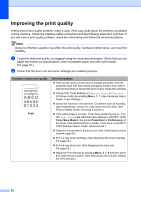
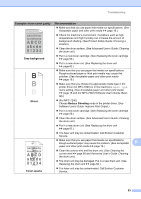
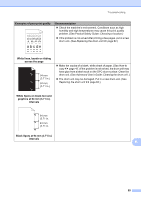
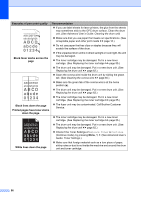
Improving the print quality B If the printout has a quality problem, make a copy. If the copy looks good, the problem is probably not the machine. Check the interface cable connections and the following steps first. And then, if you still have a print quality problem, check the chart below and follow the recommendations. Note Using non-Brother supplies may affect the print quality, hardware performance, and machine reliability. a To get the best print quality, we suggest using the recommended paper. Check that you use paper that meets our specifications. (See Acceptable paper and other print media uu page 16.) b Check that the drum unit and toner cartridge are installed properly. Examples of poor print quality ABCDEFGH abcdefghijk ABCD abcde 01234 Faint Recommendation Take out the drum unit and toner cartridge assembly. Hold the assembly level with both hands and gently shake it from side to side several times to spread the toner evenly inside the cartridge. Check if the Toner Settings of Replace Toner is Continue (Continue mode) by pressing Menu, 1, 7. (See Advanced User's Guide: Toner Settings.) Check the machine's environment. Conditions such as humidity, high temperatures, and so on, may cause this print fault. (See Product Safety Guide: Choosing a location.) If the whole page is too light, Toner Save mode may be on. Turn off Toner Save in the machine menu settings or (for MFC-7240) Toner Save Mode in the printer Properties (or Preferences) of the driver. (See Advanced User's Guide: Toner Save or (for MFC7240) Software User's Guide: Advanced tab.) Clean the corona wire of the drum unit. (See Cleaning the corona wire uu page 60.) Put in a new toner cartridge. (See Replacing the toner cartridge uu page 55.) Put in a new drum unit. (See Replacing the drum unit uu page 62.) Adjust the Print Density by pressing Menu, 2, 1, 6 and then press c to make the print darker. (See Advanced User's Guide: Setting the Print Density.) 92
-
 1
1 -
2
-
3
-
4
-
5
-
6
-
7
-
8
-
9
-
10
-
11
-
12
-
13
-
14
-
15
-
16
-
17
-
18
-
19
-
20
-
21
-
22
-
23
-
24
-
25
-
26
-
27
-
28
-
29
-
30
-
31
-
32
-
33
-
34
-
35
-
36
-
37
-
38
-
39
-
40
-
41
-
42
-
43
-
44
-
45
-
46
-
47
-
48
-
49
-
50
-
51
-
52
-
53
-
54
-
55
-
56
-
57
-
58
-
59
-
60
-
61
-
62
-
63
-
64
-
65
-
66
-
67
-
68
-
69
-
70
-
71
-
72
-
73
-
74
-
75
-
76
-
77
-
78
-
79
-
80
-
81
-
82
-
83
-
84
-
85
-
86
-
87
-
88
-
89
-
90
-
91
-
92
-
93
-
94
-
95
-
96
-
97
-
98
-
 99
99 -
 100
100 -
 101
101 -
 102
102 -
 103
103 -
 104
104 -
 105
105 -
 106
106 -
 107
107 -
 108
108 -
 109
109 -
110
-
111
-
112
-
113
-
114
-
115
-
116
-
117
-
118
-
119
-
120
-
121
-
122
-
123
-
124
-
125
-
126
-
127
-
128
-
129
-
130
-
131
-
132
-
133
-
134
-
135
-
136
-
137
-
138
-
139
-
140
 |
 |