Brother International MFC 3100C Quick Setup Guide - English - Page 3
Registration and Test Sheet
 |
UPC - 012502565819
View all Brother International MFC 3100C manuals
Add to My Manuals
Save this manual to your list of manuals |
Page 3 highlights
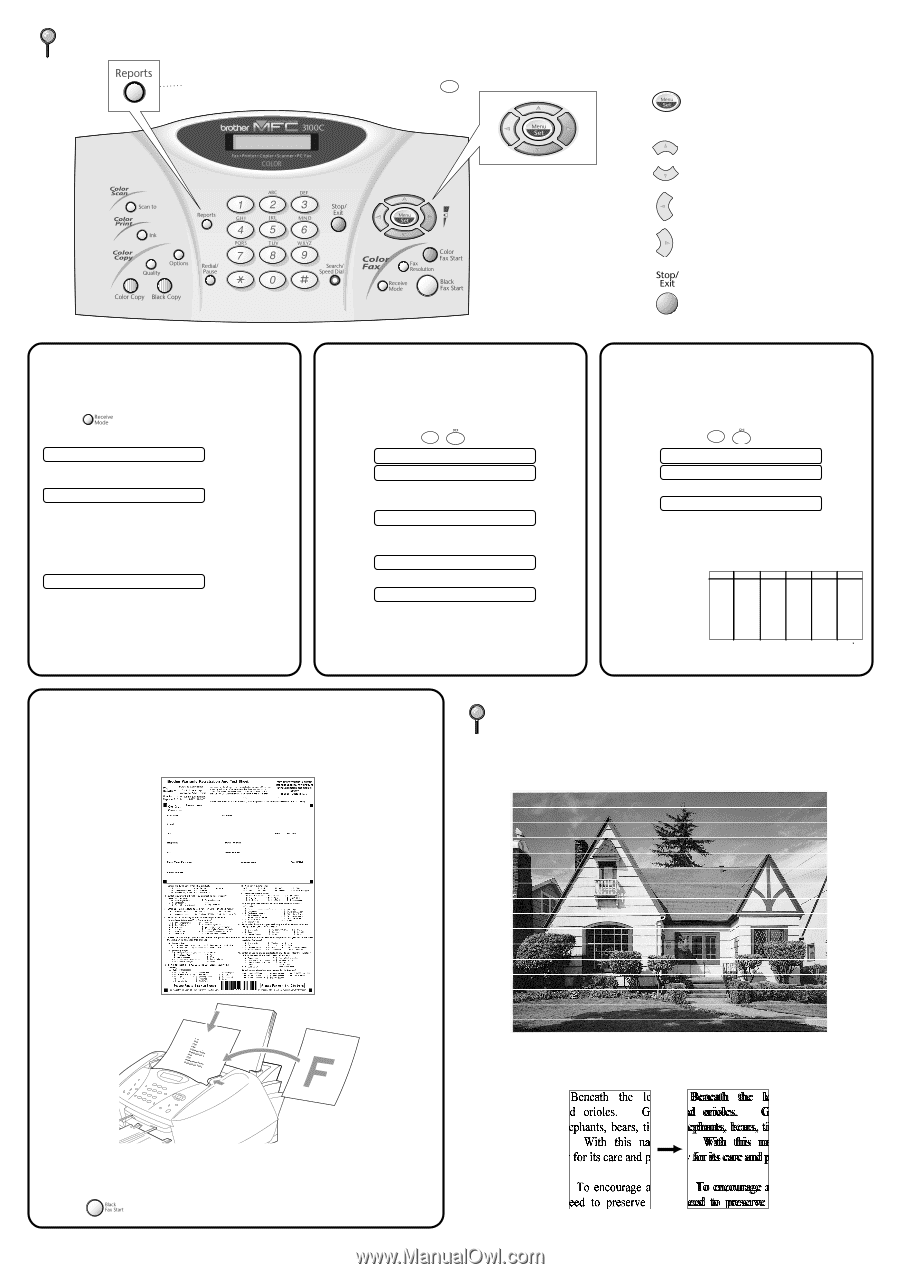
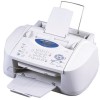
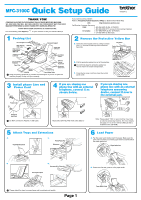
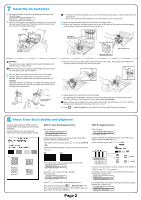
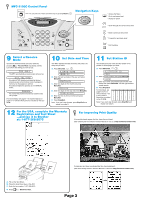
MFC-3100C Control Panel You can print a list of basic operational steps by pressing Reports, 1 . Navigation Keys * Access the Menu * Go to next menu level * Accept an option * Scroll through the current menu level * Back to previous menu level * Forward to next menu level * Exit the Menu 9 Select a Receive Mode Choose the mode that best suits your needs by pressing Receive Mode repeatedly until the LCD shows the setting you want to use. FAX ONLY The MFC automatically answers every call as a fax. EXT.TEL/TAD An external TAD (telephone answering device) answers every call and stores voice messages in memory; fax messages are printed. An external telephone operates as if in MANUAL mode. MANUAL You control the phone line and must answer every call yourself. For more details, see page 5-1 in Owner's Manual or page 6-1 in Owner's Manual that is included on the CDROM. 10 Set Date and Time Your MFC displays the date and time, and prints it on every fax you send. A. Press Menu/Set, 1 , 3 . 3.DATE/TIME YEAR:XX B. Enter the last two digits of the year and press Menu/Set. MONTH:XX C. Enter two digits for the month and press Menu/Set. DAY:XX D. Enter two digits for the day and press Menu/Set. TIME:XX:XX E. Enter the time in 24-hour format and press Menu/Set. F. Press Stop/Exit. Note: If you can't step forward, press Stop/Exit and repeat from step A. 11 Set Station ID You should store your name and fax number to be printed on all fax pages you send. A. Press Menu/Set, 1 , 4 . 4.STATION ID FAX: B. Enter your fax number, then press Menu/Set. NAME: C. Enter your name using the dial pad and the chart below, then press Menu/Set. Use the right arrow to create spaces. D. Press Stop/Exit. For more details, see pages 4-2 to 4-3 in Owner's Manual or 5-2 to 5-3 in Owner's Manual that is included on the CD-ROM. Key once twice three times four times five times 2 A B C 2 A 3 D E F 3 D 4 G H I 4 G 5 J K L 5 J 6 M N O 6 M 7 P Q R S 7 8 T U V 8 T 9 W X Y Z 9 Note: If you can't step forward, press Stop/Exit and repeat from step A. 12 For the USA, complete the Warranty Registration and Test Sheet ...and fax it to Brother at: 1-877-268-9575 For Improving Print Quality If horizontal streaks appear like this, clean the print head. (See Cleaning the Print Head in Owner's Manual or visit us at http://solutions.brother.com) A. Fill out the Test Sheet. B. Place the sheet face down in the ADF. C. Enter the fax number: 1-877-268-9575. D. Press Black Fax Start. If characters and lines are stacked like this, check alignment. (See Print Quality Check in Owner's Manual or visit us at http://solutions.brother.com) Page 3
-
 1
1 -
 2
2 -
 3
3 -
 4
4 -
 5
5 -
 6
6
 |
 |