Brother International MFC-J4710DW Quick Setup Guide - English - Page 8
Set the paper settings, MFC-J4710DW, Review Touchscreen, display, Choose your language, if needed
 |
View all Brother International MFC-J4710DW manuals
Add to My Manuals
Save this manual to your list of manuals |
Page 8 highlights
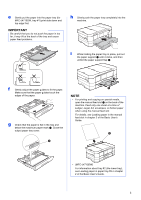
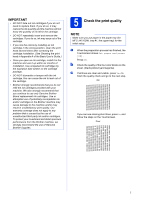
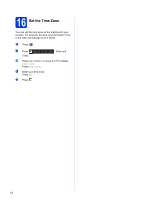
6 Set the paper settings (MFC-J4710DW) For your machine to produce the best print quality and to feed the correct paper size, the paper type and size must be set to match the paper in the tray. For details on the types and sizes of paper supported, see Paper Size and Type in chapter 2 of the Basic User's Guide. NOTE You can change the default tray that the machine will use for printing copies or received faxes. (See Tray use in Copy mode or Tray use in Fax mode in chapter 2 of the Basic User's Guide.) a When Tray Setting appears on the Touchscreen, press Tray Setting to set the paper size and paper type. b Press Tray #1 to set paper size and paper type for tray #1, or press Tray #2 to set paper size for tray #2. c Press the size and type of paper you are using. d Press OK. 7 Review Touchscreen display The Touchscreen displays information on screen operation and manual feed slot use. Review this information and go to the next step. For details, see the Basic User's Guide. 8 Choose your language (if needed) a Press . b Press All Settings. c Swipe up or down, or press a or b to display Initial Setup. Press Initial Setup. d Swipe up or down, or press a or b to display Local Language. Press Local Language. e Press your language. f Press . 8
-
 1
1 -
2
-
 3
3 -
 4
4 -
 5
5 -
 6
6 -
 7
7 -
 8
8 -
 9
9 -
 10
10 -
 11
11 -
 12
12 -
 13
13 -
14
-
15
-
16
-
17
-
18
-
19
-
20
-
21
-
22
-
23
-
24
-
25
-
26
-
27
-
28
-
29
-
30
-
31
-
32
-
33
-
34
-
35
-
36
-
37
-
38
-
39
-
40
-
41
-
42
-
43
-
44
-
45
-
46
 |
 |
