Brother International PC-420PRW Users Manual - English - Page 95
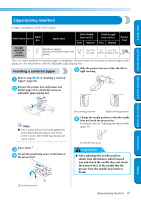
Zipper/piping Insertion, Inserting a centered zipper
 |
View all Brother International PC-420PRW manuals
Add to My Manuals
Save this manual to your list of manuals |
Page 95 highlights
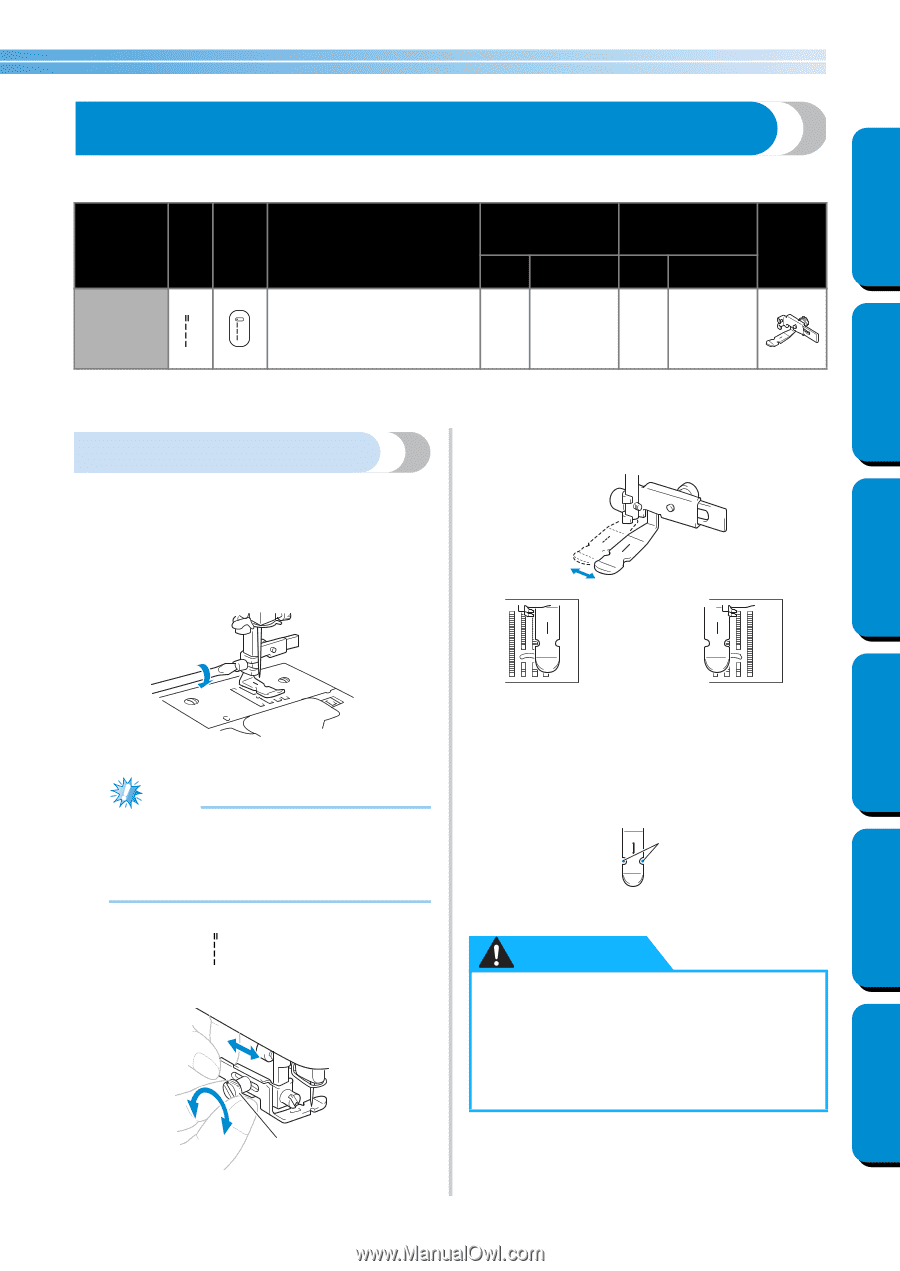
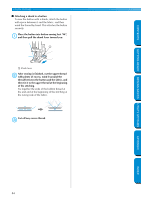
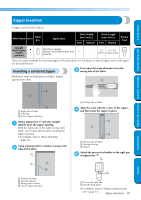
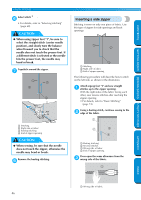
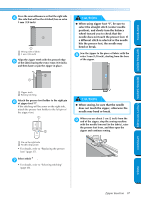
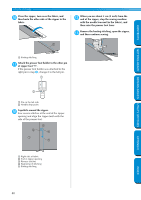
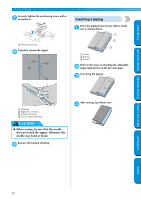
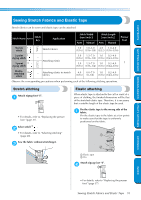
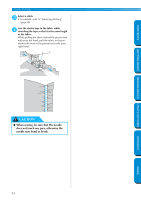
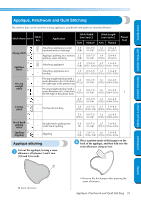
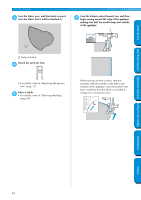
CONTENTS GETTING READY SEWING BASICS UTILITY STITCHES Zipper/piping Insertion A zipper and piping can be sewn in place. Stitch Name Pattern Stitch Key Application Stitch Width [mm (inch.)] Auto Manual Stitch Length [mm (inch.)] Auto Manual Presser Foot Straight stitch (left 1 needle position) Attaching zippers Sewing concealed seams and piping 0.0 (0) 0.0-7.0 2.5 0.2-5.0 (0-1/4) (3/32) (1/64-3/16) There are many methods for inserting zippers and pipings. The procedures for inserting a centered zipper and a piping are described below, with the adjustable zipper/piping foot. Inserting a centered zipper Slide the presser foot over either the left or 5 right feed dog. Refer to step - 1 4 of "Inserting a centered 1 zipper" (page 85). Remove the presser foot and presser foot 2 holder (page 39) to attach the screw-on adjustable zipper/piping foot. APPENDIX Note ● Use a screw driver to securely tighten the screw that holds the presser foot. If the screw is loose, the needle may break and cause injures. Select stitch 1 . 3 Loosen the positioning screw on the back of 4 the presser foot. 1 1 Positioning screw Left sewing position Right sewing position Change the needle position so that the needle 6 does not touch the presser foot. For details, refer to "Adjusting the stitch width" (page 55). 1 1 Needle drop point CAUTION ● After adjusting the needle position, slowly turn the balance wheel toward you and check the needle does not touch the presser-foot. If the needle hits the presser foot, the needle may bend or break. Zipper/piping Insertion 89 INDEX
-
 1
1 -
2
-
3
-
4
-
5
-
6
-
7
-
8
-
9
-
10
-
11
-
12
-
13
-
14
-
15
-
16
-
17
-
18
-
19
-
20
-
21
-
22
-
23
-
24
-
25
-
26
-
27
-
28
-
29
-
30
-
31
-
32
-
33
-
34
-
35
-
36
-
37
-
38
-
39
-
40
-
41
-
42
-
43
-
44
-
45
-
46
-
47
-
48
-
49
-
50
-
51
-
52
-
53
-
54
-
55
-
56
-
57
-
58
-
59
-
60
-
61
-
62
-
63
-
64
-
65
-
66
-
67
-
68
-
69
-
70
-
71
-
72
-
73
-
74
-
75
-
76
-
77
-
78
-
79
-
80
-
81
-
82
-
83
-
84
-
85
-
86
-
87
-
88
-
89
-
 90
90 -
 91
91 -
 92
92 -
 93
93 -
 94
94 -
 95
95 -
 96
96 -
 97
97 -
 98
98 -
 99
99 -
 100
100 -
101
-
102
-
103
-
104
-
105
-
106
-
107
-
108
-
109
-
110
-
111
-
112
-
113
-
114
-
115
-
116
-
117
-
118
-
119
-
120
-
121
-
122
-
123
-
124
-
125
-
126
-
127
-
128
-
129
-
130
-
131
-
132
-
133
-
134
-
135
-
136
-
137
-
138
-
139
-
140
-
141
-
142
-
143
-
144
-
145
-
146
-
147
-
148
-
149
-
150
-
151
-
152
-
153
 |
 |