Brother International PE550D Operation Manual - Page 22
Embroidery Attractive Finishes
 |
View all Brother International PE550D manuals
Add to My Manuals
Save this manual to your list of manuals |
Page 22 highlights
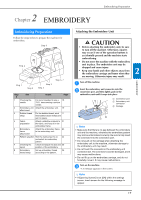
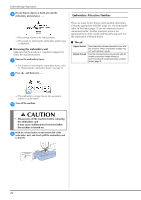
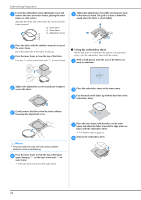
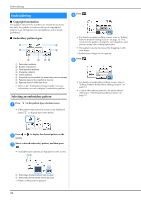
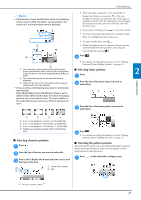
Embroidering Preparation Be sure that no objects or hands are near the d embroidery unit and press . Embroidery Attractive Finishes The carriage moves to its initial position. The screen for selecting the embroidery pattern type is displayed. ■ Removing the embroidery unit Make sure that the machine is completely stopped and follow the instructions below. Remove the embroidery frame. a • For details on removing the embroidery frame, refer to "Removing the embroidery frame" on page 23. Press , and then press . b There are many factors that go into beautiful embroidery. Using the appropriate stabilizer (page 21) and hooping the fabric in the frame (page 21) are two important factors mentioned earlier. Another important point is the appropriateness of the needle and thread being used. See the explanation of threads below. ■ Thread Upper thread Bobbin thread Use embroidery thread intended for use with this machine. Other embroidery threads may not yield optimum results. Use the included bobbin pre-wound with 90 weight embroidery bobbin thread or recommended 90 weight embroidery bobbin thread (page 8). The embroidery carriage moves into a position where it can be stored. Turn off the machine. c CAUTION • Always turn off the machine before removing the embroidery unit. It may cause malfunctions if removed when the machine is turned on. Hold the release button on the bottom left of the d embroidery unit, and slowly pull the embroidery unit to the left. 20
-
 1
1 -
2
-
3
-
4
-
5
-
6
-
7
-
8
-
9
-
10
-
11
-
12
-
13
-
14
-
15
-
16
-
 17
17 -
 18
18 -
 19
19 -
 20
20 -
 21
21 -
 22
22 -
 23
23 -
 24
24 -
 25
25 -
 26
26 -
 27
27 -
28
-
29
-
30
-
31
-
32
-
33
-
34
-
35
-
36
-
37
-
38
-
39
-
40
-
41
-
42
-
43
-
44
-
45
-
46
-
47
-
48
-
49
-
50
-
51
-
52
 |
 |
