Brother International PT-E550W Users Guide - Page 15
LABEL PRINTING, Label Preview, Printing a Label
 |
View all Brother International PT-E550W manuals
Add to My Manuals
Save this manual to your list of manuals |
Page 15 highlights
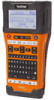
LABEL PRINTING LABEL PRINTING Label Preview You can preview the current page and check the layout before printing. 1 Press the Preview key. An image of the label is displayed on the screen. 1. The bar indicates the position of the currently displayed portion of the label. 2. The tape width of the installed tape cassette and the label length are indicated as follows: Tape width x Label length 3. The information for the installed tape cassette is 13 2 detected and indicated. The first line indicates the character color and the second line indicates the tape color. Press the or key to scroll the preview to the left or right. Press the or key to change the magnification of the preview. • Press the Esc, OK or Enter key to return to the text entry screen. • To scroll the preview to the left or right end, press the Shift key and then press the or key. • To print the label directly from the preview screen, press the Print key or open the print options screen and select a print option. Refer to "Printing a Label" on page 15 for details. • The print preview is a generated image of the label, and may differ from the actual label when printed. • The character color and tape color cannot be detected for some tape cassettes. Printing a Label Labels can be printed once text entry and formatting is complete. • Do not pull the label coming out of the tape exit slot. Doing so will cause the ink ribbon to be discharged with the tape, making the tape no longer usable. • Do not block the tape exit slot during printing or when feeding tape. 1 Doing so will cause the tape to jam. • Be sure to check that there is enough tape remaining when printing 2 several labels continuously. If tape is running low, set fewer copies, print labels one at a time, or replace the tape cassette. 3 • Striped tape indicates the end of the tape cassette. If this appears during printing, press and hold the Power key to turn the P-touch 4 labeling system off. Attempting to print with an empty tape cassette may damage the P-touch labeling system. 5 6 7 8 9 Label Preview 15
-
 1
1 -
2
-
3
-
4
-
5
-
6
-
7
-
8
-
9
-
 10
10 -
 11
11 -
 12
12 -
 13
13 -
 14
14 -
 15
15 -
 16
16 -
 17
17 -
 18
18 -
 19
19 -
 20
20 -
21
-
22
-
23
-
24
-
25
-
26
-
27
-
28
-
29
-
30
-
31
-
32
-
33
-
34
-
35
-
36
-
37
-
38
-
39
-
40
-
41
-
42
-
43
-
44
-
45
-
46
-
47
-
48
-
49
-
50
-
51
-
52
-
53
-
54
-
55
-
56
-
57
-
58
-
59
-
60
-
61
-
62
-
63
-
64
-
65
-
66
-
67
-
68
 |
 |
