Brother International SC9500 Users Manual - English - Page 49
Basic Stitching - zipper foot
 |
View all Brother International SC9500 manuals
Add to My Manuals
Save this manual to your list of manuals |
Page 49 highlights
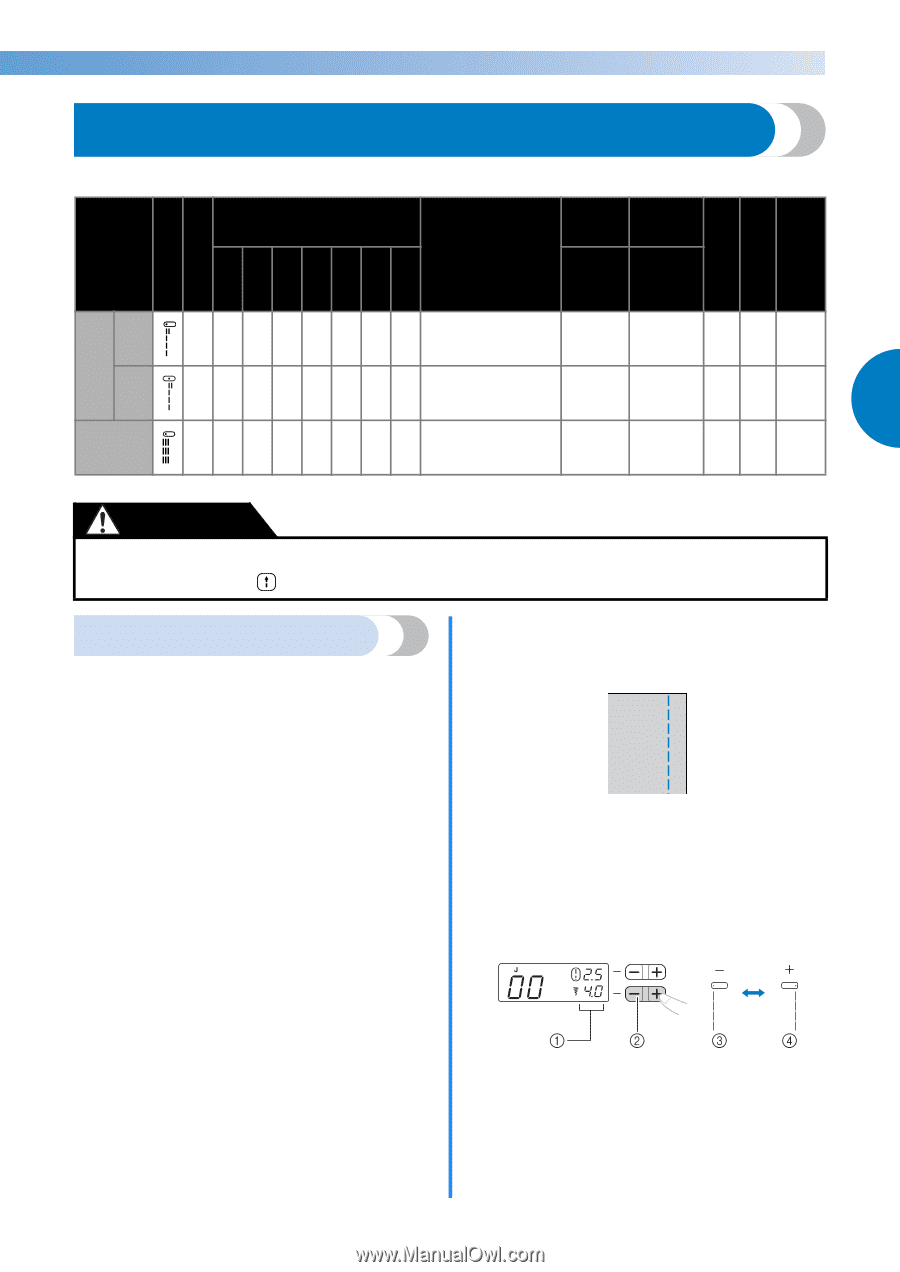
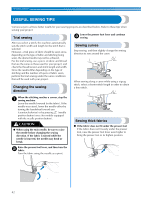
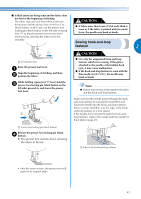
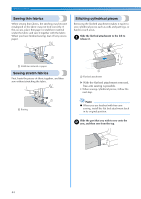
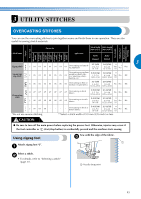
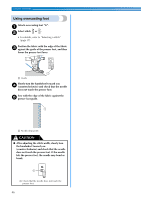
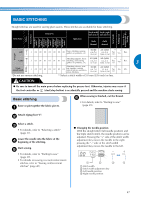
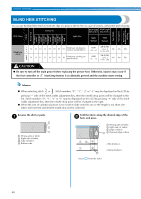
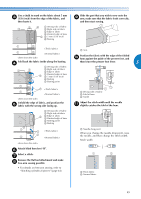
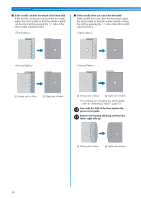
BASIC STITCHING Straight stitches are used for sewing plain seams. Three stitches are available for basic stitching. Straight Pattern Presser Foot 100 stitches model 90 stitches model 80 stitches model 70 stitches model 60 stitches model 50 stitches model 40 stitches model Twin Needle Walking Foot Reverse (Rev.)/ Reinforcement (Rfc.) Stitching Stitch Name Pattern No. Application Stitch Width Stitch Length [mm (inch.)] [mm (inch.)] Auto Manual Auto Manual Left J 00 00 00 00 00 00 00 Basic stitching, sewing gathers or pintucks, etc. 0.0 (0) 0.0-7.0 (0-1/4) 2.5 (3/32) 0.2-5.0 (1/64-3/16) ** Yes ( J ) * Yes Rev. Center J Attaching zippers, basic 01 01 01 01 01 01 01 stitching, and sewing gathers or pintucks, etc. 3.5 (1/8) 0.0-7.0 (0-1/4) 2.5 (3/32) 0.2-5.0 (1/64-3/16) ** Yes ( J ) * Yes Rev. 3 Triple stretch stitch Attaching sleeves, sew- J 02 02 02 02 02 02 02 ing inseams, sewing stretch fabrics and deco- rative stitching 0.0 (0) 0.0-7.0 (0-1/4) 2.5 (3/32) ** 1.5-4.0 Yes No (1/16-3/16) ( J ) Rfc. *Do not use reverse stitching. **Select a stitch width of 5.0 mm (3/16 inch) or less. CAUTION ● Be sure to turn off the main power before replacing the presser foot. Otherwise, injuries may occur if the foot controller or (start/stop button) is accidentally pressed and the machine starts sewing. Basic stitching Baste or pin together the fabric pieces. a When sewing is finished, cut the thread. f • For details, refer to "Starting to sew" (page 39). Attach zigzag foot "J". b Select a stitch. c • For details, refer to "Selecting a stitch" (page 37). Lower the needle into the fabric at the d beginning of the stitching. Start sewing. e • For details, refer to "Starting to sew" (page 39). • For details on sewing reverse/reinforcement stitches, refer to "Sewing reinforcement stitches" (page 40). ■ Changing the needle position With the straight stitch (left needle position) and the triple stretch stitch, the needle position can be adjusted. Pressing the "+" side of the stitch width adjustment key moves the needle to the right; pressing the "-" side of the stitch width adjustment key moves the needle to the left. a Stitch width b Stitch width adjustment key c Left needle position d Right needle position 47
-
 1
1 -
2
-
3
-
4
-
5
-
6
-
7
-
8
-
9
-
10
-
11
-
12
-
13
-
14
-
15
-
16
-
17
-
18
-
19
-
20
-
21
-
22
-
23
-
24
-
25
-
26
-
27
-
28
-
29
-
30
-
31
-
32
-
33
-
34
-
35
-
36
-
37
-
38
-
39
-
40
-
41
-
42
-
43
-
 44
44 -
 45
45 -
 46
46 -
 47
47 -
 48
48 -
 49
49 -
 50
50 -
 51
51 -
 52
52 -
 53
53 -
 54
54 -
55
-
56
-
57
-
58
-
59
-
60
-
61
-
62
-
63
-
64
-
65
-
66
-
67
-
68
-
69
-
70
-
71
-
72
-
73
-
74
-
75
-
76
-
77
-
78
-
79
-
80
-
81
-
82
-
83
-
84
-
85
-
86
-
87
-
88
-
89
-
90
-
91
-
92
-
93
-
94
-
95
-
96
-
97
-
98
-
99
-
100
-
101
-
102
-
103
-
104
-
105
-
106
-
107
-
108
 |
 |