Campbell Scientific CM106B CM106B Tripod - Page 25
CM106B Tripod, Enclosure with the -LM bracket
 |
View all Campbell Scientific CM106B manuals
Add to My Manuals
Save this manual to your list of manuals |
Page 25 highlights
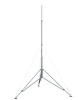
CM106B Tripod Remove the washers, nuts, and U-bolt from the U-bolt bracket. Install the bracket as shown in FIGURE 6-12 (top). Tighten the nuts on the U-bolt until the lock washers are compressed. Route the 14 AWG wire from the ground lug on the bottom side of the enclosure to the ground lug on the base of the tripod (FIGURE 6-8). Strip 1/2 in. of insulation from each end of the wire. Insert wire ends into the ground lugs and tighten. Enclosure Tab FIGURE 6-12. Enclosure with the -LM bracket 17
-
 1
1 -
2
-
3
-
4
-
5
-
6
-
7
-
8
-
9
-
10
-
11
-
12
-
13
-
14
-
15
-
16
-
17
-
18
-
19
-
 20
20 -
 21
21 -
 22
22 -
 23
23 -
 24
24 -
 25
25 -
 26
26 -
 27
27 -
 28
28 -
 29
29 -
 30
30 -
31
-
32
-
33
-
34
-
35
-
36
 |
 |

CM106B Tripod
Remove the washers, nuts, and U-bolt from the U-bolt bracket.
Install the
bracket as shown in FIGURE 6-12 (top).
Tighten the nuts on the U-bolt until
the lock washers are compressed.
Route the 14 AWG wire from the ground lug on the bottom side of the
enclosure to the ground lug on the base of the tripod (FIGURE 6-8).
Strip 1/2
in. of insulation from each end of the wire.
Insert wire ends into the ground
lugs and tighten.
FIGURE 6-12.
Enclosure with the –LM bracket
Enclosure Tab
17