Canon 600 Optura Instruction Manual - Page 46
Adjusting Exposure Manually
 |
UPC - 013803050738
View all Canon 600 manuals
Add to My Manuals
Save this manual to your list of manuals |
Page 46 highlights
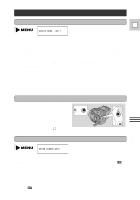
Adjusting Exposure Manually Exposure lock E When you are recording in situations where the lighting may change suddenly, you can lock the exposure at the current level in order to control the brightness of the image. S PUSH EXP CATVR/TLV. Using the Full Range of Features To lock the exposure, press the EXP wheel. Press it again to return to the automatically set exposure level. Exposure adjustment When the exposure is locked, you can adjust it manually, making the picture brighter or darker in order to deal with difficult lighting conditions, or to manipulate the mood of the scene. The camera's iris can be manually set to any position from fully closed to fully open. S PUSH EXP CATVR/TLV. To make the recorded image brighter, turn the EXP wheel upwards (to a maximum of +11). This may be necessary if the background is very bright, or if the subject is lit from behind. To make the recorded image darker, press the EXP wheel downwards (to a minimum of -11). This may be necessary if the background is very dark, or if the subject is spotlit. E . LOCK ± 0 E . LOCK ± 0 E . LOCK + 11 E . LOCK - 11 Notes: • The standard exposure level depends on which recording program you have selected. • Exposure lock is canceled if you change recording programs. • You cannot use exposure lock or adjustment when the program selector is set to the [ (Easy Recording) position. • If you use the Negative-Positive Conversion program (p. 38) turn the exposure wheel in the opposite direction to that shown above. The display only shows the exposure level - the display bar is not shown. 46
-
 1
1 -
2
-
3
-
4
-
5
-
6
-
7
-
8
-
9
-
10
-
11
-
12
-
13
-
14
-
15
-
16
-
17
-
18
-
19
-
20
-
21
-
22
-
23
-
24
-
25
-
26
-
27
-
28
-
29
-
30
-
31
-
32
-
33
-
34
-
35
-
36
-
37
-
38
-
39
-
40
-
 41
41 -
 42
42 -
 43
43 -
 44
44 -
 45
45 -
 46
46 -
 47
47 -
 48
48 -
 49
49 -
 50
50 -
 51
51 -
52
-
53
-
54
-
55
-
56
-
57
-
58
-
59
-
60
-
61
-
62
-
63
-
64
-
65
-
66
-
67
-
68
-
69
-
70
-
71
-
72
-
73
-
74
-
75
-
76
-
77
-
78
-
79
-
80
 |
 |
