Canon BP1200-DH Instruction Manual - Page 2
calculator
 |
UPC - 038569105188
View all Canon BP1200-DH manuals
Add to My Manuals
Save this manual to your list of manuals |
Page 2 highlights
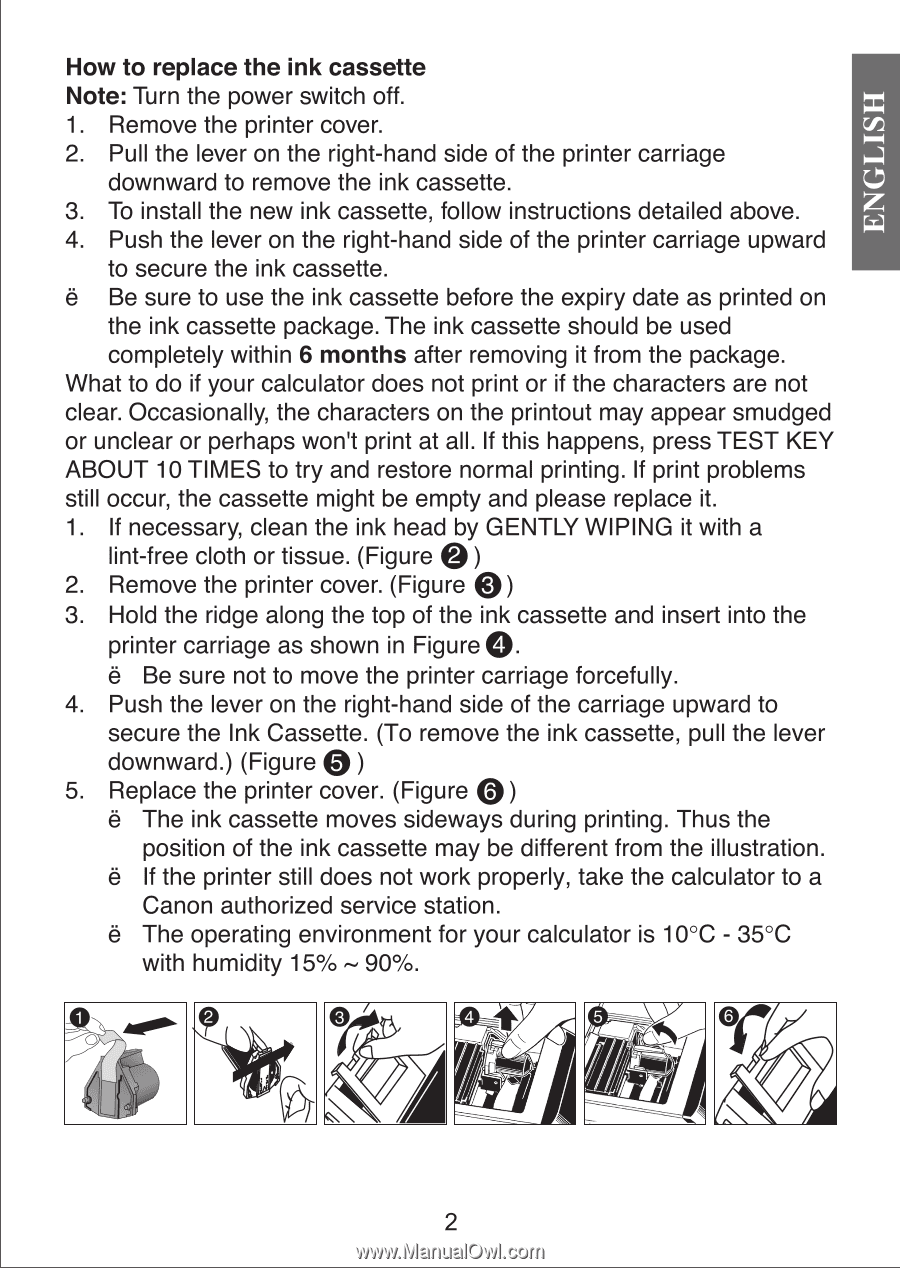
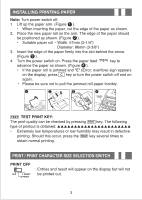
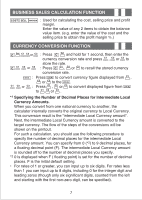
How to replace the ink cassette Note: Turn the power switch off. 1. Remove the printer cover. 2. Pull the lever on the right-hand side of the printer carriage downward to remove the ink cassette. 3. To install the new ink cassette, follow instructions detailed above. 4. Push the lever on the right-hand side of the printer carriage upward to secure the ink cassette. 6 Be sure to use the ink cassette before the expiry date as printed on the ink cassette package. The ink cassette should be used completely within 6 months after removing it from the package. What to do if your calculator does not print or if the characters are not clear. Occasionally, the characters on the printout may appear smudged or unclear or perhaps won't print at all. If this happens, press TEST KEY ABOUT 10 TIMES to try and restore normal printing. If print problems still occur, the cassette might be empty and please replace it. 1. If necessary, clean the ink head by GENTLY WIPING it with a lint-free cloth or tissue. (Figure 0) 2. Remove the printer cover. (Figure 0) 3. Hold the ridge along the top of the ink cassette and insert into the printer carriage as shown in Figure O. 6 Be sure not to move the printer carriage forcefully. 4. Push the lever on the right-hand side of the carriage upward to secure the Ink Cassette. (To remove the ink cassette, pull the lever downward.) (Figure 0 ) 5. Replace the printer cover. (Figure 0) 6 The ink cassette moves sideways during printing. Thus the position of the ink cassette may be different from the illustration. e If the printer still does not work properly, take the calculator to a Canon authorized service station. 6 The operating environment for your calculator is 10°C - 35°C with humidity 15% - 90%. 2
-
 1
1 -
 2
2 -
 3
3 -
 4
4 -
 5
5 -
 6
6 -
 7
7 -
 8
8 -
9
-
10
 |
 |