Canon CanoScan 5000F CanoScan 5000/5000F Quick Start Guide - Page 8
Connect the Scanner - power supply
 |
View all Canon CanoScan 5000F manuals
Add to My Manuals
Save this manual to your list of manuals |
Page 8 highlights
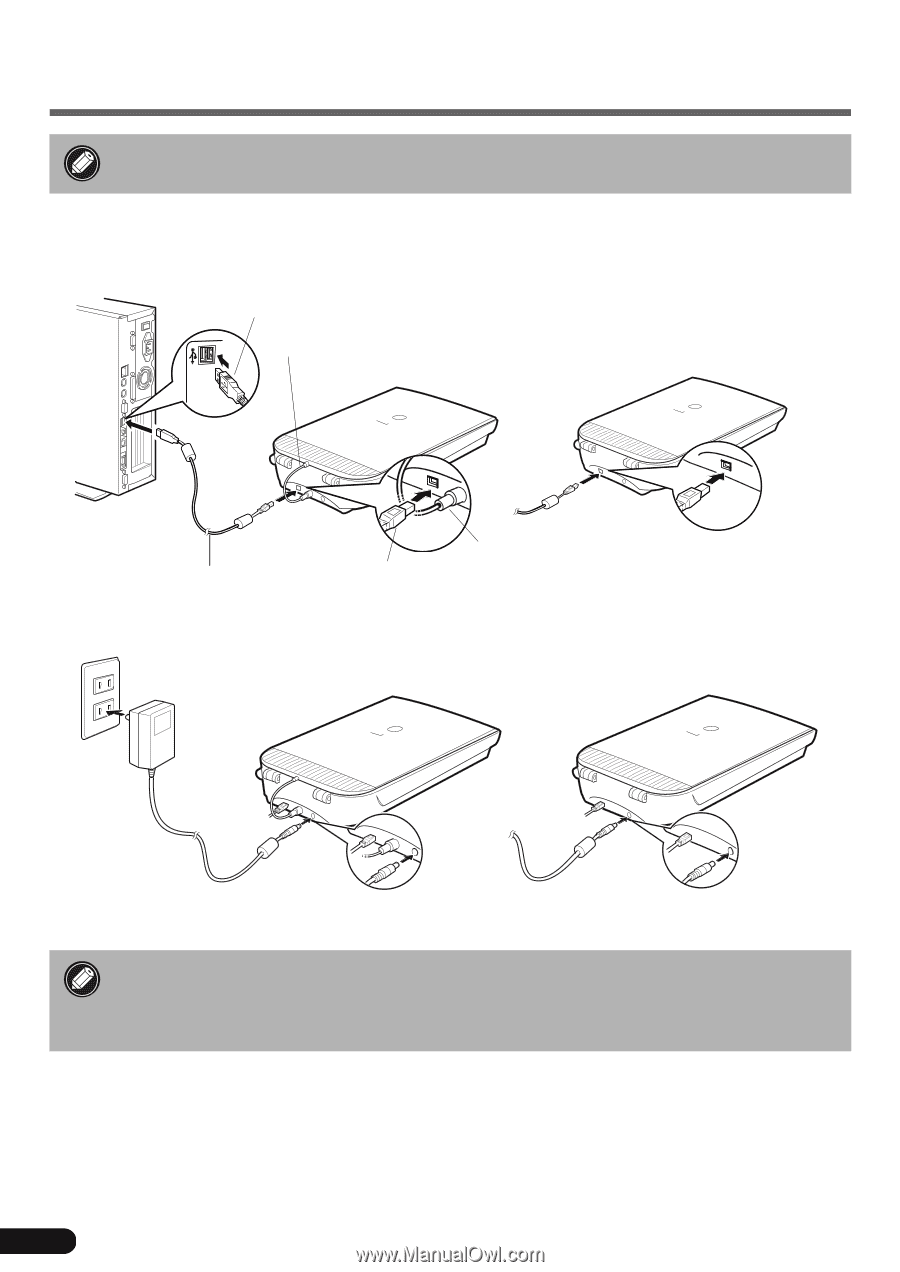
Connect the Scanner • Confirm that the scanning unit is unlocked. (P.5) 1 Peel the caution seal from the back of the scanner. 2 Connect the FAU cable to the scanner (CanoScan 5000F only). 3 Connect the scanner to the computer with the supplied USB interface cable. Wide Flat Connector FAU Cable (CanoScan 5000F only) CanoScan 5000F CanoScan 5000 USB Interface Cable FAU Cable (CanoScan 5000F only) Small Square Connector 4 Attach the supplied AC adapter to the scanner. AC Adapter CanoScan 5000F CanoScan 5000 • Only use the USB interface cable and the AC adapter provided with the scanner. Use of other cables or adapters may lead to a malfunction. • The scanner does not have a power switch. The power is activated as soon as the computer is turned on. 6
-
 1
1 -
2
-
 3
3 -
 4
4 -
 5
5 -
 6
6 -
 7
7 -
 8
8 -
 9
9 -
 10
10 -
 11
11 -
 12
12 -
 13
13 -
14
-
15
-
16
-
17
-
18
-
19
 |
 |