Canon DC210 DC210 Manual - Page 28
Recording - dvd
 |
UPC - 411378092144
View all Canon DC210 manuals
Add to My Manuals
Save this manual to your list of manuals |
Page 28 highlights
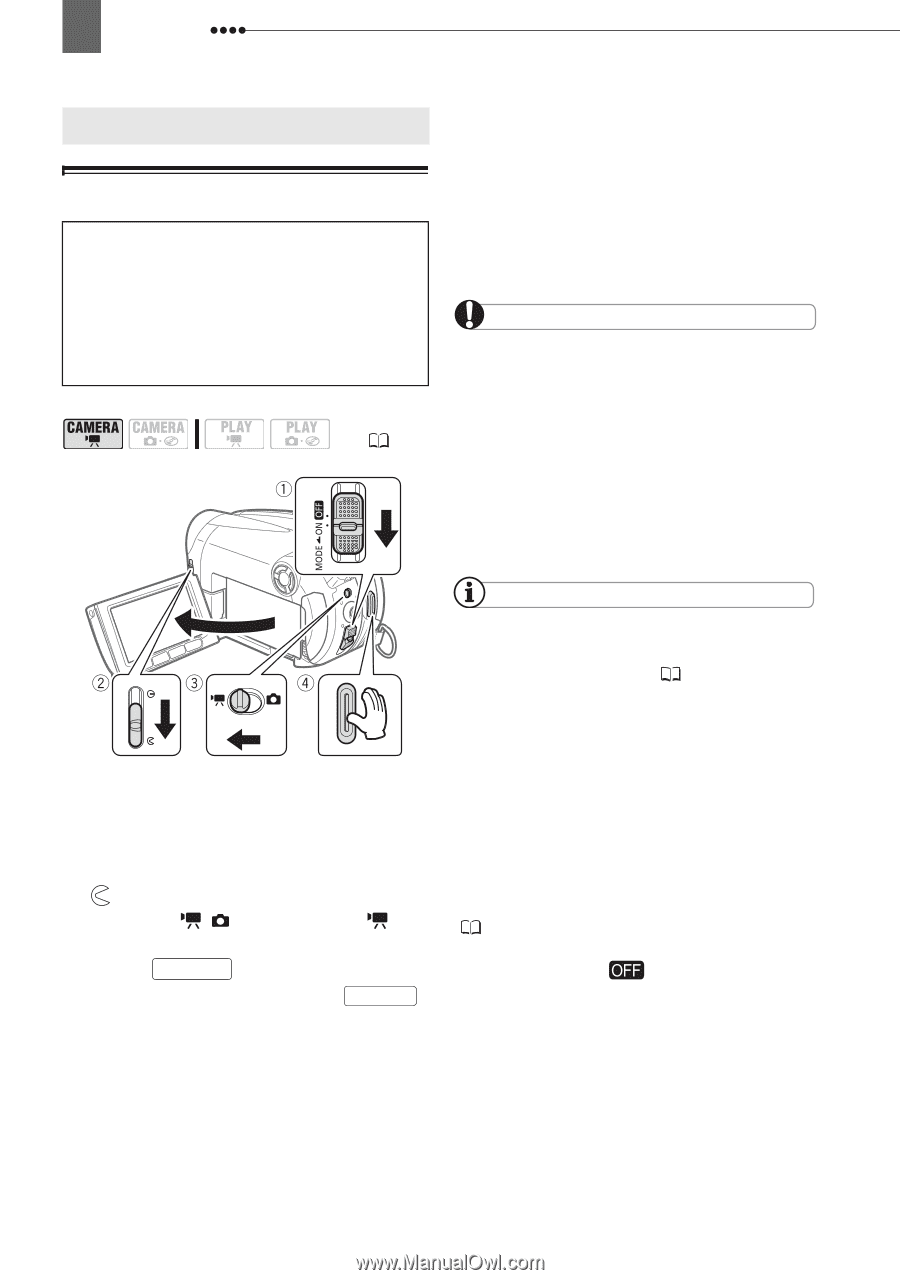
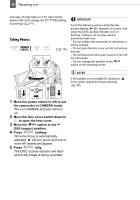
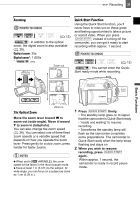
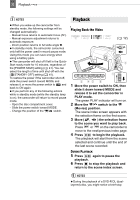
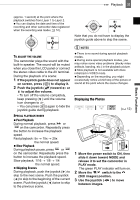
28 Recording BRaesciocrdFiunngctions Recording Shooting Video Before You Begin Recording Make a test recording first to check if the camcorder operates correctly. Since recordings made on a DVD-R or DVD-R DL disc cannot be deleted, we recommend you use a DVD-RW disc to make the test recordings. ( 12) WHEN YOU HAVE FINISHED RECORDING 1 Make sure that the DISC access lamp is off. 2 Turn off the camcorder. 3 Close the lens cover and the LCD panel. 4 Remove the disc. IMPORTANT Avoid the following actions while the DISC access indicator is on or flashing. Failing to do so may result in permanent data loss. - Do not subject the camcorder to vibrations or strong impacts. - Do not open the disc cover and do not remove the disc. - Do not disconnect the power source or turn off the camcorder. - Do not change the operating mode. 1 Move the power switch to ON to set the camcorder in CAMERA mode. The red CAMERA indicator will turn on. 2 Move the lens cover switch down to to open the lens cover. 3 Move the / switch to the (Movies) position. 4 Press Start/Stop to begin recording. • The recording starts; press Start/Stop again to pause the recording. • The DISC access indicator will flash while recording and will stay on briefly after pausing while the scene is recorded on the disc. NOTES About the recording time: By changing the recording mode you can change the recording time available on the disc ( 36). When recording in bright places it may be difficult to use the LCD screen. In such case, use the viewfinder instead. When recording in very loud places (such as fireworks shows or concerts), sound may become distorted or it may not be recorded at the actual levels. This is not a malfunction. About the Power Save mode: To save power when the camcorder is powered by a battery pack, the camcorder will automatically shut off if left without any operations for 5 minutes ( 41). To restore the power, slide the power switch toward MODE and release it, or move the power switch to and back to ON again. About the LCD and viewfinder screen: The screens are produced using extremely high- precision manufacturing techniques, with more than 99.99% of the pixels operating to specification. Less than 0.01% of the pixels may occasionally misfire or appear as black, red, blue or green dots. This has no effect on the recorded image and does not constitute a malfunction.
-
 1
1 -
2
-
3
-
4
-
5
-
6
-
7
-
8
-
9
-
10
-
11
-
12
-
13
-
14
-
15
-
16
-
17
-
18
-
19
-
20
-
21
-
22
-
 23
23 -
 24
24 -
 25
25 -
 26
26 -
 27
27 -
 28
28 -
 29
29 -
 30
30 -
 31
31 -
 32
32 -
 33
33 -
34
-
35
-
36
-
37
-
38
-
39
-
40
-
41
-
42
-
43
-
44
-
45
-
46
-
47
-
48
-
49
-
50
-
51
-
52
-
53
-
54
-
55
-
56
-
57
-
58
-
59
-
60
-
61
-
62
-
63
-
64
-
65
-
66
-
67
-
68
-
69
-
70
-
71
-
72
-
73
-
74
-
75
-
76
-
77
-
78
-
79
-
80
-
81
-
82
-
83
-
84
-
85
 |
 |