Canon EOS-1D C EOS Utility Ver.3.1 for Windows Instruction Manual
Canon EOS-1D C Manual
 |
View all Canon EOS-1D C manuals
Add to My Manuals
Save this manual to your list of manuals |
Canon EOS-1D C manual content summary:
- Canon EOS-1D C | EOS Utility Ver.3.1 for Windows Instruction Manual - Page 1
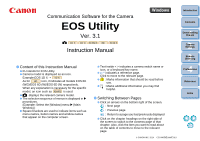
Mk II Instruction Manual Content of this Instruction Manual EU stands for EOS Utility. Camera model is displayed as an icon. Example:EOS-1D X 1D X As for 6D icon, it indicates all models EOS 6D (WG)/EOS 6D (W)/EOS 6D (N) respectively. When any explanation is necessary for the specific model - Canon EOS-1D C | EOS Utility Ver.3.1 for Windows Instruction Manual - Page 2
, fixes or support will be made available for the SOFTWARE. 4. LIMITED WARRANTY AND LIMITATION OF LIABILITY: It is your responsibility to choose, maintain and match the hardware and software components of your computer system. Thus Canon does not guarantee uninterrupted service or correction of - Canon EOS-1D C | EOS Utility Ver.3.1 for Windows Instruction Manual - Page 3
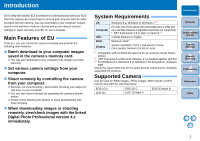
2GB Check the Canon Web site for the latest system requirements, including supported OS versions. Supported Camera Can be used for RAW images, JPEG images, MOV movies or MP4 movies shot with the cameras below. EOS-1D X EOS 6D EOS-1D C EOS 7D Mark II EOS 5D Mark III - Introduction Contents - Canon EOS-1D C | EOS Utility Ver.3.1 for Windows Instruction Manual - Page 4
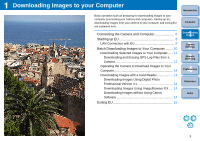
Features of EU 2 System Requirements 2 Supported Camera 2 1 Downloading Images to your Computer 5 Connecting the Camera and Computer 6 Starting up EU 8 LAN Connection with EU 9 Batch Downloading Images to Your Computer.......... 10 Downloading Selected Images to Your Computer 11 Operating - Canon EOS-1D C | EOS Utility Ver.3.1 for Windows Instruction Manual - Page 5
62 Registering Background Music to a Camera Memory Card 65 Setting Web Services 68 4 Preferences 70 Preferences 71 Basic Settings 71 Destination Folder 71 File Name 72 Remote Shooting 72 Linked Software 73 Time Settings 73 Reference 74 Troubleshooting 75 Folder Structure and File Names - Canon EOS-1D C | EOS Utility Ver.3.1 for Windows Instruction Manual - Page 6
Log Files from a Camera 13 Operating the Camera to Download Images to Your Computer 14 Downloading Images with a Card Reader 14 Downloading Images Using Digital Photo Professional Version 4.x 14 Downloading Images Using ImageBrowser EX .... 14 Downloading Images without Using Canon Software 14 - Canon EOS-1D C | EOS Utility Ver.3.1 for Windows Instruction Manual - Page 7
according to the steps for your camera model, preparation for downloading images is complete. Refer to " Confirming Computer Settings" to check the settings of the computer, and continue with "Starting up EU" (p.8). Cameras other than 7D Mk II With the < > mark on the plug facing the front of - Canon EOS-1D C | EOS Utility Ver.3.1 for Windows Instruction Manual - Page 8
camera and the computer and set the camera the icon of the camera connected to the computer. Double-click the icon of the camera connected to the computer. Select camera's power switch to . To start up EU, you must connect your camera 1D X 1D C 7D Mk II , you can fix the plug to the camera - Canon EOS-1D C | EOS Utility Ver.3.1 for Windows Instruction Manual - Page 9
. Continue with "Batch Downloading Images to Your Computer". With 1D X 1D C 5D Mk III 7D Mk II , you can operate the camera and download images saved on the memory card inserted in the camera to your computer. Refer to your camera's Instruction Manual for details. Introduction Contents - Canon EOS-1D C | EOS Utility Ver.3.1 for Windows Instruction Manual - Page 10
Transmitter Instruction Manual, and Wi-Fi Function Instruction Manual or Wired LAN Instruction Manual supplied with the camera. Note up EU before connecting the camera and the computer. The following window appears. Introduction Contents 1 Downloading Images 2Camera Settings 3Remote Shooting 2 - Canon EOS-1D C | EOS Utility Ver.3.1 for Windows Instruction Manual - Page 11
saved on the memory card inserted in the camera according to the selected condition. The downloaded images are sorted by date into folders and are then displayed in the main window of Digital Photo Professional version 4.x (RAW image processing, viewing and editing software) (hereinafter DPP), which - Canon EOS-1D C | EOS Utility Ver.3.1 for Windows Instruction Manual - Page 12
DPP. For details on using DPP, refer to the "Digital Photo Professional Version 4.x Instruction Manual" (PDF electronic manual). Continue with "Exiting EU" (p.15). Downloading Selected Images to Your Computer From the images saved in your camera's memory card, you can select the ones you want and - Canon EOS-1D C | EOS Utility Ver.3.1 for Windows Instruction Manual - Page 13
to download. Viewer window Add check mark 3 Click the [Download] button. Introduction Contents The download image dialog box appears. 4 Specify the save destination and then click the [OK] button. Download image dialog box 1 Downloading Images 2Camera Settings 3Remote Shooting 4 Preferences - Canon EOS-1D C | EOS Utility Ver.3.1 for Windows Instruction Manual - Page 14
will be displayed. By clicking the [ ] button, the selected images will be checkmarked in a batch. For a list of viewer window functions, see p.80. Downloading and Erasing GPS Log Files from a Camera 6D(WG) 7D Mk II EOS DIGITAL cameras with built-in GPS have a function for saving GPS log files - Canon EOS-1D C | EOS Utility Ver.3.1 for Windows Instruction Manual - Page 15
the Camera to Download Images to Your Computer 1D X 1D C 5D Mk III 7D Mk II If your camera has a direct image transfer function, you can download to your computer the images saved on the memory card inserted in the camera by operating the camera. Refer to your camera's Instruction Manual for - Canon EOS-1D C | EOS Utility Ver.3.1 for Windows Instruction Manual - Page 16
. The window closes and EU exits. 2 Turn the camera's power switch to < OFF >. 3 Disconnect the cable from the camera and computer. Do not pull on the cable; hold the plug and pull out. Introduction Contents 1 Downloading Images 2Camera Settings 3Remote Shooting 4 Preferences Reference Index 15 - Canon EOS-1D C | EOS Utility Ver.3.1 for Windows Instruction Manual - Page 17
26 Changing Picture Style Settings and Applying to the Camera 27 Setting JPEG Quality and Applying to the Camera .... 28 Adjusting White Balance and Applying to the Camera ..... 28 Introduction Contents 1 Downloading Images 2Camera Settings 3Remote Shooting 4 Preferences Reference Index 16 - Canon EOS-1D C | EOS Utility Ver.3.1 for Windows Instruction Manual - Page 18
Applying Picture Style Files to the Camera" (p.19), "Registering Lens Aberration Correction Data for the Lens in the Camera" (p.20), and "Registering Personal White Balance in the Camera" (p.23) respectively. Introduction Contents 1 Downloading Images 2Camera Settings 3Remote Shooting 4 Preferences - Canon EOS-1D C | EOS Utility Ver.3.1 for Windows Instruction Manual - Page 19
them to the camera with this function. For more details on WFT caption, refer to the Instruction Manual of the wireless Video Snapshot Album or slideshow played on the camera (p.65). Web Service Settings You can register web services to a camera (p.68). Introduction Contents 1 Downloading Images - Canon EOS-1D C | EOS Utility Ver.3.1 for Windows Instruction Manual - Page 20
up to three Picture Style files downloaded from the Canon Web site or created with Picture Style Editor (Picture Style file creating software) (hereinafter PSE) and saved to your computer, as user-defined settings in your camera. 1 Click [Register Picture Style File]. The [Register Picture Style - Canon EOS-1D C | EOS Utility Ver.3.1 for Windows Instruction Manual - Page 21
Style files, refer to the Canon Web site. The Picture Style files that you can apply to the camera are files with the ".PF2" or ".PF3" extension. For details on using PSE, refer to the "Picture Style Editor Instruction Manual" (PDF electronic manual). The [Register lens aberration correction - Canon EOS-1D C | EOS Utility Ver.3.1 for Windows Instruction Manual - Page 22
delete correction data from the camera by removing the check mark from the registered lens and clicking the [OK] button. Introduction Contents 1 Downloading Images 2Camera Settings 3Remote Shooting 4 Preferences Reference Index To use this function, the EOS Lens Registration Tool must be installed - Canon EOS-1D C | EOS Utility Ver.3.1 for Windows Instruction Manual - Page 23
Saving White Balance to your Computer 1D X 1D C You can save the adjustment results for an image's white balance to your computer as a white balance file (extension ".WBD"). White balance files saved to your computer can be registered in the camera as personal white balances (p.23). Register the - Canon EOS-1D C | EOS Utility Ver.3.1 for Windows Instruction Manual - Page 24
Camera 1D X 1D C White balance files created by adjusting the white balance of an image and saving the results can be registered in the camera as or manual white balance, refer to "Setting the White Balance" in the camera's Instruction Manual. Introduction Contents 1 Downloading Images 2Camera - Canon EOS-1D C | EOS Utility Ver.3.1 for Windows Instruction Manual - Page 25
here. Most functions set with the capture window are those tend to be changed during shooting. 3 Click the [ ] button. 1 Connect your camera and computer, and then start up EU (p.6). 2 Click [Remote Shooting]. The capture window appears. The [Shooting menu] appears. Introduction Contents - Canon EOS-1D C | EOS Utility Ver.3.1 for Windows Instruction Manual - Page 26
can set the JPEG image quality and apply it to the camera, in the same way as operating from the camera (p.28). WB (white balance) SHIFT You can adjust the white balance, in the same way as operating from the camera (p.28). HDR (High Dynamic Range) Mode You can shoot photos with a wide dynamic - Canon EOS-1D C | EOS Utility Ver.3.1 for Windows Instruction Manual - Page 27
returns to the [Shooting menu]. Introduction Contents 1 Downloading Images 2Camera Settings 3Remote Shooting 4 Preferences Reference Index The [Picture Style] window appears. When 1D C is connected and Canon Log gamma is set on the camera, the Picture Style set or changed with this software - Canon EOS-1D C | EOS Utility Ver.3.1 for Windows Instruction Manual - Page 28
Setting Default setting 3 Click the [Return] button. The settings are applied to the camera, and the display returns to the [Shooting menu]. Introduction Contents 1 Downloading Images 2Camera Settings 3Remote Shooting 4 Preferences Reference Index If you select [Monochrome] for the - Canon EOS-1D C | EOS Utility Ver.3.1 for Windows Instruction Manual - Page 29
and Applying to the Camera 1D X 1D C You can set the JPEG image quality and apply it to the camera, in the same way as operating from the camera. 1 Click [JPEG quality]. The [JPEG Quality] window appears. 2 Click the setting value. The settings are applied to the camera. Higher values give - Canon EOS-1D C | EOS Utility Ver.3.1 for Windows Instruction Manual - Page 30
camera to shoot automatically with timer shooting. Remote Live View Shooting 30 HDR (High Dynamic Range) Shooting 36 Remote Live View Window Functions 38 Focusing Manually Music to a Camera Memory Card 65 Setting Web Services 68 Introduction Contents 1 Downloading Images 2Camera Settings - Canon EOS-1D C | EOS Utility Ver.3.1 for Windows Instruction Manual - Page 31
Live View Shooting You can control your camera remotely from EU and shoot still images from your computer screen. Also, the shot images are saved directly on your computer and you can recheck them using the linked software Digital Photo Professional version 4.x (hereinafter DPP). This function is - Canon EOS-1D C | EOS Utility Ver.3.1 for Windows Instruction Manual - Page 32
settings that cannot be set in the capture window can be set by operating the camera. A warning lamp blinks during the countdown for self-timer shooting and the manual exposure, the metering value is displayed in real time in the exposure level area. Introduction Contents 1 Downloading Images - Canon EOS-1D C | EOS Utility Ver.3.1 for Windows Instruction Manual - Page 33
View/Movie func. set.]. Click The [Live View/Movie func. set.] window appears. For details on specifying settings, see the next page. Introduction Contents 1 Downloading Images 2Camera Settings 3Remote Shooting 4 Preferences Reference Index 32 - Canon EOS-1D C | EOS Utility Ver.3.1 for Windows Instruction Manual - Page 34
[OK] button. 5D Mk III 6D 7D Mk II Select Click Select Click Introduction Contents Exposure simulation Exposure simulation simulates and displays the image with a brightness close to the actual resulting image. Enable The displayed image brightness will be close to the actual brightness - Canon EOS-1D C | EOS Utility Ver.3.1 for Windows Instruction Manual - Page 35
DPP starts up automatically. You can quickly review the shot image in the [Quick Preview] window displayed before camera to your computer during in-camera RAW processing, the camera and computer will connect after the processing is finished. Options for Basic Zone modes cannot be set to cameras - Canon EOS-1D C | EOS Utility Ver.3.1 for Windows Instruction Manual - Page 36
[Remote Live View window] is displayed. Pressing the Live View shooting button will also display the Live View image on the camera's LCD monitor, allowing you to view the image while operating the camera. You can shoot by operating the capture window, even if the [Remote Live View window] is not - Canon EOS-1D C | EOS Utility Ver.3.1 for Windows Instruction Manual - Page 37
on the image's overall tonal range. The higher the number, the wider the dynamic range will be. [Effect] 5D Mk III 7D Mk II : Selects the finishing effect. For specific finishing effects, refer to the pages about HDR (High Dynamic Range) shooting in the Instruction Manual provided with your camera - Canon EOS-1D C | EOS Utility Ver.3.1 for Windows Instruction Manual - Page 38
set to [Enable] and the HDR picture is shot handheld, the edges of the photos will be cropped, lowering the resolution slightly. Also, if the images cannot be aligned properly due to camera shake, etc., auto image alignment may not take effect. Note that when shooting with excessively bright or dark - Canon EOS-1D C | EOS Utility Ver.3.1 for Windows Instruction Manual - Page 39
camera settings and focusing while viewing your subject on the computer screen. See also the list of [Remote Live View window] functions at the end of this manual in the [Zoom View] window. Focusing Manually You can focus manually while viewing the enlarged image in the [Remote Live View window]. - Canon EOS-1D C | EOS Utility Ver.3.1 for Windows Instruction Manual - Page 40
position adjustment. Focusing Using AF In Quick, Live, Face Detection Live, and other AF modes, images can be focused automatically in the same way as on the camera itself. Focusing Using Quick Mode 1D X 1D C 5D Mk III 6D 1 Select [Quick mode] from the list box. Introduction Contents 1 Downloading - Canon EOS-1D C | EOS Utility Ver.3.1 for Windows Instruction Manual - Page 41
selected in step 2, all the AF points are automatically selected. If [Manual selection] is selected in step 2, only the selectable AF points are displayed achieved, the camera makes a beeping sound and the AF point color changes. Introduction Contents 1 Downloading Images 2Camera Settings 3Remote - Canon EOS-1D C | EOS Utility Ver.3.1 for Windows Instruction Manual - Page 42
On 7D Mk II , you can set frame to move it to the position where you want to focus. AF is executed. When focus is achieved, the camera makes a beeping sound and the AF point turns green. If focus is not achieved, the AF point turns red. Introduction Contents 1 Downloading Images - Canon EOS-1D C | EOS Utility Ver.3.1 for Windows Instruction Manual - Page 43
Live Mode 1D X 1D C 5D Mk ] button. 2 Click the [ON] button. Focusing Using Face+Tracking 7D Mk II 1 Select [Face detection + Tracking AF] from the [Focus] list box. Images 2Camera Settings 3Remote Shooting 4 Preferences Reference Index AF is executed. When focus is achieved, the camera - Canon EOS-1D C | EOS Utility Ver.3.1 for Windows Instruction Manual - Page 44
Mk II This [Focus] list box. AF is executed. When focus is achieved, the camera makes a beeping sound and the AF point turns green. If focus is not achieved and zones depend on the selected aspect ratio and the image being shot (still image/movie). Checking the Depth of Field and Exposure You - Canon EOS-1D C | EOS Utility Ver.3.1 for Windows Instruction Manual - Page 45
View Window You can change the white balance of an image in the [Remote Live View window] and register the changed white balance in the camera. 1 Select the white balance to apply to the image. The selected white balance is applied to the image displayed in real time and you can check it in - Canon EOS-1D C | EOS Utility Ver.3.1 for Windows Instruction Manual - Page 46
camera so the camera's horizontal position and the horizontal reference match. 1D X 1D C 5D Mk III 7D Mk II To adjust vertical tilt, move the camera so the camera the camera is very tilted, the electronic level's margin of error will be bigger. Introduction Contents 1 Downloading Images 2Camera - Canon EOS-1D C | EOS Utility Ver.3.1 for Windows Instruction Manual - Page 47
. Depending on the connected camera, there are the following differences. 6D For a RAW image, aspect ratio information is only attached with the shot image, and the image is not cropped. For a JPEG image, the image is cropped. 1D X 1D C For both RAW and JPEG images, aspect ratio information is - Canon EOS-1D C | EOS Utility Ver.3.1 for Windows Instruction Manual - Page 48
pages related to "Setting the Sound Recording" in your camera's Instruction Manual. 1 Click the [Settings] button in the audio recording area of the [Remote Live View window]. Introduction Contents 1 Downloading Images 2Camera Settings 3Remote Shooting The [Recording settings] window appears - Canon EOS-1D C | EOS Utility Ver.3.1 for Windows Instruction Manual - Page 49
meter Select [Auto], [Manual], or [Disable] from the settings box appears when 6D 7D Mk II is connected. In conditions with much loud to [Auto] or [Manual]. If there is sound the Wind filter function. [Manual]: Function for advanced users. You check mark from this box in locations - Canon EOS-1D C | EOS Utility Ver.3.1 for Windows Instruction Manual - Page 50
with the extension ".CR2" shot with a Canon camera can be displayed as an overlay. • Even if the image has been adjusted with Digital Photo Professional version 4.x, the overlaid image will be displayed in the condition when it was shot. Even with supported image file types, the display of the - Canon EOS-1D C | EOS Utility Ver.3.1 for Windows Instruction Manual - Page 51
with its composite ratio adjusted (p.51). 3 Move the camera and subject to compose your picture. You cannot use the Overlaid Display function in the [Zoom View] window. Enlarging/Reducing an Overlay Image An image displayed as an overlay (the overlay image) can be enlarged/ reduced from 25 to 200 - Canon EOS-1D C | EOS Utility Ver.3.1 for Windows Instruction Manual - Page 52
100%. Use the Composite Ratio slider to set the composite ratio. Drag the Composite Ratio slider left or right. Introduction Contents 1 Downloading Images 2Camera Settings 3Remote Shooting 4 Preferences The composite ratio set with the Composite Ratio slider is applied to the overlaid display - Canon EOS-1D C | EOS Utility Ver.3.1 for Windows Instruction Manual - Page 53
new position. You can also use the cursor of your mouse to enlarge/reduce or rotate the image. 1 Click the [Move overlay image] button. 2 Drag the cursor of your mouse over the overlay image. The overlay image is moved to a new position. You can drag the cursor of your mouse in the [Remove Live - Canon EOS-1D C | EOS Utility Ver.3.1 for Windows Instruction Manual - Page 54
Hiding an Overlay Image Hide an image displayed as an overlay (the overlay image). 1 Remove the check mark from [Show overlay image]. The overlay image is hidden. Displaying Grid Lines You can display grid lines in the [Remote Live View window] in the same way as the camera's Live View function, - Canon EOS-1D C | EOS Utility Ver.3.1 for Windows Instruction Manual - Page 55
. To hide the grid lines, remove the check mark from [Show grid]. Shooting by Operating the Camera Even when remote shooting is set, you can still operate the camera and shoot - as when shooting with only the camera. Also, since the shot images are saved to your computer's hard disk, you can - Canon EOS-1D C | EOS Utility Ver.3.1 for Windows Instruction Manual - Page 56
compressed separately and recorded without compression between frames. The compression rate is therefore low. Since the image size is large, the file size will also be large. When the 1D C is connected and Canon Log gamma is set on the camera, the Canon Log gamma setting icon and [ ] (View - Canon EOS-1D C | EOS Utility Ver.3.1 for Windows Instruction Manual - Page 57
appears. On 1D X 1D C , specify audio Contents 1 Downloading Images 2Camera Settings mark removed from its file name are not downloaded. When downloading movie files to your computer afterwards from the camera's memory card, use the method described on p.10 to p.14 of this Instruction Manual - Canon EOS-1D C | EOS Utility Ver.3.1 for Windows Instruction Manual - Page 58
. set.] window before setting. Introduction Contents Displayed contents may differ depending on the connected camera. 5D Mk III 6D 7D Mk II 1 Downloading Images 2Camera Settings 3Remote Shooting 4 Preferences Reference Index Select Click Select Click Selectable movie recording sizes - Canon EOS-1D C | EOS Utility Ver.3.1 for Windows Instruction Manual - Page 59
from the camera's memory card to your computer. Movie files having a check mark removed from its file name are not downloaded. When downloading movie files to your computer afterwards from the camera's memory card, use the method described on p.10 to p.14 of this Instruction Manual to download - Canon EOS-1D C | EOS Utility Ver.3.1 for Windows Instruction Manual - Page 60
Shooting Two types of timer shooting are available where the camera automatically takes shots at a specified time or a specified set a short interval between shots and there is insufficient time to transfer and save the images, it may not be possible to take shots at the specified interval. In this - Canon EOS-1D C | EOS Utility Ver.3.1 for Windows Instruction Manual - Page 61
icon and select [BULB]. Specify the following settings for cameras other than 1D X 1D C . • For cameras with < B > (bulb) on the Mode dial, set to < B >. • For cameras without < B > (bulb) on the Mode dial, set the Mode dial to < M > (manual), and select [BULB] in the capture window or set the - Canon EOS-1D C | EOS Utility Ver.3.1 for Windows Instruction Manual - Page 62
II You can preset the bulb exposure's exposure time. With the bulb timer, you do not need to hold down the shutter button during the bulb exposure. This reduces camera 00:00:00 to 99:59:59. Introduction Contents 1 Downloading Images 2Camera Settings If you select [Disable], the bulb timer will - Canon EOS-1D C | EOS Utility Ver.3.1 for Windows Instruction Manual - Page 63
more details on setting items, also refer to the Instruction Manuals provided with your EX-series Speedlite and with your camera. 1 Prepare your camera and flash. When using an external flash, attach it on your camera. 2 Connect your camera and computer, and then start up EU (p.6). 3 Click [Remote - Canon EOS-1D C | EOS Utility Ver.3.1 for Windows Instruction Manual - Page 64
the built-in flash on 7D Mk II . 6 Specify settings. Flash function settings window The window displayed differs depending on the connected camera and flash. Check that this box appears. Introduction Contents 1 Downloading Images 2Camera Settings 3Remote Shooting 4 Preferences Reference Index 63 - Canon EOS-1D C | EOS Utility Ver.3.1 for Windows Instruction Manual - Page 65
on the camera's LCD monitor, EU's [Flash function settings] window automatically closes. You can use modeling flash by clicking the [Modeling flash] button. You should only use modeling flash for a maximum of 10 times continuously. (For more information, refer to the Instruction Manual provided - Canon EOS-1D C | EOS Utility Ver.3.1 for Windows Instruction Manual - Page 66
Images 2Camera Settings 3Remote Shooting 4 Preferences Reference The [Register Background Music] window appears. When the [EOS Sample Music] folder is installed to your computer, five tracks appear in [Background music to register] the first time as EOS Sample Music. When the camera - Canon EOS-1D C | EOS Utility Ver.3.1 for Windows Instruction Manual - Page 67
the [Edit Track Name] button and enter a track name up to 25 characters (single-byte). Then, click the [OK] button. Introduction Contents 1 Downloading Images 2Camera Settings The track name for the music file changes. You can also display the [Edit Track Name] dialog box by double-clicking - Canon EOS-1D C | EOS Utility Ver.3.1 for Windows Instruction Manual - Page 68
EOS Sample Music is not installed on your computer. 4 Click the [Register] button. The music files in [Background music to register] are registered (copied) to the camera your camera one track at a time is not possible. 5 Click the [Close] button. Introduction Contents 1 Downloading Images - Canon EOS-1D C | EOS Utility Ver.3.1 for Windows Instruction Manual - Page 69
site for each Web service. A computer is required for specifying settings for Web services, including CANON iMAGE GATEWAY. For information on countries and areas supporting CANON iMAGE GATEWAY services, refer to Canon Web site (http://canon.com/cig). 1 Connect your camera and computer. Start up - Canon EOS-1D C | EOS Utility Ver.3.1 for Windows Instruction Manual - Page 70
your login name and password for CANON iMAGE GATEWAY, and then click the [Login] button. The [Edit Web Services] window appears. 4 Set Web services to use. Follow on-screen instructions to set the Web services to use. When setting of the Web services is completed, click the [Finish] button - Canon EOS-1D C | EOS Utility Ver.3.1 for Windows Instruction Manual - Page 71
to use. Preferences 71 Basic Settings 71 Destination Folder 71 File Name 72 Remote Shooting 72 Linked Software 73 Time Settings 73 Introduction Contents 1 Downloading Images 2Camera Settings 3Remote Shooting 4 Preferences Reference Index 70 - Canon EOS-1D C | EOS Utility Ver.3.1 for Windows Instruction Manual - Page 72
destination folder of images downloaded from your camera or of images shot remotely. Introduction Contents 1 Downloading Images 2Camera Settings images have been downloaded, DPP starts up automatically and the downloaded images are displayed in DPP's main window. If you remove the check mark - Canon EOS-1D C | EOS Utility Ver.3.1 for Windows Instruction Manual - Page 73
's file name, select a naming rule for the file from the list box. (If [Do not modify (Download Images)] is selected, images are saved with the file name set in the camera.) You can also customize the naming rule for files by clicking the [Customize] button. You can set prefix characters, number - Canon EOS-1D C | EOS Utility Ver.3.1 for Windows Instruction Manual - Page 74
Linked Software From the list box, you can select the linked software that starts up when images are downloaded from the camera or when images are shot remotely. Also, you can register third-party software as linked software by clicking the [Register] button. Time Settings You can specify settings - Canon EOS-1D C | EOS Utility Ver.3.1 for Windows Instruction Manual - Page 75
Troubleshooting 75 Folder Structure and File Names in the Memory Card ..... 77 Uninstalling the Software 77 Fixing the Plug to the Camera 78 Index 88 About This Instruction Manual 89 Trademarks 89 1 Downloading Images 2Camera Settings 3Remote Shooting 4 Preferences Reference Index - Canon EOS-1D C | EOS Utility Ver.3.1 for Windows Instruction Manual - Page 76
is < ON > (p.8). EU and the camera may not communicate normally with a cable other than the EOS DIGITAL camera-dedicated Canon interface cable (p.6). Connect your camera and computer directly with the interface cable provided with your camera. Do not connect the camera via a hub; doing so may - Canon EOS-1D C | EOS Utility Ver.3.1 for Windows Instruction Manual - Page 77
User's Manual for more information on sleep mode. A non-Canon flash does not fire during Remote Live View shooting When a non-Canon flash is mounted on the camera for Remote Live View shooting, set [Silent shooting] in the camera to [Disable]. Introduction Contents 1 Downloading Images 2Camera - Canon EOS-1D C | EOS Utility Ver.3.1 for Windows Instruction Manual - Page 78
or xxxCANON EOSMISC File name File type ****YYYY.JPG JPEG image file ****YYYY.CR2 RAW image file ****YYYY.MOV MOV movie file ****YYYY.MP4 MP4 movie file ****YYYY.THM Thumbnail file ****YYYY.WAV Audio file The camera specific character string set at the time of factory shipment or - Canon EOS-1D C | EOS Utility Ver.3.1 for Windows Instruction Manual - Page 79
Mk II Fasten the plug to the camera with the cable protector to prevent it from detaching during remote shooting. 1D X 1D C 1 Open the cover, and connect the small plug of the cable to the camera's terminal. Cable protector attached. Check the direction of the < in. > mark - Canon EOS-1D C | EOS Utility Ver.3.1 for Windows Instruction Manual - Page 80
7D Mk II 1 (2) (1) 2 (1) (2) (3) Cable protector 3 4 Clamp Provided interface cable Introduction Contents 1 Downloading Images 2Camera Settings 3Remote Shooting 4 Preferences Reference Index 79 - Canon EOS-1D C | EOS Utility Ver.3.1 for Windows Instruction Manual - Page 81
4 Preferences Reference Recording time Deletes the image Check mark (p.12) Image display size Exits EU Displays the main window Downloads the images to the computer Displays the [Preferences] window * Ratings set on the camera, or Digital Photo Professional Ver. 3.9 or later are displayed - Canon EOS-1D C | EOS Utility Ver.3.1 for Windows Instruction Manual - Page 82
Displays all the categories Contents Lens category 1 Downloading Images 2Camera Settings 3Remote Shooting Displays lenses selected in [Select Displays only the registered lenses Index No. of lenses registered in the camera/No. of lenses that can be registered Lens names displayed in the - Canon EOS-1D C | EOS Utility Ver.3.1 for Windows Instruction Manual - Page 83
Displayed items differ depending on the model and settings of the camera connected. For *1 to *10 explanations, see the next button*6 Save destination for shot images Shutter speed Aperture ISO speed Image recording quality Save destinations for shot images*7 Displays the [Timer shooting settings - Canon EOS-1D C | EOS Utility Ver.3.1 for Windows Instruction Manual - Page 84
Contents 1 Downloading Images 2Camera Settings Narrow setting range 1 level Widen setting range 1 level Setting width 0 AEB level setting Maximum setting range 1D X 1D C 5D Mk III 6D 7D Mk II When the AEB bracketing setting exceeds the displayable range, [ ], [ ] marks are displayed to - Canon EOS-1D C | EOS Utility Ver.3.1 for Windows Instruction Manual - Page 85
information differs depending on the settings. For more details on settings, also refer to the Instruction Manual provided with your EX-series Speedlite or camera. [Modeling flash] button Introduction Contents 1 Downloading Images 2Camera Settings 3Remote Shooting 4 Preferences Reference Index 84 - Canon EOS-1D C | EOS Utility Ver.3.1 for Windows Instruction Manual - Page 86
1D X 1D C 5D Mk III 6D 7D Mk II Movie compression format Frame rate Movie recording size Starts/stops movie recording 1D C 1D X 1D C 5D Mk III 6D Show/hide electronic level (p.45) 1D X 1D C 5D Mk III 6D View Assist button*3 7D Mk II 7D Mk II Auto rotation button*1 Rotates the image*2 Controllers - Canon EOS-1D C | EOS Utility Ver.3.1 for Windows Instruction Manual - Page 87
List of Remote Live View Window (Compose Tab) Functions (p.49) Overlay image filename Overlay image controllers Introduction Contents Opens an overlay image (p.49) Moves and displays the overlay image (p.52) Enlarge/Reduce slider (p.50) Rotate slider (p.51) Composite Ratio slider (p.51) Resets - Canon EOS-1D C | EOS Utility Ver.3.1 for Windows Instruction Manual - Page 88
43) Shows/hides the controllers 1 Moves the display position Magnified display position 1 Downloading Images 2Camera Settings 3Remote Shooting 4 Preferences Reference Moves the display position Rotates the image AF point show/hide Controllers 2 Closes the window Display magnification Index 87 - Canon EOS-1D C | EOS Utility Ver.3.1 for Windows Instruction Manual - Page 89
Log Files from a Camera 13 Downloading Images with a Card Reader 14 Downloading Selected Images 11 E Exiting the EOS Utility 15 F File Shooting 41 Focusing in Quick Mode (Remote Live View Shooting 39 Focusing Manually (Remote Live View Shooting 38 Focusing Using AF 39 Folder Structure and - Canon EOS-1D C | EOS Utility Ver.3.1 for Windows Instruction Manual - Page 90
1 Downloading Images 2Camera Settings 3Remote Shooting About This Instruction Manual It is prohibited to reproduce, in whole or part, the contents of this Instruction Manual without permission. Canon may change without notice the software specifications and contents of this Instruction Manual
-
 1
1 -
 2
2 -
 3
3 -
 4
4 -
 5
5 -
 6
6 -
 7
7 -
8
-
9
-
10
-
11
-
12
-
13
-
14
-
15
-
16
-
17
-
18
-
19
-
20
-
21
-
22
-
23
-
24
-
25
-
26
-
27
-
28
-
29
-
30
-
31
-
32
-
33
-
34
-
35
-
36
-
37
-
38
-
39
-
40
-
41
-
42
-
43
-
44
-
45
-
46
-
47
-
48
-
49
-
50
-
51
-
52
-
53
-
54
-
55
-
56
-
57
-
58
-
59
-
60
-
61
-
62
-
63
-
64
-
65
-
66
-
67
-
68
-
69
-
70
-
71
-
72
-
73
-
74
-
75
-
76
-
77
-
78
-
79
-
80
-
81
-
82
-
83
-
84
-
85
-
86
-
87
-
88
-
89
-
90
 |
 |
1
2
3
4
Introduction
Contents
Downloading
Images
Camera
Settings
Remote
Shooting
Reference
Preferences
Index
Communication Software for the Camera
EOS Utility
Ver. 3.1
Instruction Manual
1D X
1D C
5D Mk III
6D
7D Mk II
Content of this Instruction Manual
EU stands for EOS Utility.
Camera model is displayed as an icon.
Example:EOS-1D X
As for
icon, it indicates all models EOS 6D
(WG)/EOS 6D (W)/EOS 6D (N) respectively.
When any explanation is necessary for the specific
model, an icon such as
is used.
displays the relevant camera model.
The selection sequence of menus is displayed in
procedures.
(Example: Select the [Window] menu
[Main
Window].)
Square brackets are used to indicate items such as
menu names, button names and window names
that appear on the computer screen.
1D X
6D
6D(WG)
© CANON INC. 2014
CCS-M056EUaWE-010
Text inside < > indicates a camera switch name or
icon, or a keyboard key name.
p.**
indicates a reference page.
Click to move to the relevant page.
: Marks information that should be read before
use.
: Marks additional information you may find
helpful.
Switching Between Pages
Click on arrows on the bottom right of the screen.
: Next page
: Previous page
:
Return to a page you had previously displayed
Click on the chapter headings on the right side of
the screen to switch to the contents page of that
chapter. Also, click the item you want to read about
on the table of contents to move to the relevant
page.