Canon EOS 30D Digital Photo Professional Instruction Manual Windows (EOS 30D) - Page 43
Automatically Adjusting the Tone Curve Tone Curve Assist
 |
UPC - 013803065114
View all Canon EOS 30D manuals
Add to My Manuals
Save this manual to your list of manuals |
Page 43 highlights
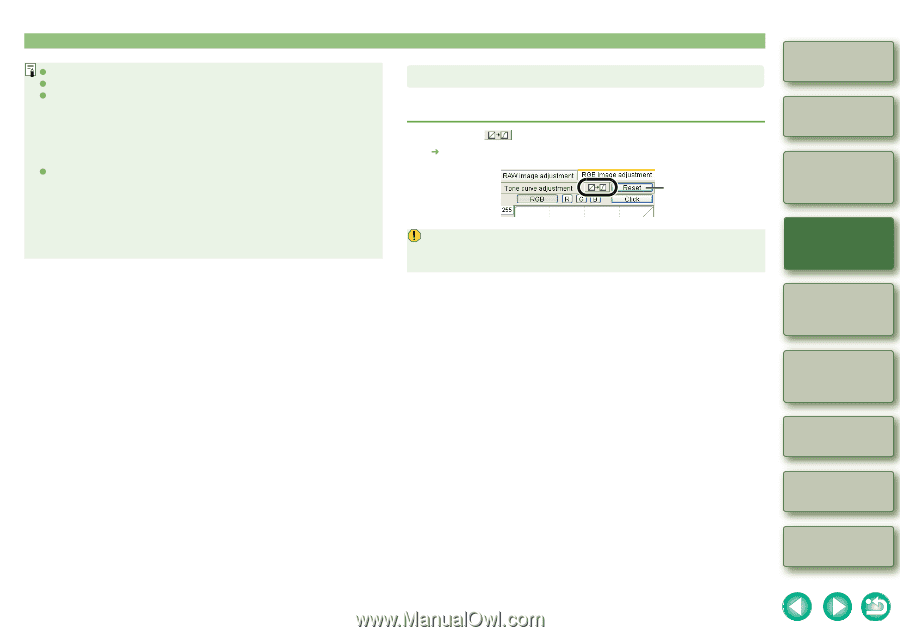
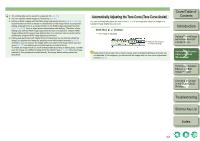
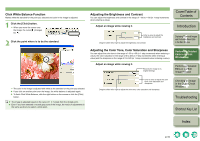
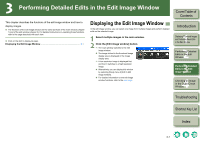
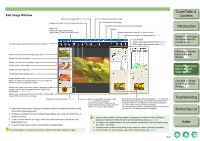
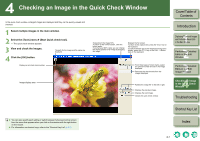
O The editing data can be saved in a separate file (p.1-15). O You can transfer edited images to Photoshop (p.1-21). O Editing of RAW images with the RAW image adjustment function (p.2-4 to p.2-7) is recommended as there is almost no deterioration of the image which accompanies editing. Although there is a similar function in the RGB image adjustment function (p.2-7 to p.2-10), there is slight picture deterioration with editing. Therefore, where editing only with the RAW image adjustment function is insufficient, efficient RAW image editing which keeps image deterioration to a minimum can be performed by additionally using the RGB image adjustment function. O Editing data performed with Digital Photo Professional has not directly edited the image, but displays the image by applying virtual editing data (a recipe) (p.1-15). Therefore, you can recover the image which was shot or the image which was last saved (p.1-17) and editing can be performed any number of times. To create an image which you have directly edited according to editing data, convert/ save the image as a different image from the edited image (p.1-18). Since the image created by this procedure is edited directly, the image before editing cannot be recovered. Automatically Adjusting the Tone Curve (Tone Curve Assist) You can automatically adjust the tone curve (p.2-9) of an image and adjust an image to a standard image brightness and color. Click the [ ] button. ¿ The image is adjusted. Restores the image to its original settings. Depending on the image, there may be cases where standard brightness and color are not adjusted. If this happens, you should edit the image with the tone curve adjustment function (p.2-9). Cover/Table of Contents Introduction 1 Displaying Thumbnail Images and Performing Basic Edits in the Main Window 2 Performing Detailed Edits in the Edit Window 3 Performing Detailed Edits in the Edit Image Window 4 Checking an Image in the Quick Check Window Troubleshooting Shortcut Key List Index 2-8
-
 1
1 -
2
-
3
-
4
-
5
-
6
-
7
-
8
-
9
-
10
-
11
-
12
-
13
-
14
-
15
-
16
-
17
-
18
-
19
-
20
-
21
-
22
-
23
-
24
-
25
-
26
-
27
-
28
-
29
-
30
-
31
-
32
-
33
-
34
-
35
-
36
-
37
-
 38
38 -
 39
39 -
 40
40 -
 41
41 -
 42
42 -
 43
43 -
 44
44 -
 45
45 -
 46
46 -
 47
47 -
 48
48 -
49
-
50
-
51
-
52
 |
 |